OBID
®
classic-pro Installation ID MAX50.10-E/-RE
FEIG ELECTRONIC GmbH Page 28 of 39 M90802-1de-ID-B-FCC.doc
E N G L I S H
1. Select installation place:
The installation should be executed always on a surface as even as possible.
2. Connection:
see chapter 8.1. Connections
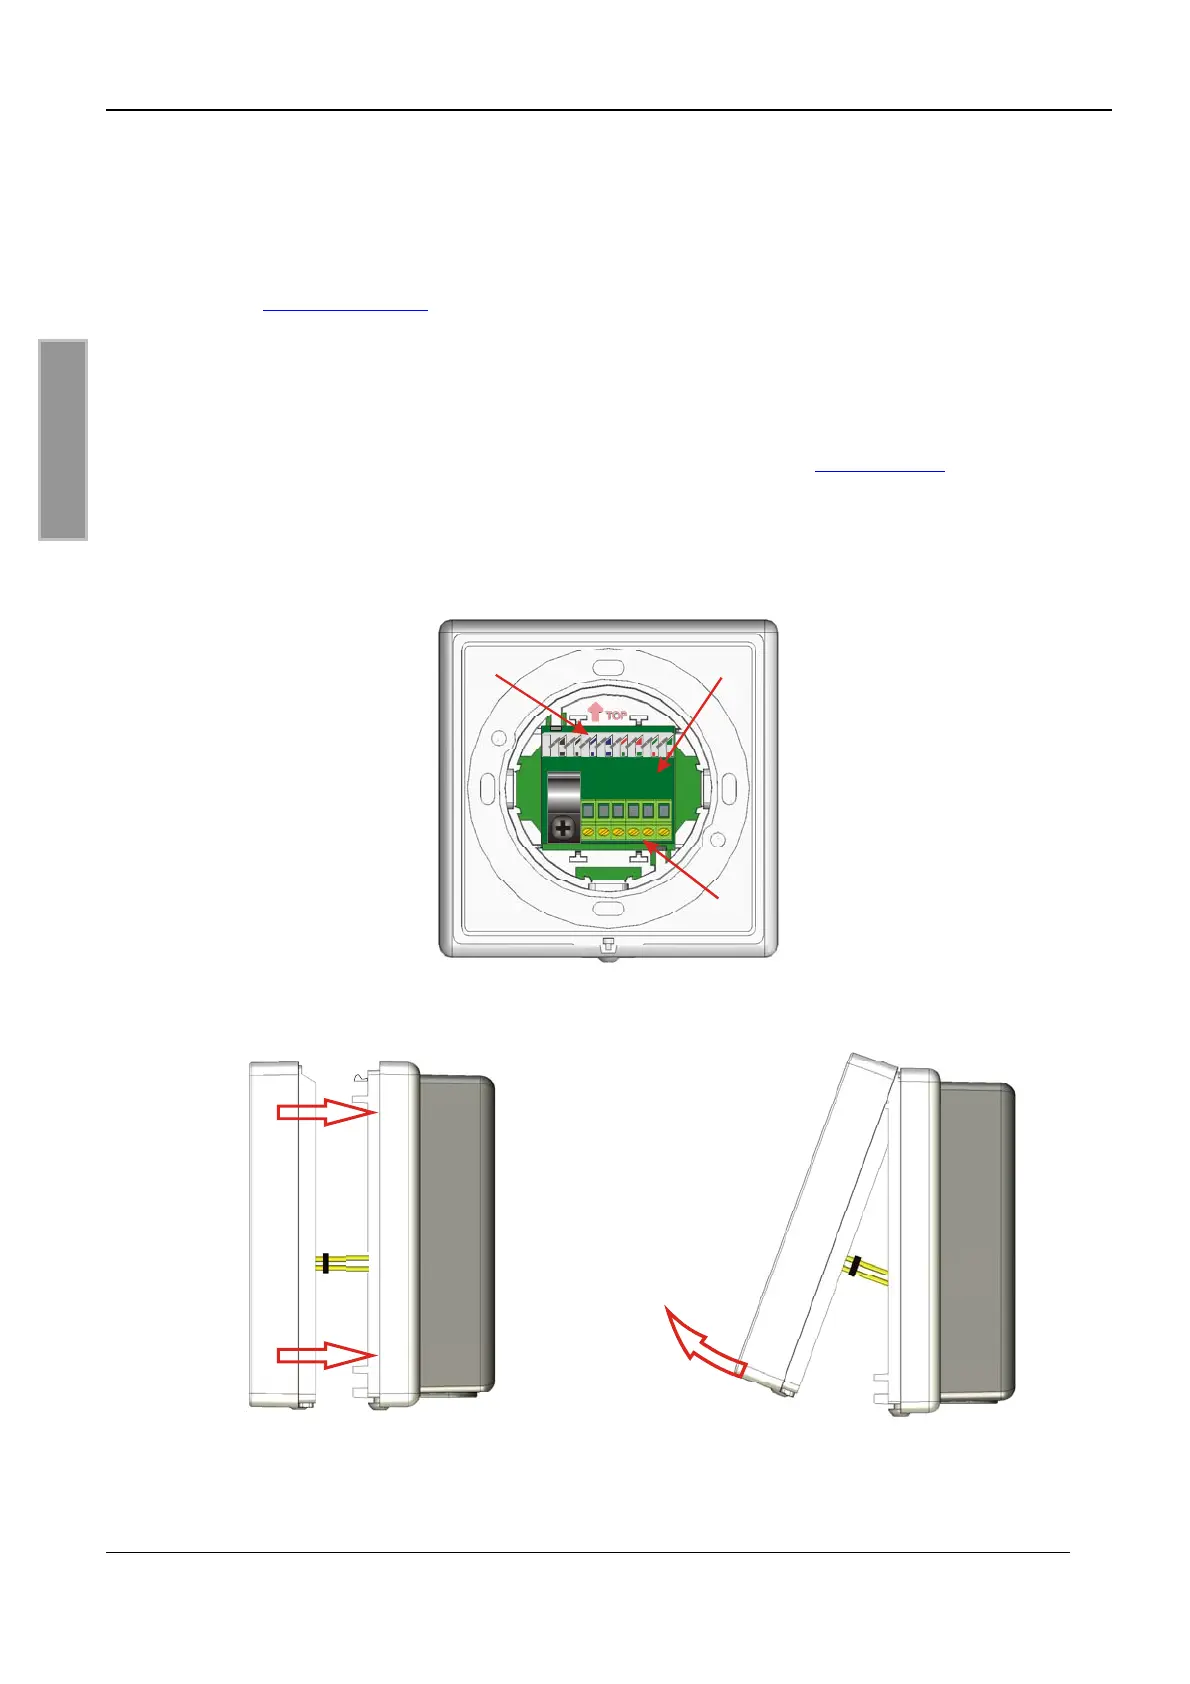
4. Wall installation:
• Snap in the connection board from the back side into the lower casing (see Fig. 4)
• Screw bottom part of casing to selected surface.
Take care about the mounting direction (⇑ TOP), see chapter: 8. Installation
• Put the casing upper part straight onto its bottom part and snap it in. (see Fig. 5)
Insert the pin board X1 of the Reader electronic carefully in the socket board X1 of the
connection board (1)!
• Screw top of casing to bottom part by using the screw Torx 3x8mm (Torx T10).
• Remove the protection foil from the front part.
88
B
A
7
8
5436412
3
X2
(1)
Fig. 4 Backside view with the fitted connection board (1)
Fig. 5 Fitting of the housing cover Fig. 6 Opening of the housing cover