Do you have a question about the FIBARO FGFS-101 and is the answer not in the manual?
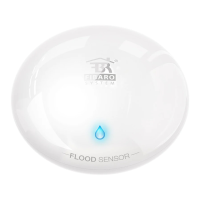
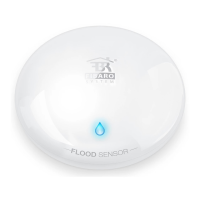
| Type | Freestanding |
|---|---|
| Purpose | Indoor/outdoor |
| Accuracy | 0.5 °C |
| Connectivity technology | Wireless |
| Humidity measuring range | 0 - 40 % |
| Battery type | CR123A |
| Number of batteries supported | 1 |
| Storage temperature (T-T) | - °C |
| Built-in display | No |
| Width | 72 mm |
|---|---|
| Height | 28 mm |
Process for adding the Flood Sensor to an existing Z-Wave network.
Process for removing the Flood Sensor from a Z-Wave network.
Instructions to switch the sensor from battery to DC power.
Actions and functions accessible via the device's TMP button.
Operating the sensor through the FIBARO Home Center interface.
Understanding the LED signals and visual feedback from the sensor.
Using the TMP button to navigate device menus for Z-Wave actions.
Manual procedure to wake the sensor for configuration updates.
Restoring the device to factory default settings and removing network data.
Details on the four functional association groups for device linking.
Steps to link other Z-Wave devices to the Flood Sensor.
Instructions for testing the Z-Wave network communication range.
Interpreting the visual indicator signals during range testing.
Configuring the device's wake-up frequency in battery mode.
Setting the duration before the flood state is cleared after the event.
Parameter to enable or disable audible and visual alarms during flooding.
Setting the frequency for measuring temperature and battery level.
Temperature value that triggers the low temperature alarm indication.
Temperature value that triggers the high temperature alarm indication.
Controls how the LED indicator displays temperature information.
Enabling tamper alarms for movement or button press events.
Determines how long alarm signals are actively displayed.
Time after which a quieted alarm will reactivate.
Option to disable the internal flood sensor functionality.
Configures secure command transmission for association groups.