®
DUAL Page 5 of 28
Integrated Fire Protection System
OWNER'S OPERATION & MAINTENANCE MANUAL
FM-0860-0-31F
4. INSTALLATION, OPERATION & MAINTENANCE INSTRUCTIONS
4.1 INSTALLATION
IMPORTANT ! The FIREFLEX
®
DUAL unit IS NOT
designed to be installed in area subject to freezing
conditions. Refer to section 1.3 for additional details.
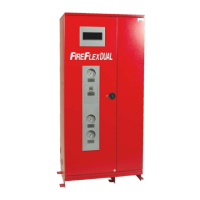
1. Install the FIREFLEX
®
DUAL cabinet (refer to section 8).
IMPORTANT ! THE CABINET MUST BE FIRMLY
ANCHORED TO THE FLOOR USING ALL FOUR (4)
ANCHORING HOLES.
2. Install the automatic sprinkler piping and clean agent
releasing piping, detection and signaling circuits (if
applicable) in accordance with applicable standards.
3. Connect all devices and alarm devices to the remote
releasing control panel, where applicable, according to
electrical schematics (refer to section 7).
4. Connect the AC power for the remote releasing control
panel and for the optional air compressor on two
separate breakers in the electric distribution panel (refer
to section 7).
5. Conform to local municipal or other codes regarding
installations of fire protection systems.
6. Place the
FIREFLEX
®
DUAL system in service (refer to
chapters 4.2 & 4.3).
7. If the system does not operate as it should, make the
necessary corrections according to manuals issued or
consult your distributor or FIREFLEX Systems Inc.
8. Make sure that building owner or a delegated
representative has received instructions regarding the
operation of the system.
4.2 PRELIMINARY INSPECTION
See figures 4.5 & 4.6 at the end of the current section.
1.
FIREFLEX
®
DUAL cabinet shall be firmly anchored
to the floor.
2. Open door to mechanical section.
3. Cylinder (A) shall be solidly fixed with brackets (F).
4. Check the pressure of the cylinder with pressure
gauge (D) according to table 4.1. If the cylinder
shows a loss in pressure of more than 10%, it shall
be refilled or replaced.
5. Check that piping supports have been installed at the
correct intervals and are adequate for the purpose.
6. The piping distribution system shall be inspected to
determine that it is in compliance with the design and
installation documents.
7. Nozzles and pipe size shall be in accordance with
system drawings. Means of pipe size reduction and
attitudes of tees shall be checked for conformance to
the design.
8. Check that all nozzles are fitted in accordance with
the design requirements and are aimed in the correct
alignment away from obstructions or barriers that
could prevent adequate distribution/mixing of the
gas.
9. Protected area Integrity test shall be considered to
locate and then effectively seal any significant air
leaks that could result in a failure of the enclosure to
hold the specified agent concentration level for the
specified holding period. The currently preferred
method is using a blower door fan unit and smoke
pencil.
10. Main water supply control valve (D1) should be
closed.
11. Priming valve (B1) must be closed.
12. Air supply must be CLOSED (refer to section 5).
13. Drain test valve (B6) and main drain valve (D3) must
be closed.
14. Alarm test valve (B5) must be closed.
15. All gauges (B11, B12 and E3) should read 0 psi.
16. Using the built-in contractor's hydrostatic test ports
(see figure 4.5), fill sprinklers network with water and
maintain pressure as per NFPA-13 requirements.
WARNING ! Do not subject the air pressure gauges to
hydrostatic pressures above 250 psi (17.2 bar). Close
gauge valves before proceeding with hydrostatic test.
17. Correct leaks if any before completing test. OPEN
main drain valve (D3) to completely drain the
sprinklers network.