12
!0 ANTI-TIP BRACKET INSTALLATION
Safety requires refrigerators be stable when doors and/or drawer, are open. Depending on your installation enclosure, an anti-tip bracket may need to be fitted if the ceiling/cabinetry above the
enclosure is not secured to the wall (to withstand a 100kg load). This will prevent the possibility of the appliance tipping forward, when doors and/or drawer, are open.
ImpORTANT!
When fastening with masonry plugs and/or screws:
Ensure the screws avoid electrical, gas and water conduits.
Ensure the surface the bracket is fastened to withstand a 100kg load.
Ensure light-weight masonry material such as cinder block and new concrete (no curing time) are not used in installation.
Do not use metallic materials that may corrode, stain and/or damage the enclosure.
If a minimum 60mm overlap cannot be achieved we
recommend fastening a solid spacer (wooden beam etc.)
behind the bracket.
1 Ensure the length of the spacer corresponds to the
enclosure’s width. Always secure the spacer to existing
studs on the enclosure wall.
3 Hammer masonry plugs into the wall until flush.
Fix bracket to the wall with Phillips screws x 4. Ensure
screws hold tight.
2 Fix bracket to the wall with Phillips screws x 4. Ensure
screws hold tight and the bracket overlaps the appliance
when it is positioned (60mm min.) for a secure hold.
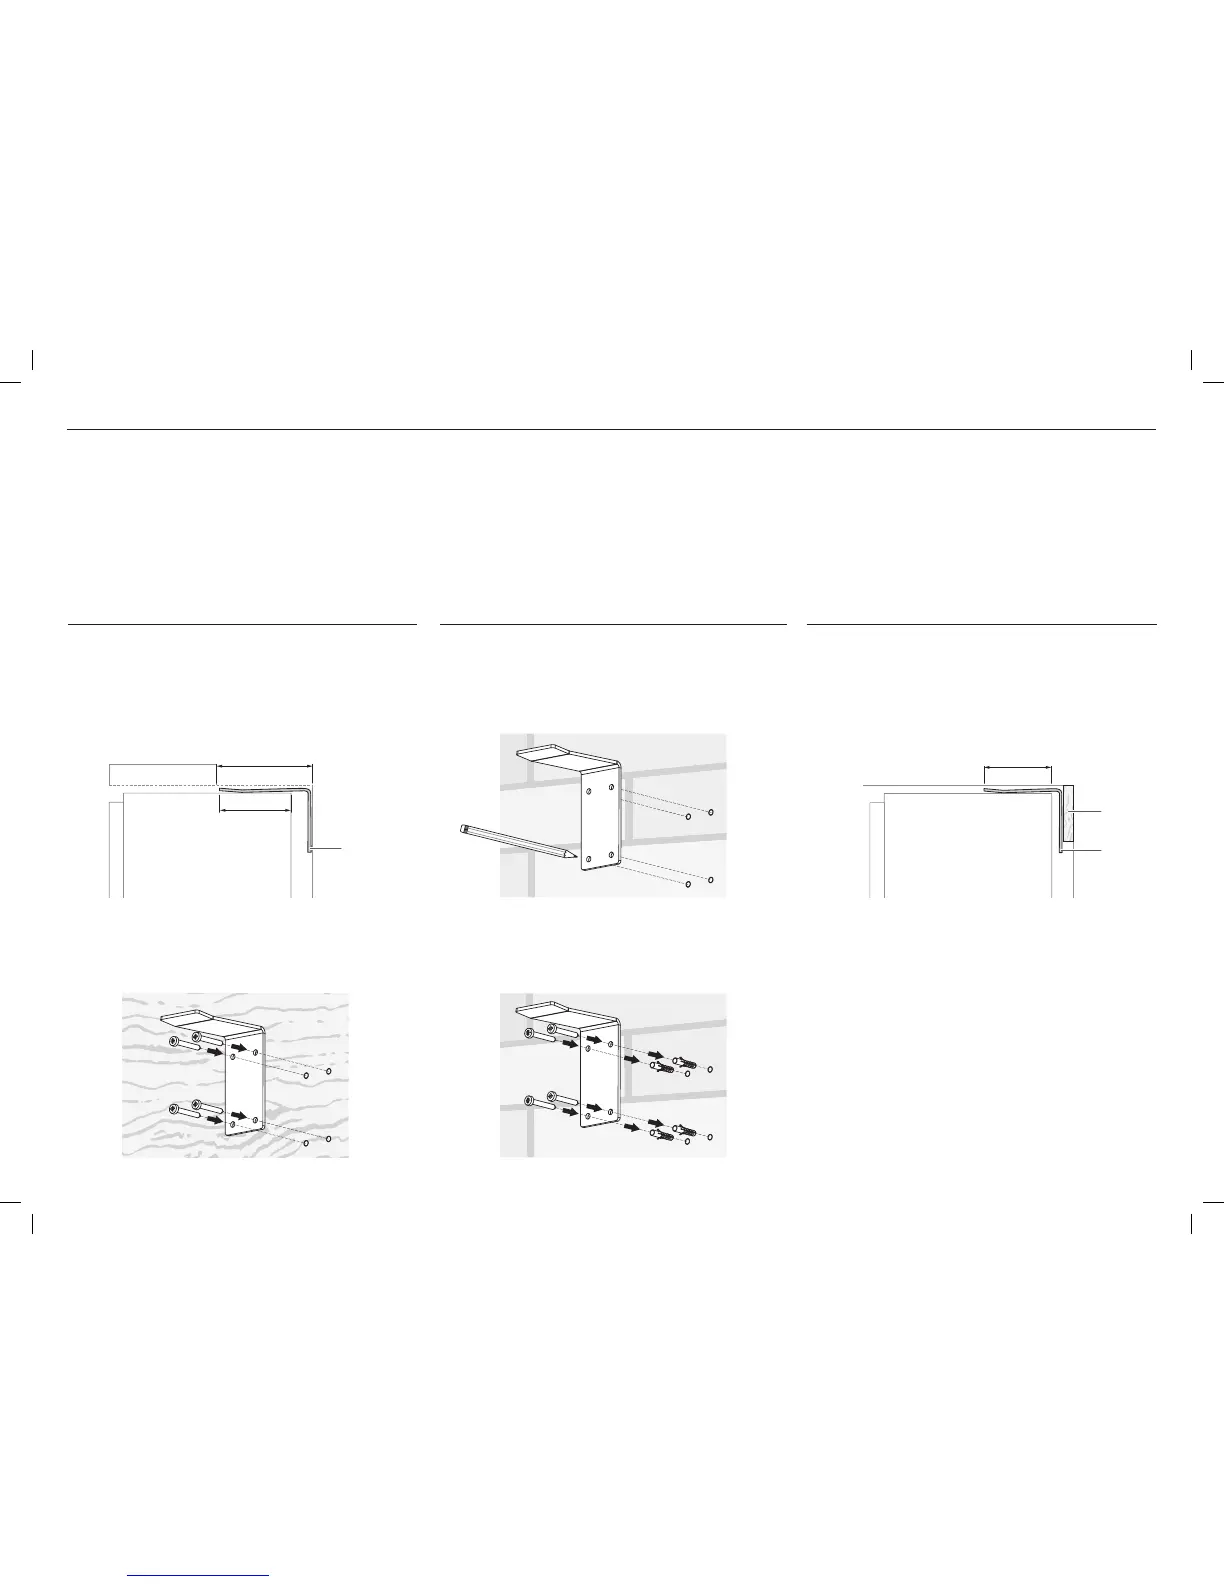
WOODEN WALL INSTALLATION SOLID WALL INSTALLATION
A
If greater than 100mm, an
anti-tip bracket is required
60mm min.
overlap
Bracket
PROFILE VIEW
1 Project the top front edge of the finished enclosure to the
centre of the back wall, this will locate the top of the anti-
tip bracket (refer to A).
2 Mark screw locations to drill Ø6.0mm x 35mm deep holes.
60mm min. overlap
Spacer
Bracket
PROFILE VIEW
2 Fix bracket to the spacer with Phillips screws x 4. Ensure
screws hold tight and the bracket overlaps the appliance
when it is positioned (60mm min.) for a secure hold.
1 Project the top front edge of the finished enclosure to the
centre of the back wall, this will locate the top of the anti-
tip bracket (refer to A). Ensure a structural beam/wall stud
closest to the centre of the wall enclosure is located.
SPACER INSTALLATION
 Loading...