Do you have a question about the Fisher & Paykel DE4060M1 and is the answer not in the manual?
Instructions for removing all outer and inner packaging materials from the dryer before use.
Guidance for positioning the dryer on the floor, ensuring adequate clearance for operation.
Specifies vent system length and bend restrictions for free-standing dryer installations.
Lists necessary tools and components for the inverted wall mounting process.
Details the items provided in the wall mounting kit for dryer installation.
Step-by-step guide for securely installing the dryer on wall brackets and adjusting the control panel.
Procedure to run a test cycle to confirm correct installation and functionality before drying.
This document provides comprehensive installation instructions for Fisher & Paykel vented dryers, emphasizing safety, optimal performance, and various setup configurations. It guides users through the unpacking process, accessory identification, and different venting options, ensuring the dryer operates efficiently and safely within the home environment.
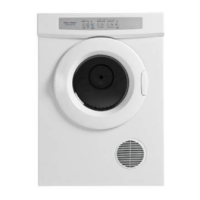
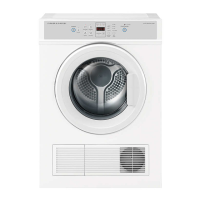
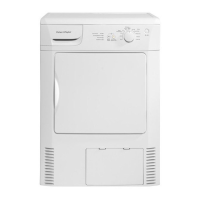
The Fisher & Paykel vented dryer is designed to efficiently dry laundry by expelling moist air from the drum. It operates by drawing in ambient air, heating it, and then circulating it through the tumbling clothes to evaporate moisture. The resulting warm, moist air is then vented out of the dryer, either internally into the room or externally to the outside, depending on the chosen installation method. The dryer is equipped with a control panel that allows users to select various drying cycles and settings, ensuring proper care for different fabric types and load sizes. Its primary function is to provide a convenient and effective solution for drying clothes, reducing reliance on line drying and offering quick turnaround for laundry needs.
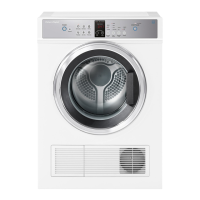
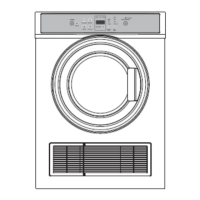
The dryer offers flexible installation options to suit different household layouts and preferences. It can be set up as a freestanding unit, placed on the floor, or inverted and mounted on a wall above a washer or tub. The wall-mounted configuration is particularly useful for maximizing space in laundry areas, and the inversion feature ensures that the control panel remains easily accessible.
For optimal performance and safety, the dryer requires adequate ventilation. Users can choose between internal and external venting. Internal venting, where moist air is discharged directly into the room, is the factory default setting. However, external venting is highly recommended as it prevents the recirculation of moist air, eliminates condensation on walls and ceilings, reduces lint accumulation within the dryer, and prevents lint and other fine particles from being blown into the room. External venting systems typically involve ducting that directs exhaust air outside, requiring specific kits and adherence to installation guidelines regarding duct length and bends.
The control panel is designed for ease of use, allowing users to select drying cycles such as "Time Dry" and adjust other settings. For wall-mounted installations where the dryer is inverted, the display can be adjusted to read correctly, ensuring an intuitive user experience regardless of the mounting orientation. The dryer also incorporates safety features, such as requiring the lint filter to be correctly in place and ensuring the power cord is properly connected to an earthed outlet.
Before initial use, an installation test cycle is recommended. This cycle, typically a 30-minute "Time Dry" with an empty drum, verifies that the dryer is installed correctly and functioning properly. The presence of warmth inside the drum at the end of this cycle indicates normal operation. The dryer is designed to automatically turn off at the end of a cycle or if any problems are detected, with fault codes displayed on the screen to assist with troubleshooting.
Regular maintenance is crucial for the dryer's longevity and efficient operation. The document highlights the importance of keeping the lint filter clean, as this is essential for proper airflow and drying performance. The lint filter should be correctly in place before each use.
The installation instructions also touch upon aspects that contribute to long-term maintenance by preventing potential issues. For instance, external venting helps reduce the chance of lint being sucked into the dryer, thereby minimizing internal buildup and potential blockages. The recommendation to install the dryer in a well-ventilated, dust-free environment further supports its maintenance by preventing dust and debris from entering the appliance and affecting its components.
In terms of electrical safety, users are advised to regularly check the power cord for damage and ensure it is not squashed or twisted during installation or use. A damaged power cord must be replaced by a Fisher & Paykel trained and supported service technician to prevent electric shock hazards. The dryer should not be operated if it has been damaged during transport, in which case a service technician should be contacted.
The design of the venting system, particularly for external venting, also plays a role in maintenance. Angling the vent system helps avoid condensation running back into the dryer, which could otherwise lead to moisture-related issues or damage. Adhering to guidelines for duct length and bends ensures optimal airflow, preventing strain on the dryer's motor and heating elements, and contributing to its overall lifespan.
The document implicitly encourages proactive maintenance by emphasizing correct installation and initial checks. By following the unpacking instructions, ensuring all protective covers are removed, and completing the installation test cycle, users can identify and address potential issues early, thereby preventing more significant problems down the line. The focus on proper ventilation, both internal and external, is a key maintenance consideration, as it directly impacts the dryer's efficiency and the indoor air quality of the laundry area.
| Type | Heat Pump Dryer |
|---|---|
| Control Type | Electronic |
| Drying Technology | Heat Pump |
| Width | 600 mm |
| Height | 850 mm |
| Product Type | Dryer |
| Heat Pump Technology | Yes |
| Reverse Tumbling Action | Yes |
| Sensor Drying | Yes |
| Child Lock | Yes |
| Delay Start | Yes |
| Display Type | LED |