Type 2500
26
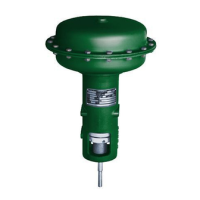
Installing Controller/Transmitter on
Sensor
Note
If the installation is in a location that is
not readily accessible and shop calibra-
tion is required, remove the torque tube
arm from the cage or vessel before
installing the controller or transmitter to
the sensor. Install the controller/trans-
mitter on the torque tube arm in the
shop; then calibrate and return the con-
troller/transmitter with the torque tube
arm assembly attached for installation.
Perform step 1 only if adding a heat in-
sulator to a unit that does not have one.
Key numbers in this step are shown in
figure 16.
1. To install the heat insulator, secure the shaft exten-
sion (key 37) to the torque tube assembly rotary shaft
with the shaft coupling (key 36). Tighten both set
screws (key 38), with the coupling centered as shown
in figure 16. Then mount the insulator assembly (key
35) on the controller/transmitter case with four button
head cap screws and washers (keys 40 and 53).
Tighten the screws.
CAUTION
In the following step, avoid bending the
rotary shaft of the torque tube assem-
bly. Bending or side loading of this
shaft could cause erroneous readings.
Additionally, make sure the ball bearing
assembly (key 12, figure 19) is removed
from the case (key 1, figure 19) to pro-
vide clearance when installing the case
on the sensor.
2. Remove the bearing assembly (key 12, figure 19)
from the case (key 1, figure 19).
3. Carefully slide the controller/transmitter case
straight in. Secure the case on the torque arm or insu-
lator with the four cap screws (key 39).
Note
If a heat insulator is used, do not insu-
late its exterior.
4. Slide the bearing assembly (key 12, figure 19) onto
the shaft or shaft extension of the insulator, and install
the bearing assembly (key 12, figure 19) into the case
(key 1, figure 19).
5. Install the flapper base (key 30, figure 19) on the
torque tube rotary shaft, making sure the flapper is
centered over the nozzle or Bourdon tube valve. Se-
cure the base with the hex nut (key 40, figure 19). For
a controller/transmitter with an indicator assembly,
install the pointer assembly according to the section
entitled Replacing the Bourdon Tube.
6. Connect the supply and output pressure tubing and
perform the calibration procedure.
Replacing the Bourdon Tube
Refer to figure 19 for key number locations.
1. Disconnect the tubing (key 10 for Type 2503 and
key 11 for Type 2500) from the Bourdon tube base.
For a controller/transmitter with indicator assembly,
loosen the side hex clamp nut (key 40) and remove
the pointer assembly (key 51) from the torque tube
rotary shaft.
2. Remove the mounting screws (key 45) and Bour-
don tube assembly (key 16).
3. Inspect the Bourdon tube. Replace it if necessary,
using a tube with a black color code for a 3 to 15 psig
or 0 to 20 psig (0.2 to 1 bar or 0 to 1.4 bar) range. Use
a tube with a red color code for a 6 to 30 psig or 0 to
35 psig (0.4 to 2 bar or 0 to 2.4 bar) range. The range
is stamped at the Bourdon tube base.
4. Mount the Bourdon tube on the level set arm (key
28). Secure it with the mounting screws, using the
proper orientation as shown in figure 17. Connect the
tubing to the tube base, with tubing from the R con-
nection on the relay (key 34) going to the marked base
connection. The other tubing goes to the unmarked
base connection. With an indicator assembly, install
the pointer assembly on the rotary shaft and tighten
the hex nut.
5. Perform the calibration procedure.
Changing Action
Note
The following procedure is necessary to
restore previous action if the mounting
method has been changed. Figure 19
shows key numbers.
1. Reposition the Bourdon tube (and indicator assem-
bly, if used) according to steps 1 through 4 of the sec-
tion entitled Replacing the Bourdon Tube.
2. Loosen the hex nut (key 40) and remove the flap-
per base (key 30) from the torque tube rotary shaft.
Turn the flapper base over and install it on the rotary
shaft, using the proper orientation as shown in figure
17 and making sure the flapper is centered over the
nozzle or Bourdon tube valve.
3. Perform the calibration procedure.
 Loading...