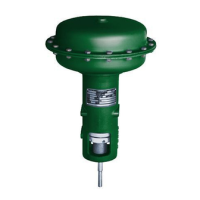
Type 2500
28
or 90, figure 19), or the 1/8-inch NPT pipe plug (key
73, not shown), from the relay base (key 23, figure
19).
3. Install the pipe plug or the desired adjustment as-
sembly into the relay base.
4. Replace the tubing (key 10) to the proportional
band valve assembly.
Changing Relay
The relay may be removed for cleaning, repair, or re-
placement.
Removal
1. For a controller or transmitter with indicator assem-
bly, loosen the two lower relay screws (key 96) and
slide out the indicator base plate (key 53).
2. Disconnect the tubing (key 10 or 11) from the relay.
3. Remove both mounting screws, relay, and relay
gasket (keys 43, 34, and 22).
Replacement
1. Install a new gasket (key 22), the replacement
relay (key 34), and secure with two mounting screws
(key 43). On a controller or transmitter with an indica-
tor assembly, slide the base plate under the two lower
screws of the relay case, align the plate so the pointer
will read properly, and tighten the screws.
2. Connect the tubing (key 10 or 11) to the relay.
3. Test the relay deadband, according to the Relay
Deadband Testing procedure in this section.
4. If the deadband is within tolerance, go to the Cal-
ibration section. If the deadband is not within toler-
ance, perform the Relay Assembly Maintenance pro-
cedure
Relay Assembly Maintenance
The alignment tool shown in figure 18 is not essential
for assembly of the relay, but its use does prevent ex-
cessive air consumption and deadband. If low air con-
sumption and minimum deadband are required, make
or purchase the alignment tool before disassembling
the relay.
Refer to figures 20 and 21 for key number locations.
Disassembly
1. Remove the relay according to the Changing Relay
procedure in this section.
2. Remove the orifice assembly or connector (key
88), check to see if the orifice is plugged or damaged,
and inspect the O-ring (key 90).
3. Remove six casing screws and washers (keys 96
and 98) and, remove the top diaphragm (key 91). For
Figure
18. Relay Alignment Tool
15A3519–B
A6016
a high temperature relay, also remove the gasket (key
100, figure 21) that covers the diaphragm.
4. Remove the spacer ring (key 84), diaphragm as-
sembly (key 86), and relay spring (key 92) from the
relay body (key 83). On a high temperature relay, also
remove the gasket (key 99, figure 21) from underneath
the diaphragm assembly.
5. Remove the four screws (key 97), spring plate (key
95), spring plate gasket (key 94), spring (key 92), and
inner valve (key 87).
6. Inspect the valve seats for roughness due to corro-
sion. One seat is in the diaphragm assembly; the other
is in the relay body (key 83). If necessary, replace the
parts.
7. Inspect the diaphragms and gaskets, and replace
them if necessary. Also, replace the spring and inner
valve (keys 92 and 87) if they show signs of corrosion.
The lower diaphragm comes as part of an assembly; it
must be installed as an assembly.
8. Clean all parts thoroughly before assembly.
Assembly
1. Place the relay spring in the relay body and, for a
high temperature relay, install a bottom gasket. Install
the diaphragm assembly, spacer ring, and top dia-
phragm on the body so that all flow passage holes are
in line. For a high temperature relay, also install a gas-
ket over the top diaphragm.
2. Place the casing assembly on the top diaphragm
so that the lugs on the casing and spacer ring line up
and are also in line with the body lug.
 Loading...