Instruction Manual
D103042X012
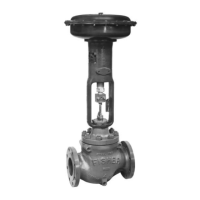
D4 Valve
July 2015
8
2. Install the plug (key 2) on the stem (key 47) and insert a new groove pin (key 4).
3. Thoroughly clean the seat ring and bonnet threads in the valve body (key 1). Also clean the valve body seat ring
gasket surfaces.
4. Apply anti‐seize lubricant (key 54) to the threads of the seat ring (key 3), and its mating threads in the valve body.
5. Apply anti‐seize lubricant (key 54) to the seat ring gasket (key 9) and install into the valve body.
6. Screw the seat ring into the valve body. Use a socket wrench to tighten the seat ring to the torque values shown in
table 8. Remove all excess lubricant after tightening.
7. Lubricate (key 54) the threads on the valve body and hammer nut and the contact surfaces of the bonnet and
hammer nut flange. Install the bonnet and actuator assembly with pinned valve plug onto the valve body. Tighten
the hammer nut using an adjustable wrench until the nut stops turning. A few hammer blows will be required to
ensure that the assembly is tight.
8. See the actuator assembly and spring adjustment sections of this manual.
Valve Packing
Note
These instructions apply to valves manufactured with serial numbers equal to and greater than 18679262. See Appendix A for
information on packing constructions with serial numbers less than 18679262.
If your D4 valve assembly has a packing retainer lock ring (see figure 6), proceed to Appendix A.
WARNING
Observe the warning at the start of the Maintenance section.
The valve stem packing can only be accessed from within the valve body. If packing maintenance is required, first
disassemble per steps 1, 2, and 6 or 7 in the Valve Plug and Seat Ring Disassembly section of this document.
Disassembly
1. Unscrew the packing retainer (key 10) from the bonnet (key 5).
2. Remove the five Belleville springs (key 11), packing spacer (key 14), packing (key 13), and two anti‐extrusion rings
(key 12) from the bonnet, using a formed wire hook.
3. Clean and inspect the packing box wall to ensure that the packing surfaces are not damaged. If the surface
condition is damaged, and cannot be improved by light sanding, replace the bonnet by contacting your Emerson
Process Management sales office.
4. Inspect the valve stem for scratches or wear, and valve plug for wear or damage. Replace if necessary.