3
ASSEMBLY
14
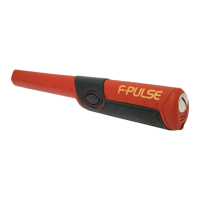
TARGET PINPOINTING
(no-motion PINPOINT Mode)
After you have identified a target using a motion mode of detection, press
to identify the target’s exact location. This technique can yield more
information about the target’s shape and size and also find its exact
location to facilitate excavation.
Using :
1.
Position the searchcoil just barely off the ground, and to the side of the
target.
2.
Press and hold and raise the searchcoil about 2 inches. Lifting the
searchcoil away from the ground makes the ground signal go negative,
so the machine is silent.
3.
Now move the searchcoil slowly across the target, and you can locate it
by the sound. The target is located directly under where the sound is
loudest.
Narrow It Down:
1.
To narrow the response further, position the center
of the searchcoil near the center of the response
pattern, but not directly over the center.
2.
Release, then press and hold again again.
3.
Repeat this narrowing procedure to narrow the field of
detection further.
Note:
Depth indication is less accurate after
narrowing.
COIL DRIFT
If you keep depressed for continuous searching,
realize that drift will occur over time, causing the detector
to gain or lose sensitivity. Periodic retuning of the
detector is required to minimize drift; release
and press to retune.
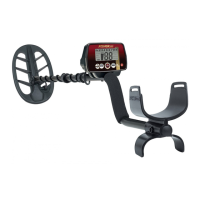
●
1 Position detector upright.
●
2 Rotate the LOCKING COLLAR fully in the
counterclockwise direction.
●
3 Insert your finger inside the tube and make sure the
INTERNAL CAM LOCK is flush with the inside of the tube.
●
4
Insert the MIDDLE STEM into the
S-ROD, with the SILVER BUTTON
pointed upward
●
5 Rotate the MIDDLE STEM until the
SILVER BUTTON locates in the hole.
●
6 Twist the LOCKING COLLAR fully in the clockwise
direction until it locks.
●
7 Repeat this process on the LOWER STEM.
●
8 Using the BOLT and KNURLED KNOB, attach
the SEARCHCOIL to the LOWER STEM.
●
9
Adjust the LOWER STEM to a length that lets you
maintain a comfortable upright posture, with your arm
relaxed at your side, and the SEARCHCOIL parallel to the
ground in front of you.
●
10
Wind the CABLE securely around the STEMS, leaving slack at
the bottom.
●
11
Connect CABLE PLUG to housing.
Do not twist the Cable or Plug. Turn Locking Ring only. Use
minimal finger pressure to start the threads. Do not cross-
thread. When the Locking Ring is fully engaged over the
threaded connector, give it a firm turn to make sure that it
is very tight. When the Locking Ring is fully engaged over the
threaded connector, it may not cover all of the threads.
●
12
Tighten both
LOCKING COLLARS.
S-ROD
LOCKING
COLLAR
INTERNAL
CAM LOCK
SILVER BUTTON
MIDDLE
STEM
S-ROD
MIDDLE STEM
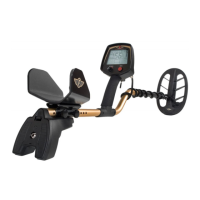
●
2
●
3
●
4
●
4
●
5
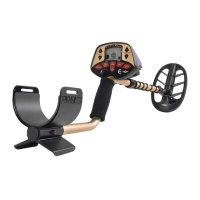
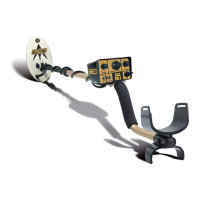
Hand-grip
Search
Coil
Cable
Cable
Plug
S-Rod
Middle
Stem
Locking
Collar
Knu
rled
Knob
Battery
Compartment
(back side)
Headphone
Jack
Armrest
Sea
rchoil
*
Note: Very tall users can purchase the optional Extended Lower Stem (TUBE5X), for extended reach.
Caution:
Forcing in MIDDLE STEM with CAM LOCK raised may form a burr on
camlock. If this happens, remove burr with knife to allow insertion.
Armrest Adjustment
If you wish to change the position of
the armrest, remove the screw and
move the armrest to one of the
alternate hole locations.
MF2B-manual-SPREADS.qx_MF2B-F2manual 2/9/15 11:57 AM Page 3