Instruction Manual
D103175X012
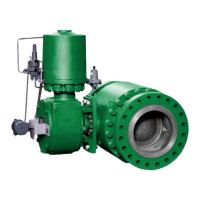
GX Valve and Actuator
July 2017
17
Note
The following step also provides additional assurance that the valve body fluid pressure has been relieved.
7. For standard bonnet constructions (figures 18, 19, 20, and 21), body nuts (key 7) attach the actuator yoke (key 8)
to the valve body (key 1). Loosen these nuts approximately 3mm (1/8 inch).
For extension and bellows bonnet constructions, bonnet nuts (key 46) attach the actuator yoke (key 8) to the
extension bonnet (key 39). Loosen these nuts approximately 3mm (1/8 inch).
8. Then loosen the valve‐to‐yoke gasketed joint by either rocking the actuator yoke or prying between the valve and
actuator yoke. Work the prying tool around the actuator yoke until it loosens.
WARNING
If there is evidence of process fluid under pressure leaking from the joint, retighten the valve body/joint nuts and return to
the Warning at the beginning of the Maintenance section to ensure proper steps have been taken to isolate the valve and
relieve process pressure, thus avoiding property damage or personal injury.
9. If no fluid leaks from the joint, loosen the packing follower (key 29) two turns to relieve the packing compression
load.
10. For standard bonnet constructions (figures 18, 19, 20, and 21), remove the body nuts (key 7) completely.
For extension and bellows bonnet constructions (figures 22 and 23), remove the bonnet nuts (key 46) completely.
CAUTION
To avoid property damage, place the actuator yoke on a protective surface, as described in the following procedure.
11. Carefully lift off the actuator yoke and set it on a protective surface to prevent damage.
For standard bonnet constructions, if the bonnet (key 4) together with the valve stem plug assembly has a tendency
to lift with the actuator yoke, ensure it does not drop from the actuator.
For extension and bellows constructions, ensure the bonnet (key 4) does not lift with the actuator yoke.
CAUTION
For extension and bellows bonnet constructions, lifting the bonnet with the actuator yoke may cause possible damage to
the valve plug and to the bellows.
12. Remove the stem adjustor nut (key 27) and locknut (key 28).
13. For standard bonnet constructions, remove the bonnet and the valve plug/stem assembly and set on a protective
surface.
For extension and bellows bonnet constructions, remove only the bonnet (key 4).
14. Remove the valve/yoke gasket (figures 18, 19, 20, and 21 key 5, figures 22 and 23 key 47) and cover the opening
of the valve to protect the gasket surface and prevent foreign matter from getting into the valve cavity.
15. Remove the packing follower (key 29) from the bonnet (key 4).