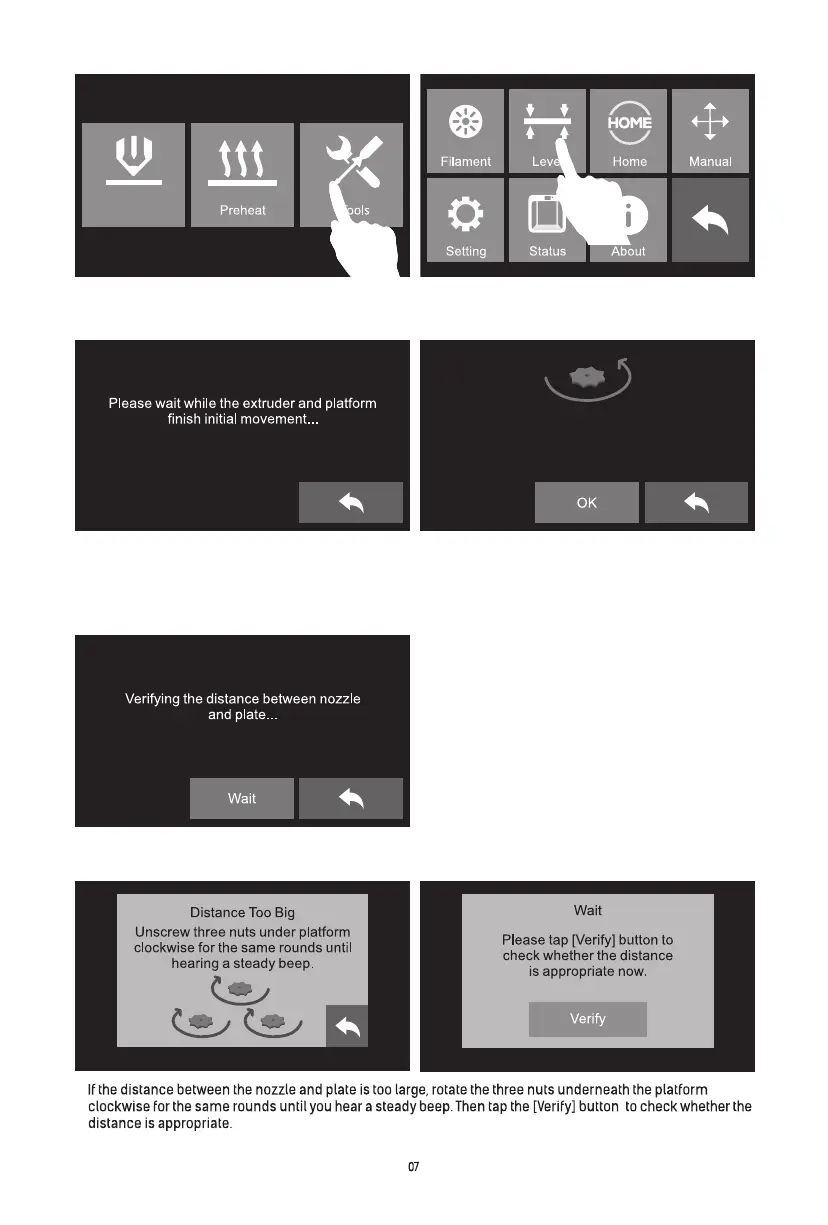
Screw the three nuts under the platform
counterclockwise until they are tight,
then tap the [OK] button.
3. Please wait while the extruder and platform finish initial movements. Screw three nuts under the
platform anticlockwise, then tap [OK] button.
Attention: three nuts may be tightened up before going out, please skip this step if you find
three nuts have been tightened up, and continue to following steps
1. Tap [Tools]-[Level] on touch screen. 2. Tap [Tools]-[Level] on touch screen.
4. After tapping [OK] button, the extruder will move towards the first point and the plate will move
up and down to verify the distance between nozzle and plate.
5.
Build