Install the unit in a chosen place on a flat firm surface.
During cold weather, it is recommended to bring the valve back to room temperature before operating.
All plumbing for water inlet, distribution and drain lines should be done correctly in accordance with legislation in
force at the time of installation.
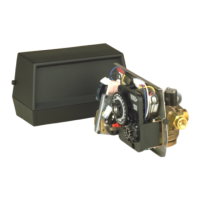
The distribution tube should be cut flush with the top of the tank. Slightly bevel the ridge in order to avoid
deterioration of the seal whilst fitting the valve (View sketch below).
Lubricate the distribution tube joint and the joint with a 100% Silicon lubricant. Never use other types of greases
that may damage the valve.
All soldering on main plumbing and to the drain line should be done before fitting the valve. Failing to do so can
generate irreversible damages.
Use Teflon® tape if necessary in order to seal between the drain fitting and the outlet flow control.
On units with by-pass, place in by-pass position. Turn on the main water supply. Open a cold soft water tap nearby
and let run a few minutes or until the system is free from foreign material (usually solder) that may have resulted
from the installation. Once clean, close the water tap.
Place the by-pass in service position and let water flow into the mineral tank. When water flow stops, slowly open
a cold water tap nearby and let run until the air is purged from the unit.
Plug the valve to a power source. Once plugged the valve may do a cycle on its own in order to go to service
position.
Fill approximately 25mm of water above the grid plate, (if used). Otherwise, fill to the top of the air check in the brine
tank. Do not add salt to the brine tank at this time.
Initiate a manual regeneration, bring the valve into « brine draw and slow rinse position » in order to draw water
from the until the blockage of the anti air valve ; the water level will be approximatively in the middle of the air
check.
Open a cold water tap and let the water run in order to drain the air out of the circuit.
Bring the valve in brine refill position and let it get back to service position automatically.
Now you can add salt to the brine tank, the valve will operate automatically.
3 - INSTALLATION INSTRUCTIONS
4
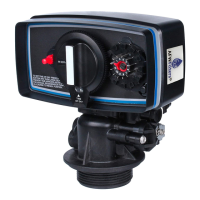
7700 VALVE
3.1
3.2
3.3
3.4
3.5
3.6
3.7
3.8
3.9
3.10
3.11
3.12
3.13
3.14
3.15
Distribution tube length cut
Bevel exterior
diameter
Cut at bottle height
Lubricate O’ ring
Distribution tube
Tube adapter dia.32
to 1.05” (27mm)