47
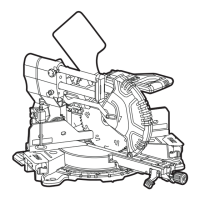
SMS 305 18-EC
Turn off the saw. Wait until the blade
comes to a complete stop before returning
the saw head to the raised position, then
remove the workpiece.
Bevel cutting (see figure X2)
A bevel cut is a cut made across the grain
of the work piece with the blade at an angle
other than 90° to the miter table and the
workpiece. A straight bevel cut is made with
the miter table set at the 0° position and with
the saw head set at a bevel angle.
Here raise a straight bevel cut without sliding
function as an example:
Remove the battery from the saw.
Properly position the workpiece. Make sure
the work piece is clamped firmly against
the table and the fence.
Set the miter table at 0° position, secure
the miter arm in place.
Tilt the saw head to desired angle, tighten
the bevel lock lever (14).
Attach the battery to the saw. Grasp the
main handle (1) and turn on the saw.
Always allow the blade to reach full speed
before cutting.
Lower the saw head all the way down, and
cut through the workpiece.
Turn off the saw. Wait until the blade
comes to a complete stop before returning
the saw head to the raised position, then
remove the workpiece.
Compound cutting (see figure X3)
A compound miter cut is a cut made using
a miter angle and a bevel angle at the same
time.
Remove the battery from the saw.
Properly position the workpiece. Make sure
the work piece is clamped firmly against
the table and the fence.
Rotate the miter table to desired angle and
secure the miter arm in place.
Tilt the saw head to desired angle, tighten
the bevel lock lever (14).
Attach the battery to the saw.
Grasp the main handle (1) and turn on the
saw. Always allow the blade to reach full
speed before cutting.
Lower the saw head all the way down, and
cut through the workpiece.
Turn off the saw. Wait until the blade
comes to a complete stop before returning
the saw head to the raised position, then
remove the workpiece.
Cutting grooves (see figure X4)
See the related section: Setting cutting
depth to set the desired depth of cut.
After adjusting the desired position of the
blade, cut parallel grooves (X-1) across the
width of the workpiece using a slide (push)
cut.
Remove the material between the grooves
with a chisel.
Cutting warped material (see
figure X5)
When cutting warped material, always make
sure it is positioned on the miter table with
the convex side against the fence.
If the warped material is positioned in
wrong way, it will pinch the blade near the
completion of the cut.
Cutting round or irregularly
shaped material (see figure X6)
For round material such as dowel rods
or tubing, always use a clamp or a fixture
designed to clamp the workpiece firmly
against the fence and table. Rods have a
tendency to roll while being cut, causing the
blade to “bite” and pull the work with your
hand into the blade.
Cutting aluminum (see figure X7)
WARNING!
Always use the appropriate saw blade made
especially for cutting Aluminum.
Certain workpieces, due to their size, shape
or surface finish, may require the use of a
clamp or fixture to prevent movement during
the cut.
Position the material so that you will be
cutting the thinnest cross section.
Cutting large material
(see figure X8)
Occasionally you will encounter a piece of
wood a little too large to fit beneath the lower
guard.