48
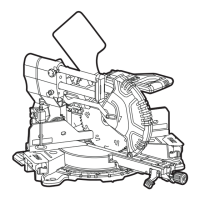
SMS 305 18-EC
If this occurs, simply place your right thumb
on the upper side of the guard and roll the
guard up just enough to clear the workpiece.
Avoid doing this as much as possible, but
if need be, the saw will operate properly
and make the bigger cut. Never tie, tape,
or otherwise hold the guard open when
operating this saw.
Cutting crown molding
WARNING!
Always use the workpiece clamp, and place
tape on the area being clamped to avoid
marks on the work piece.
To fit properly, crown molding must be
compound mitered with extreme accuracy.
Since compound cuts are the most difficult
to accurately obtain, trial cuts should be
made in scrap material, and much thought
and planning invested prior to making your
required cut.
C
utting crown molding flat on the
table (see figure X9)
Move the sliding fence to the proper
position.
Set the bevel and miter angles. Tighten the
miter locking knob (16) and the bevel lock
lever (14).
Position the molding on the saw table.
Clamp the workpiece in place with the work
clamp.
Turn on the saw. Lower the saw head and
make cut.
Wait until the blade comes to a complete
stop before returning the saw head to
the raised position and/or removing the
workpiece.
NOTE
Always make a test cut using scrap to confirm
that the angles are correct.
Key Miter Setting Bevel Setting Type of Cut
A 31.6° Right 33.9° Left
Inside corner-Left side
1. Position top of molding against fence.
2. LEFT side is finished piece
B 31.6° Left 33.9° Right
Inside corner-Right side
1. Position top of molding against fence.
2. RIGHT side is finished piece
C 31.6° Left 33.9° Right
Outside corner-Left side
1. Position top of molding against fence.
2. LEFT side is finished piece
D 31.6° Right 33.9° Left
Outside corner-Right side
1. Position top of molding against fence.
2. RIGHT side is nished piece
Cutting crown molding against
the miter fence (see figure X10)
Set the bevel angle at 0° and the miter
angle at 45°, to either the left or the right as
needed.
Lay the workpiece on the saw with its
bottom edge resting at a natural angle flush
against the fence and its top edge resting
flush against the miter table.
Secure the workpiece against miter fence
with a clamp.
Slide the saw arm toward the operator.
Turn on the saw and make cut.
Wait until the blade comes to a complete
stop before returning the saw head to
the raised position and/or removing the
workpiece.
NOTE
Always make a test cut using scrap to confirm
that the angles are correct.