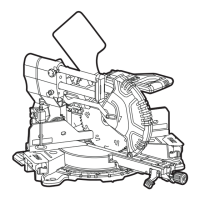
46
SMS 305 18-EC
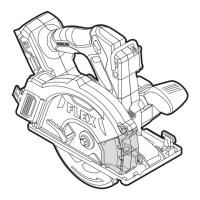
Check the function of lower
blade guard (see figure W)
WARNING!
Remove the battery from the saw.
Set the miter table at 0° position, secure
the miter table in place. Lock the saw head
in the closest position in relation to the
fence.
Set the bevel angle at 0° position.
Properly position the work piece with a
thickness equal to the maximum vertical
cutting capacity on either side of saw
blade. Make sure the work piece is
clamped firmly against the table and the
fence.
Release the arm-lock pin (5), press the saw
arm the fully down position, then release
the saw arm, it will springs back to the
uppermost position. Repeat this process
for several times, to ensure the lower blade
guard (19) work properly, without binding,
jam.
Cutting with your sliding miter
saw
WARNING!
Do not stand in line with the saw blade in
front of the power tool. Always stand to
the side of the saw blade. This protects your
body against possible kickback.
WARNING!
Position your body and hands properly to
make cutting easier and safer. Do not reach
one hand across the other when in front of
the tool arm. Failure to follow all instructions
may result in serious personal injury.
WARNING!
Never perform any cutting operation
“freehand” (i.e., without holding the work
piece against the fence), because the blade
could grab the workpiece, causing it to slip
and twist.
WARNING!
N
ever place hands near the cutting area.
Keep hands, fingers and arms away from the
rotating saw blade.
WARNING!
Be aware of the path of the saw blade.
Make a dry run with the saw “OFF” by
conducting a simulated cutting cycle and
observe the projected path of the saw blade.
Keep hands out of the path of saw blade.
WARNING!
NEVER move the workpiece or make
adjustments to any cutting angle while the
saw is running and the blade is rotating.
Any slip can result in contact with the blade,
causing serious personal injury.
WARNING!
Do not try to cut narrow pieces using the
sliding feature. Failure to heed this warning
could result in serious personal injury.
Crosscut and miter crosscut (see
figure X1)
A crosscut is a cut made across the grain of
the work piece.
–
For narrow workpiece, it can be cut through
by a single cut. Perform this kind of cut by
using non-sliding cutting method, tighten
the slide-rail lock knob (4) to fix the saw head
in the closest position in relation to fence.
–
For wide workpiece, loosen the slide-rail
lock knob (4), so that the saw head can slides
along its guide rods from the most distant
point to closest position in relation to the
fence to perform the cut.
A straight crosscut is a cut made with the
miter table set at the 0° position. Miter
crosscuts are made with the miter table set at
an angle other than 0°, either left or right.
WARNING!
Never pull the saw toward you during a cut.
The blade can suddenly climb up on top of
the work piece and force itself toward you.
Remove the battery from the saw.
Properly position the workpiece. Make sure
the work piece is clamped firmly against
the table and the fence.
Set desired miter angle, and secure the
miter arm in place.
Loosen the slide-rail lock knob (4).
Attach the battery.
Grasp the main handle (1) and turn on the
saw. Always allow the blade to reach full
speed before cutting.
Lower the saw head all the way down, and
cut through the edge of the workpiece.
Push (but do not force) the saw head
toward the fence all the way to the rear
position to complete the cut.