Page 4 of 5
Entering the MEASURING Mode
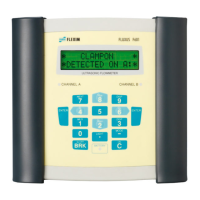
18) Using the 4 or 6 keys, place the carrots around >MEA<
(MEASURING) then press Enter.
19) A Check Mark () under a Channel indicates this channel
will be making measurements. Use the 4 and 6 keys to
move the carrots to the Channel you plan on activating
then use the 2 and 8 keys to change the minus sign (-) to a
check mark ( ). A dot (.) under any Channel indicates this
Channel has not been programmed.
20) If you are recording data, this screen allows you to apply
file numbers to the pipe you are measuring. For example,
you can measure multiple pipes, assign different numbers
to each pipe, and the data will be separated in memory by
the Measuring Point Number.
21) Use the keypad to enter the Sound Path to indicate the
placement of the transducers onto the pipe then press
ENTER. Sound Path 1 will place the transducers on
opposite sides of the pipe. Sound Path 2 places the
transducers on the same side of the pipe. Sound Path 2 is
recommended and simpler to install.
Sound Path 1 has stronger communications signals.
22) Transd. Distance indicates the separation distance
between the two transducers as placed on the pipe. You
MUST mount the transducers with this separation. Note
that Negative Transducer Distance is possible in Sound
Path 1 on small diameter pipes.
CHANN: >A< B Y Z
MEASUR – . .
.
par >MEA< opt sf
MEASURING
A: Meas. Point No.:
xxx ( →)
.
Transd. Distance
A: 1.12 inch Reflex
.
 Loading...
