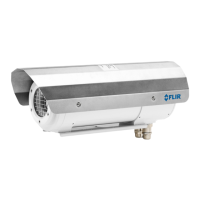
IRCamSafeEX-AXB/C Ex d enclosures for infrared cameras
8
• The permitted ambient temperatures for the assembled components must not
be exceeded.
• When stripping the insulation, ensure that the wire insulation reaches the
clamps.
• When stripping the insulation, ensure that the wire is not damaged.
• The switch assembly may only be installed in dry and clean conditions.
8.8.1.4 Locking the rear enclosure cover
1. Check that the O rings are positioned correctly and are in perfect condition.
2. Check that the thread for the rear cover is clean and in perfect condition. The cover
must be replaced if the thread is damaged.
3. Check that assembly paste is applied to the thread (e.g. Teflon paste).
4. Apply new drying agent.
5. Carefully position the enclosure cover and manually screw it down.
6. Position the assembly wrench on the rear cover and screw the enclosure cover down
until the index position is reached.
7. Screw in and tighten 1 × enclosure index screw.
8. Screw in and tighten 4 × enclosure locking screws.
8.8.1.5 Installing the earth connection
The earth connection is suitable for fine-wire cables up to 1.5 mm
2
and single-wire ca-
bles up to 2.5 mm
2
. Place the stripped end of the earth cable in the earth connection and
tighten the M4 screw for the earth connection to a maximum torque of 1.2 Nm.
8.9 Commissioning
Before commissioning
• Ensure that the device is not damaged.
• Ensure that the device has been installed in line with the instructions.
• Ensure that the protective window grid has been fitted correctly.
• Check the cable glands for any damage and ensure they are secured.
• Check that screws and nuts are fastened securely.
• Check that the power supply and data cable are installed correctly; check the cable
sheaths for any damage.
• Check the tightening torques.
• If necessary, ensure that any unused cable glands have been sealed with stoppers
approved in line with Directive 94/9/EC.
Steps during commissioning
1. Turn on the mains voltage.
2. Configure the Ethernet connection to the protective enclosure controller using the
EDS Configurator tool.
3. Load the website for the protective enclosure controller and, if necessary, configure
the network switch settings.
4. Check and configure the Ethernet connection to the infrared camera using the FLIR
IP Config tool.
5. Start the monitor software.
6. Check the camera image.
7. Check the sensor values (temperature, humidity, pressure) for the protective enclo-
sure controller.
8.10 Maintenance
Operators of electrical systems in potentially explosive atmospheres must ensure that
the system is kept in proper working order and is operated correctly. The operator must
also monitor the system and carry out maintenance and repair work as required. Mainte-
nance work and troubleshooting must only be performed by specialist personnel. In par-
ticular, when carrying out maintenance work, it must be ensured that the parts essential
for maintaining the type of protection and the features offered by the system are in proper
#T559891; r.18204/18204; en-US
16