Handling the camera11
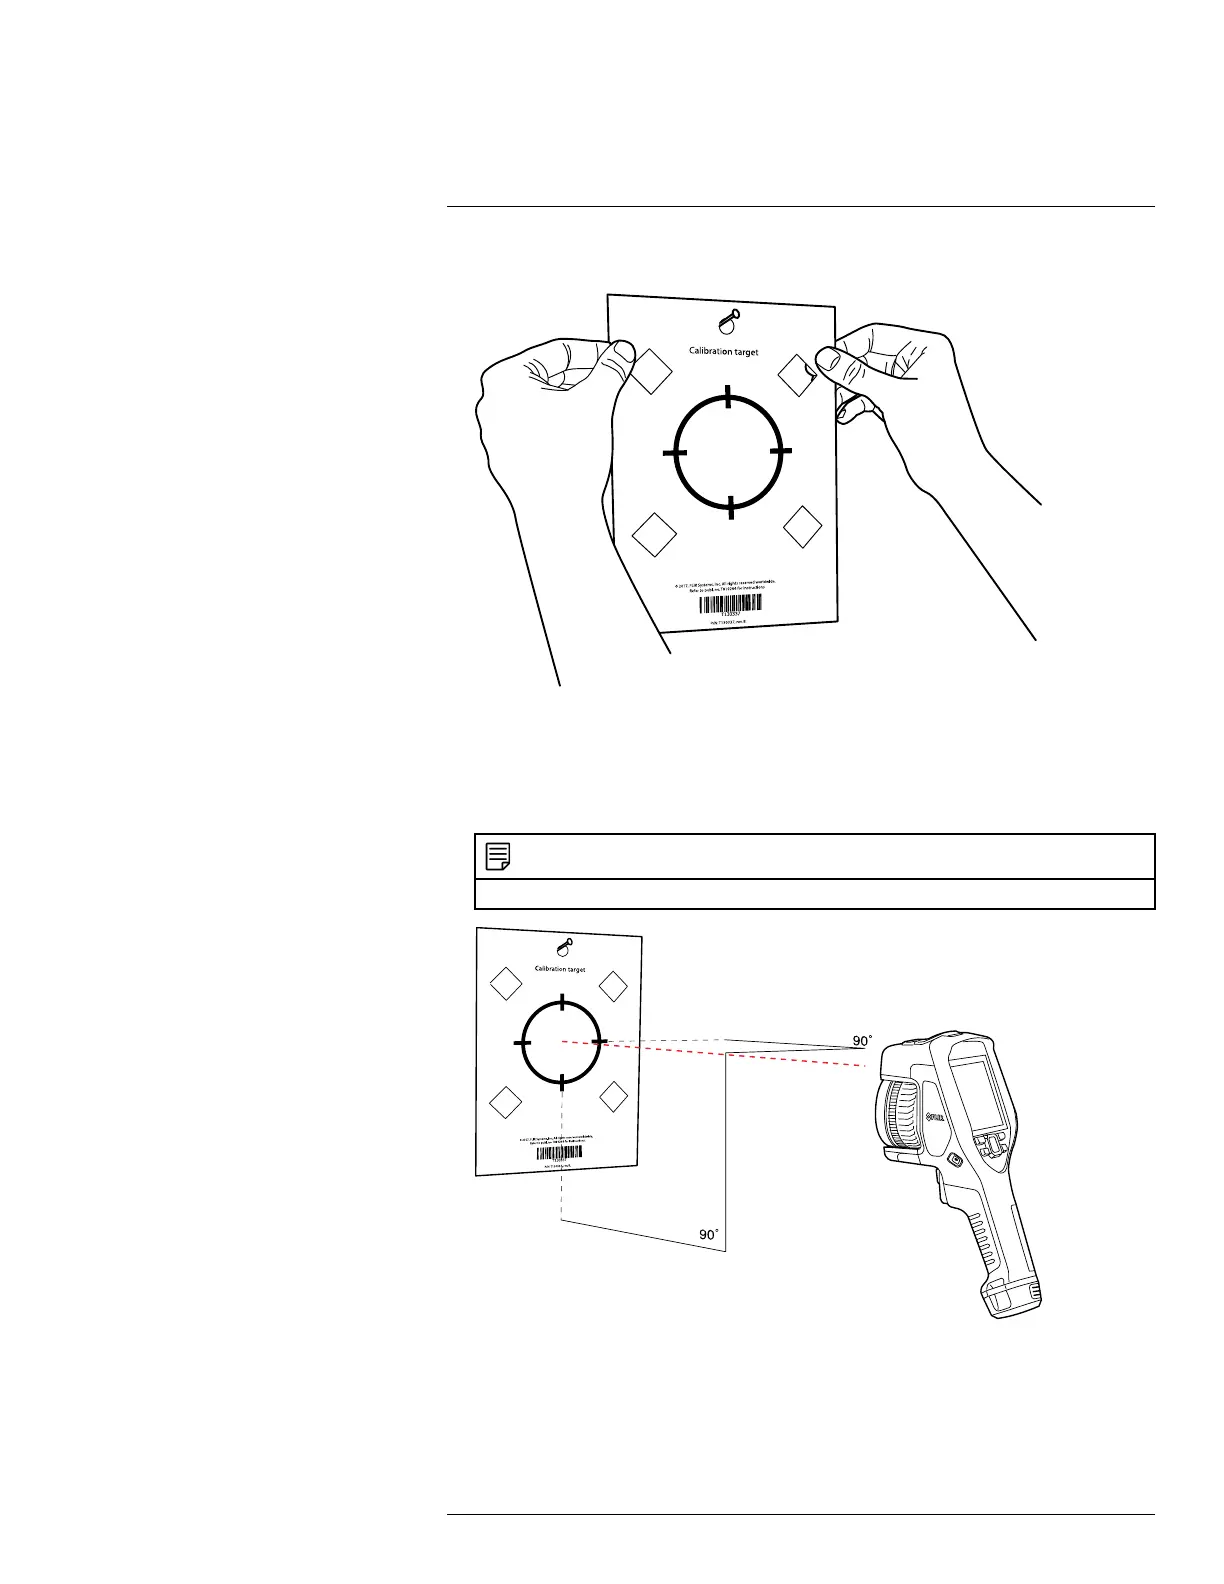
2. Tape or hang the calibration target on a wall.
3. Mount the new lens on the camera according to the procedure in section 11.18 Chang-
ing camera lenses, page 47. When the lens is mounted, the calibration wizard starts
automatically.
4. From a distance of 2 m (6.6 ft.), aim the camera toward the crosshair, using the laser
pointer. The camera will take a picture automatically.
NOTE
Make sure the camera’s optical path is perpendicular to the calibration target. See the image below.
#T810190; r. AL/47698/47698; en-US
51