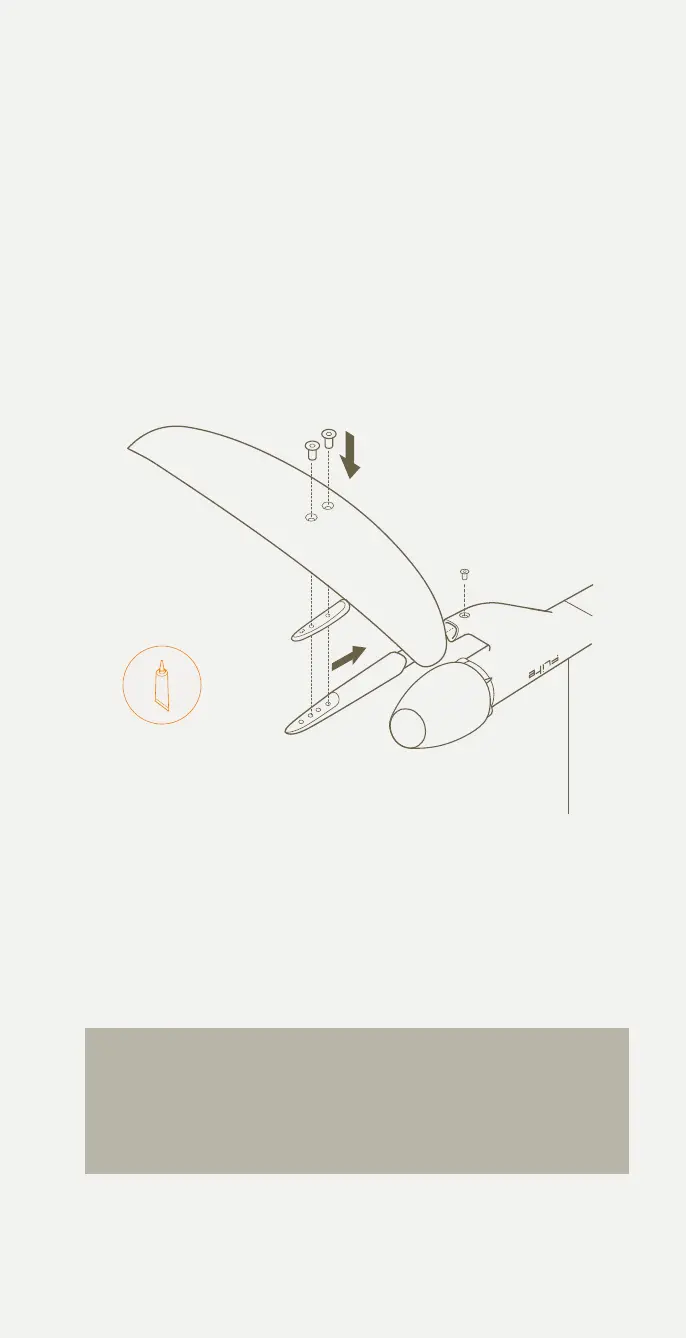
Connect the stabiliser wing
1 Take the Flite 500 stabiliser from the travel bag and remove the wing
cover. Make sure to use the provided Flite 500 shims.
2 Take the correct stabiliser wing shim and fit between the stabiliser
wing and the fuselage tail.
3 To ensure correct mounting, direction and placement, the wing when
installed correctly should have the rounded, curved leading edge
facing the front wing.
ALWAYS ADD TEF-GEL TO THE STAINLESS STEEL FASTENERS THAT ARE
BEING INSERTED INTO THE ALUMINIUM. IF LEAVING WINGS ATTACHED
FOR EXTENDED PERIODS, ENSURE THAT YOU LOOSEN FASTENERS AND
RE-APPLY TEF-GEL EVERY FEW WEEKS. FAILURE TO DO SO MAY RESULT IN
CORROSION AND DAMAGE TO YOUR EFOIL FASTENER INSERTS.
PRO TIP We have supplied 0, 1, 2, 3, 4 and 5 degree shims so you
can customise your ride. Changing shims alters the amount of
stabilising downforce provided by the tail, and also impacts the
balance point of the foil and responsiveness. Higher shim numbers
can generate earlier takeoff. Based on extensive testing, we
recommend using the 3 or 4 shim on Flitescooter.
TEF-GEL
Connect the fuselage tail
Turning on Flitescooter
Place the inated Flitescooter
on a clear surface. Locate the
handlebar cap and remove
by gently pulling up
Turn the handlebar lock
counterclockwise so that the
opening lines
up with the handlebar cavity.
Insert the handlebars into the
handlebar cavity. Turn the
handlebar
lock clockwise until it stops.
This will keep the handlebars
locked into
place.
Flitescootering for the rst time
Arming the motor
Connect the front wing
Connect the stabliser
25
 Loading...