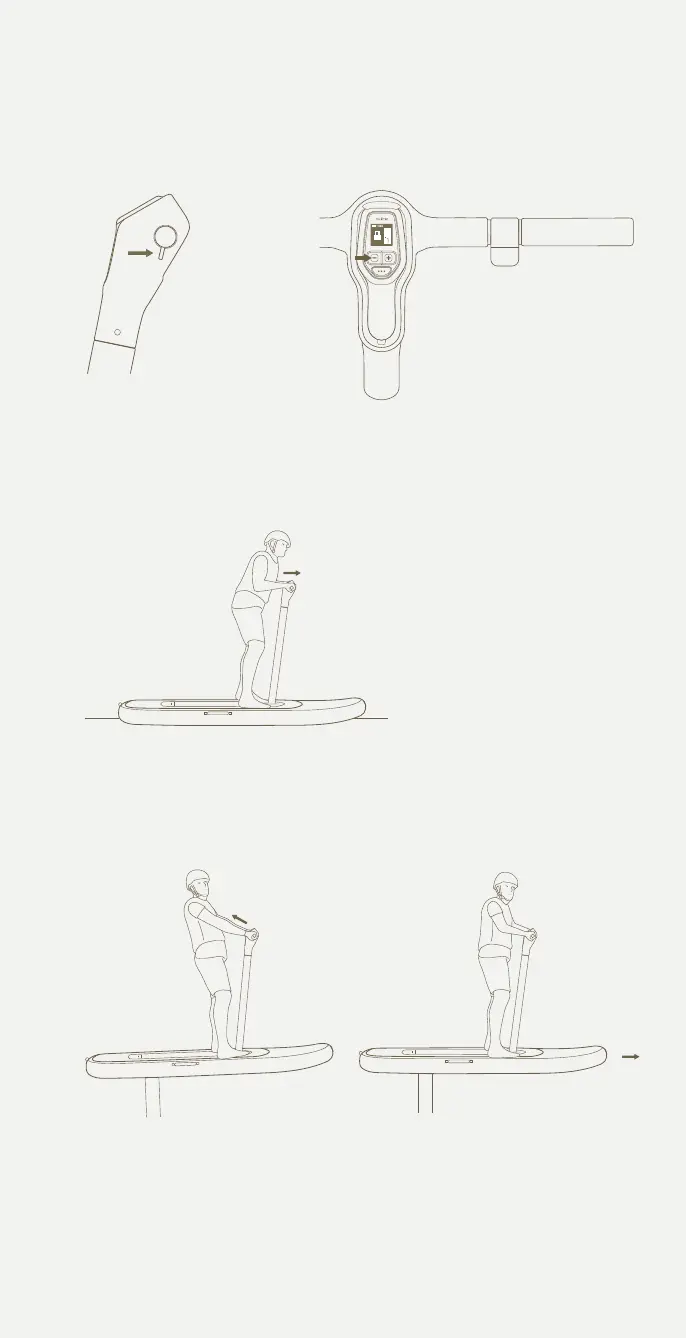
Press the thumb throttle
and push forward gently
on the handlebars to keep
the board flat until planing.
The Flitescooter is planing
when it skims over the
surface of the water.
Push forward slightly to
level out or touch down.
You’ll be up and flying in
no time.
Shift your weight back
by softly pulling on the
handlebars.
5 Gradually throttle to plane
6 Lean back to fly 7 Level out
Pg. 43 - Angle too aggressive
Updates
Pg. 12 - Update ite scooter bladder
Pg. 12 - Update ite scooter core
Pg. 27 - Update 'turning on itescooter' image
Pg. 17 - long throw trigger update
Pg. 32 - Update handlebar image to one without controller in it.
- Add existing controller image back into this page
-Add ‘Latch for Flite Controller’ to handlebar diagram
-Update line ‘throttle trigger’ to ‘Thumb throttle’
Controller as it previously was showing all controls
Add below images in this order to
Flitescooter Common Mistakes
Pg. 14 - wing and stab update - Cruiser 1800 + 500 + jet
Press the thumb
throttle all the way
in and then release
it completely.
Within a few seconds,
press and release the
minus button on Flite
Controller.
4 Arm the system
Connect the fuselage tail
Turning on Flitescooter
Place the inated Flitescooter
on a clear surface. Locate the
handlebar cap and remove
by gently pulling up
Turn the handlebar lock
counterclockwise so that the
opening lines
up with the handlebar cavity.
Insert the handlebars into the
handlebar cavity. Turn the
handlebar
lock clockwise until it stops.
This will keep the handlebars
locked into
place.
Flitescootering for the rst time
Arming the motor
Connect the front wing
Connect the stabliser
43
 Loading...