For parts or assistance, call Flotec Customer Service at 1-800-365-6832
Operation 11
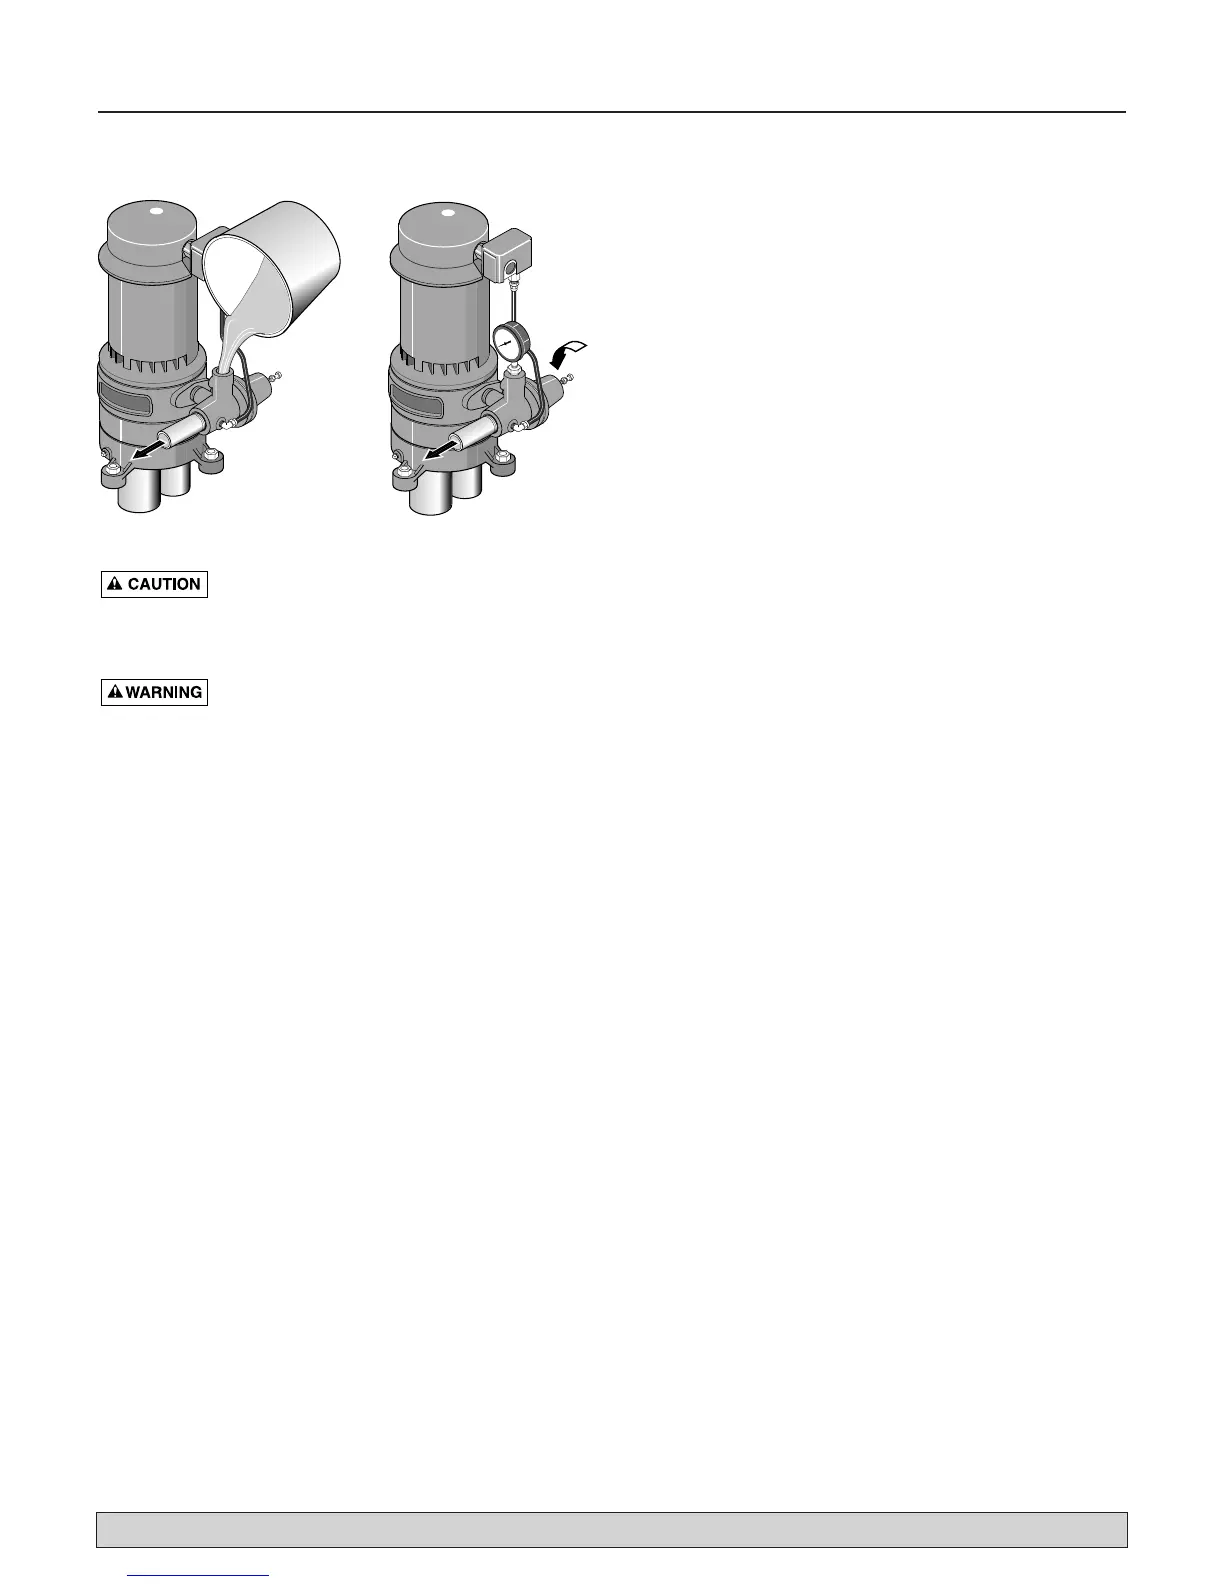
PRIMING THE PUMP (Figure 13)
NEVER run pump dry. Running pump with-
out water may cause pump to overheat, damaging seal
and possibly causing burns to persons handling pump.
Fill pump with water before starting.
NEVER run pump against closed discharge.
To do so can boil water inside pump, causing hazardous
pressure in unit and possibly scalding persons handling
pump.
NOTICE: Open water system faucets before priming
pump for the first time.
1. Remove pressure gauge.
A. Close regulator valve (turn clockwise).
B. Fill pump and suction pipe with water.
C. Replace pressure gauge, using teflon tape on
thread; tighten gauge.
IMPORTANT: If a priming tee and plug have been pro-
vided for a long horizontal run, fill suction pipe through
tee and replace plug. (Remember: teflon tape plug.)
2. Start Pump:
Pressure should build rapidly to 50 PSI (345 kPa) or
more as jet and pump prime.
IF NO PRESSURE OR NO WATER, REPEAT
STEP No.1 two or three times to remove entrapped
air from suction pipes.
3. If, after priming pump several times and no water is
pumped, make sure that:
A. Suction pipe is in the water and has no leaks.
NOTE: Air can leak in where water won’t leak out.
Make sure all joints are tight.
B. Control valve, check valve, or foot valve is
installed and operating correctly.
C. Pump is not trying to lift water more than 25 feet
(7.6M) (shallow well) or more than rated lift for
deep well jet used (including compensation for
horizontal piping). See “Performance and Jet
Chart” for your installation.
D. Pump is not airlocked, suction port should be
highest point in suction pipe; no sags in suction
pipe (run it straight and angled slightly upward
from well head to pump).
NOTE: For deep well installation, go to step 4.
Shallow well installations go to step 6.
4. Once unit has primed and pressure is stabilized,
slowly open regulator valve (turn counterclockwise)
until pressure falters (pressure gauge needle flutters).
Close control valve (turn clockwise) slightly until
pressure stabilizes. This setting provides maximum
flow.
5. Pump may draw well down far enough to lose its
prime. If so, close regulator valve until pressure is sta-
ble throughout pumping cycle. Close faucets and
allow pump to pressurize tank and shut off.
6. Check system by alternately opening and closing
faucets in the system. With faucets open, pressure
will drop until pump starts; with faucets closed, pres-
sure will build up until pump shuts off.
7. There are conditions of deep well operation when the
regulator valve may be completely open without any
faltering of pressure. In this case, operate pump with
regulator valve open.