1. Take the belt clip off.
2. With the back of the radio facing you, lift the battery cover latch up and remove the cover.
3. Insert the three AA NiMH batteries (or Alkaline Batteries) with + and – polarity as shown
inside. (The ribbon must be underneath the three AA NiMH battery and must wrap around the
right side of the batteries).
4. Close the battery cover firmly.
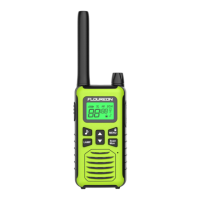
Radio Battery Meter
The number of bars ( ) on the radio battery icon shown indicates the charge remaining in the
battery. When the radio battery meter show 0 segments, the radio chirps periodically (Low
Battery Alert). When the battery power falls below 3V, the intercom will shut down.
Note: Remove the battery from radio for storage purposes.
Removing the Three AA NiMH Rechargeable Batteries (or Alkaline Batteries)
1. Turn the radio off.
2. With the back of the radio facing you, lift the battery cover latch up and remove the cover.
3. Remove each the three AA NiMH rechargeable batteries(or Alkaline Batteries) by pulling the
ribbon attached to the radio.
4. Close the battery cover firmly.
Note:
• Be careful when removing NiMH or AA batteries. Do not use sharp or conductive tools to
remove either of these batteries.
• Remove the batteries before storing your radio for extended periods of time. Batteries corrode
over time and may cause permanent damage to your radio.
Using the Micro-USB Charger
The micro-USB charger is a handy port that allows you to conveniently charge your NiMH
batteries.
1. Make sure your radio is turned OFF.
2. Plug the micro-USB cable into the micro-USB charging port on your radio. Connect the other
end of the micro- USB charger to wall power outlet.
3. The battery meter on LCD will move to indicate the battery is charging.
Note:
• It is recommended to power OFF your radio while charging.
• When moving between hot and cold temperatures, do not charge the NiMH batteries until the
battery temperature acclimates (usually about 20 minutes).
• Do not store the radio while connected to the charger.
• Do not charge AA alkaline batteries.
Turning your Radio On and Off
1. To Power on your radio, turn rotary knob clockwise.
2. To Power off your radio, turn rotary knob counterclockwise.
Setting the Volume
1. To increase volume, turn the rotary knob clockwise..
2. To decrease volume, turn the rotary knob counterclockwise.
Talk Range
Your radio is designed to maximize performance and improve transmission range. Do not use
the radios closer than five feet apart.
Monitor Button
EN-3
Keypad Tones
You may enable or disable the keypad tones. You will hear the key tone each time a button
pushed.
• To disable/disable keypad tones, power OFF your radio. Press ▼ button & power ON radio at
the same time until you see the display.
Roger Tone
You can set your radio to transmit a unique tone when you finish transmitting.
• To disable/enable roger tone, power OFF your radio. Press ▲ button & power ON radio at the
same time until you see the display.
Setting High Low Power
1. Press Menu until ‘Pr’ appears on the display.
2. Press ▲/▼ to select HI or LO. (HI- High Power, LO- Low Power)
3. Press the PTT button to exit menu or menu to continue setup.
Keypad Lock
To avoid accidentally changing your radio settings:
1. To lock the radio, press and hold MENU/ button until the key lock indicator icon on
display appear.
2. To unlock the radio, press and hold MENU/ button until key lock indicator icon on
display disappear.
Scanning Channels
Use the scan function search all channels for transmission from unknown sources; find
someone in your group who has accidentally changed channels or find unused channels quickly
for own usage.
To Start Scanning
1. Press the Scan/Mon button briefly to turn on the scan function. The scan icon will appear
on the display and the radio begins to scan through the channel & sub-codes.
2. When the radio detects channel activities matching the channel and sub-code combination,
the radio stops scanning and you can hear the transmission. Press the PTT/Menu/Scan/Call
button to exit the scan function.
Advanced Scanning
3. If the radio stops scanning on a channel you do not want to listen to, you may temporarily
remove that channel from the scan list by long press the ▲ or▼ key for more than 3 seconds.
This channel will be temporarily removed from the scan list. Press ▲ or ▼to resume
scanning. To restore the channel, turn the radio off and then back on.
Priority scan
4. Before entering scan, current channel and sub-code are the priority channel and sub-code.
When a radio receives transmission from priority channel and a sub-code, the radio will switch
to priority channel and sub-code without completing the whole scanning cycle.
LED Lamp
Your radio has a built-in-LED Lamp.
Press ‘LAMP’ button once to turn ON the lamp, press again to turn OFF the lamp.