INSTALLATION, OPERATION, &
MAINTENANCE MANUAL
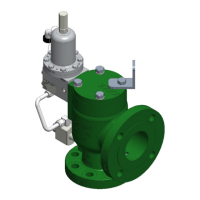
TITLE: F7000 / 8000 Series Rev. V
Pilot-Operated Safety Relief Valve Page 29 of 41
12) Backflow preventer test:
a) Attach a pressure supply line to the exhaust port of the test fixture block.
b) Reduce the pressure in the test tank to approximately 50% of the pilot valve set pressure or 50
psig, whichever is lower.
c) Slowly increase the pressure through the exhaust port. As this pressure increases above the
test tank pressure, the dome pressure gage should begin to increase and read the same as the
exhaust port pressure. If this occurs, the backflow preventer is working properly. If this does
not occur, disassemble and inspect the parts.
5.5 F300 PILOT VALVE ADJUSTMENT (See Illustrations on Pages 18, 20, 21 and 27)
1) The set pressure for the F300 pilot valve may be adjusted by turning the pressure adjusting (PA)
screw, changing springs, or by exchanging diaphragm-style and piston-style internals. Contact
Flow Safe to verify the proper parts for the desired set pressure.
2) Attach pilot valve assembly to the test tank with the cap removed and the pressure adjustment
screw turned out to below where the set point is believed to be.
3) Slowly increase inlet pressure to set point, as defined in 5.1.
4) Dome pressure and inlet pressure should increase together until first bubble (or first flow of liquid)
from the pilot exhaust occurs (at approx. 96 - 98% of set pressure for ASME settings), and then
dome pressure should begin decreasing.
5) Adjust the PA screw as necessary to cause dome pressure to drop to the specified value within 2 –
4% after pilot first exhaust . If further adjustments fail to achieve the required dome reduction, stop
the test, disassemble the pilot valve, and inspect parts as required.
6) After dome pressure drops to the specified value (or lower), slowly lower the test tank pressure
until the pilot closes and the exhaust flow stops. At this point dome pressure and inlet pressure will
equalize. Pilot leakage should stop at an inlet pressure of no less than 94% of set pressure for
ASME settings, or 96% for DOT settings.
7) Increase the test tank pressure slowly until the dome pressure drops again. Continue flowing test
fluid to the pilot valve and check for modulation.
8) If necessary for smoother modulation, make minor adjustments to the proportional band screw as
originally set in Section 4.3 or 4.4. The screw should not be backed out more than a total of about
2-1/2 turns. See Section 6.3 for more detail on this adjustment.
9) When the set pressure and modulating action have been adjusted to the desired settings, tighten
the PA screw lock nut and proportional band screw lock nut.
10) Install and tighten the cap onto the PA screw.
11) Repeat the test to verify repeatable performance.
12) With the pilot valve assembly pressurized to just under set point, inspect all tubing, connections,
and fasteners for leaks.
13) Backflow preventer test:
a) Attach a pressure supply line to the exhaust port of the test fixture block.
b) Reduce the pressure in the test tank to approximately 50% of the pilot valve set pressure or 50
psig, whichever is lower.
c) Slowly increase the pressure through the exhaust port. As this pressure increases above the
test tank pressure, the dome pressure gage should begin to increase and read the same as the
exhaust port pressure. If this occurs, the backflow preventer is working properly. If this does
not occur, disassemble and inspect the parts.
 Loading...