E110-SERIES TUTORIAL AUTOMATIC UNIT CONVERSION
FW_E110_AutoUnitConv_002_EN Page 5
2 How to setup the automatic unit conversion
This chapter explains the procedure how to setup the automatic unit conversion.
2.1 How to set the K-Factor (units) for the flowmeter
For easy access the procedure gives the action (what to do), the result (how the E-series
will respond) and a notice to give additional information to make the procedure more easy to
do. For future reference, make a note of the settings.
2.1.1 The automatic unit conversion - AUTO-VOL and AUTO MAS mode
This procedure gives the information how to setup the AUTO-VOL or the AUTO-MAS mode.
For volumetric units, use the AUTO-VOL mode. For mass units use, use the AUTO-MAS
mode.
This procedure assumes that the E-series is not installed in the field.
This procedure uses the factory default settings for the explanation. (AUTO-VOL
[automatic unit conversion], L/min [flow rate] and m
3
[Total, accumulated total]).
This procedure assumes, as read from the flowmeter certificate, the flowmeter is
calibrated for: 6624.605 [average K-factor], m
3
/hr [flow rate].
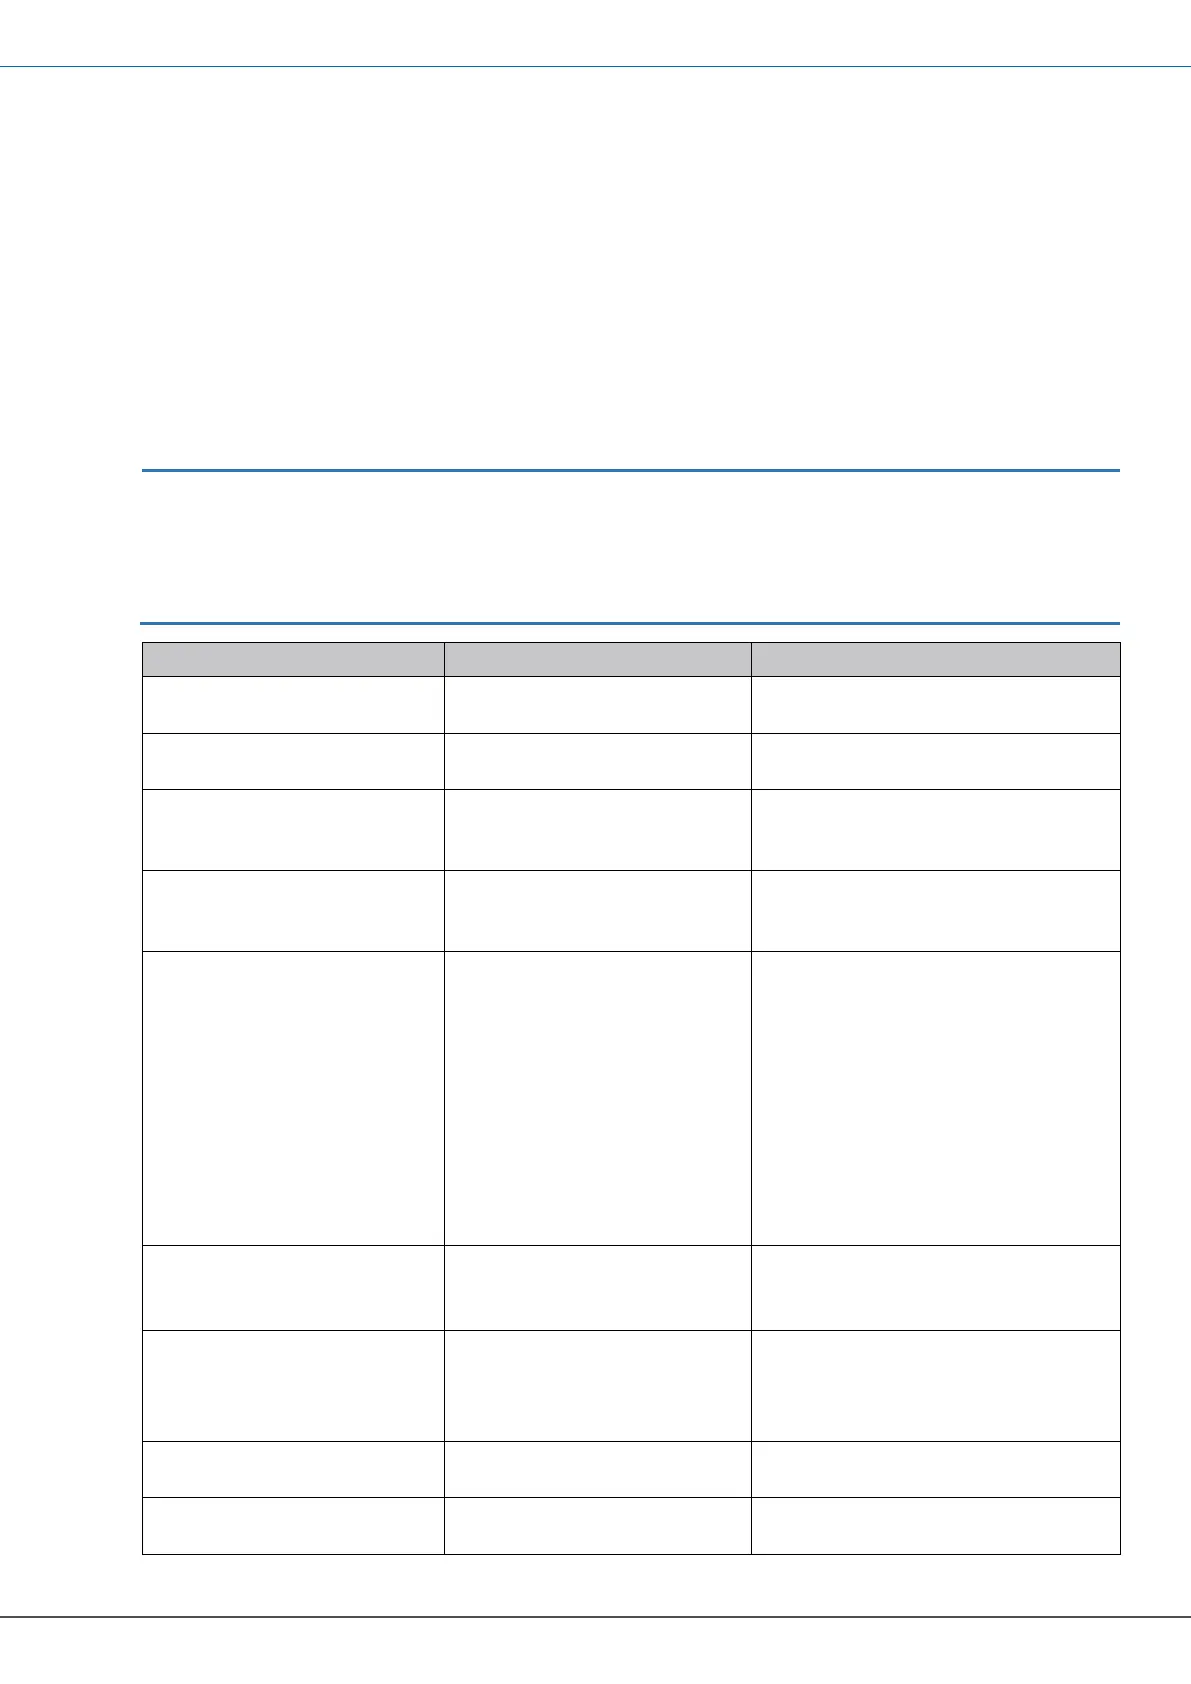
1. Press the PROG button
for at least 7 seconds.
The SETUP indicator
comes on continuously.
2. Wait for the setup menu
to show.
3. Press the ► button until
the FLOWMETER
menu shows.
The FLOWMETER menu
shows.
In this menu you can match the
flowmeter with the E-series.
4. Press the ▲ button until
the UNITS menu
shows.
The UNITS menu is used to make
a choice between the automatic
unit conversion modes.
5. Press the PROG button
momentarily.
The PROG indicator
comes on.
Now you can select the automatic
unit conversion mode.
When the K-factor of the flowmeter
is known:
For volumetric measurement
select AUTO-VOL.
For mass measurements select
AUTO-MAS.
For measurement units which are
not supported by AUTO-VOL or
AUTO-MASS, select HAND.
6. Press the ▲ button to
make the required
selection.
The AUTO-VOL selection
shows (the flowmeter is
calibrated for m
3
/hr).
For the explanation,
the mode AUTO-VOL is selected.
7. Press the PROG button
momentarily.
The PROG indicator goes
off.
The selection is
confirmed.
8. Press the ▲ button until
the UNIT menu shows.
9. Press the PROG button
momentarily.
The PROG indicator
comes on.
Now you can set the measurement
unit.
 Loading...