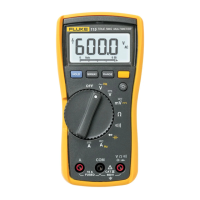
Digital Multimeters
Performance Tests
11
Table 5. DMM Performance Tests (cont)
Display Reading
Step Function Range Applied
114
[1]
115
[1]
116
[1]
117
[1]
41 VoltAlert Hi
N/A N/A N/A
Refer to
steps 1 – 5
in the
procedure
below
42 VoltAlert Lo
N/A N/A N/A
Refer to
steps 6 – 9
in the
procedure
below
[1] If using a Fluke 9100 calibrator, the Calibrator Frequency mode must be used to obtain accurate frequency.
[2] To keep from tripping the calibrator to standby, ramp up the voltage in 50 V increments with a 5 second delay between
increments.
Testing the VoltAlert Function (117 only)
Use the following procedure to verify that VoltAlert functions properly.
Note
• Ensure the instrument is REMOVED from the holster prior to performing the test.
• Keep the meter away from electrical noise sources during the tests, i.e., florescent
lights, dimmable lights, motors, etc.. These sources can trigger VoltAlert and
invalidate the test.
• It may be necessary in steps 4 and 8 below to slightly adjust the Meter’s position for
maximum signal strength, in order to get the Meter’s beeper to sound continuously.
Refer to Figure 4 while performing the following steps.
1. Select the VoltAlert function, and verify that “Hi” is on the display. Verify that the beeper is silent and
the red LED is off.
2. Connect a double banana plug to the output voltage terminals of the calibrator (Fluke 5500A or
equivalent).
3. Set the calibrator output to 10 V at 60 Hz.
4. Hold the Meter so that the Meter’s top is vertically and horizontally centered and contacting the banana
plug’s Hi terminal. Verify that the Meter’s beeper is on continuously, and the red LED, at the top of the
display, lights up.
5. Place the calibrator in standby mode and verify that the beeper is now silent and the red LED is off.
6. Press the q(display should indicate ‘Lo’ range).
7. Set the calibrator’s output to 30 V at 60 Hz.

 Loading...