Series III Multimeter
Performance Tests
15
Testing the Ohms Function
1. Set the UUT to Ω (ohms).
2. Connect the ohms calibrator or decade resistor to the VΩG and COM input terminals of the UUT.
3. Referring to Table 7, set the decade resistor or ohms calibrator to the resistance value indicated in steps
1 through 7. Verify that the display reading is within the limits shown.
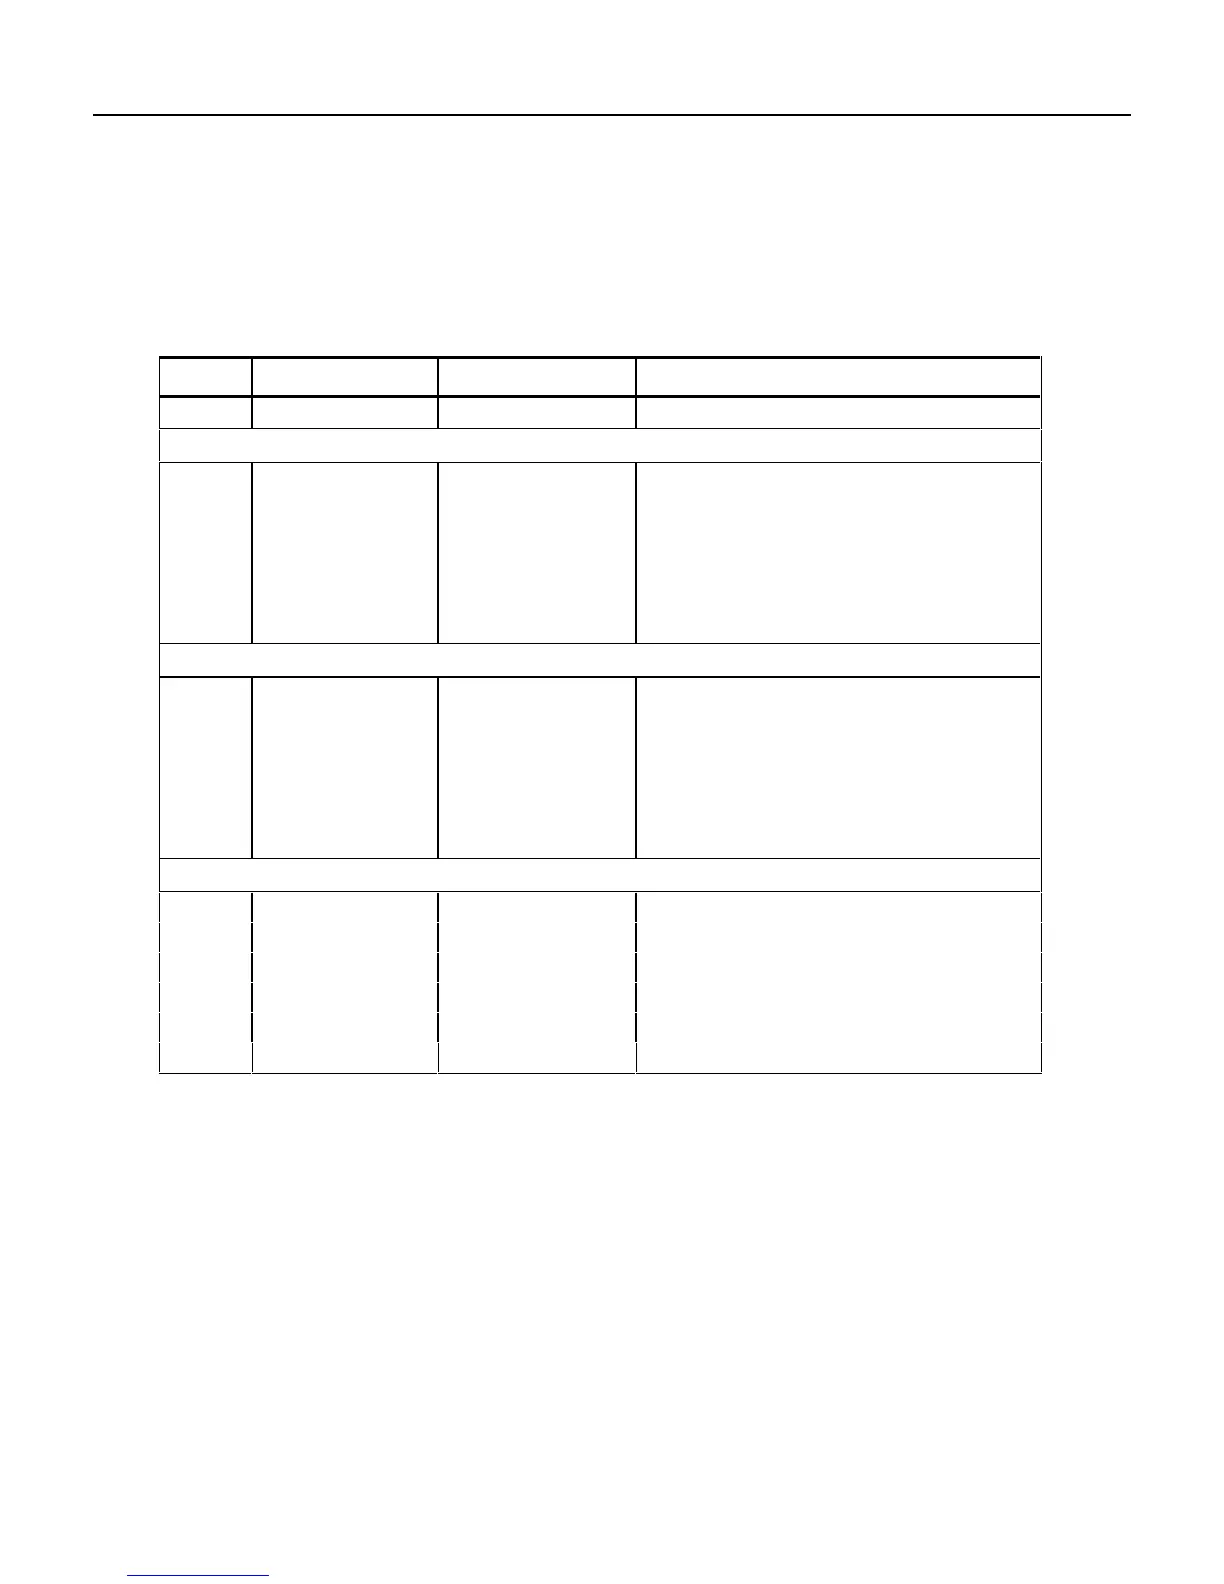
Table 7. Resistance Test
Step Range Input Resistance Display Reading
1 400 Ω short 0 to 0.2 Ω
Decades of 1:
2 400 Ω 100 Ω 99.4 to 100.6 Ω (plus 0 reading)
34 kΩ 1 kΩ .995 to 1.005 kΩ
4 40 kΩ 10 kΩ 9.95 to 10.05 kΩ
5 400 kΩ 100 kΩ 99.3 to 100.7 kΩ
64 MΩ 1 MΩ .995 to 1.005 MΩ
7 40 MΩ 10 MΩ 9.87 to 10.13 MΩ
Decades of 1.9:
2 400 Ω 190 Ω 189.0 to 191.0 Ω (plus 0 reading)
34 kΩ 1.9 kΩ 1.891 to 1.909 kΩ
4 40 kΩ 19 kΩ 18.91 to 19.09 kΩ
5 400 kΩ 190 kΩ 188.8 to 191.2 kΩ
64 MΩ 1.9 MΩ 1.891 to 1.909 MΩ
7 40 MΩ 19 MΩ 18.78 to 19.22 MΩ
Decades of 3.5:
2 400 Ω 350 Ω 348.4 to 351.6 Ω (plus 0 reading)
34 kΩ 3.5 kΩ 3.485 to 3.515 kΩ
4 40 kΩ 35 kΩ 34.85 to 35.15 kΩ
5 400 kΩ 350 kΩ 347.8 to 352.2 kΩ
64 MΩ 3.5 MΩ 3.485 to 3.515 MΩ
7 40 MΩ 35 MΩ 34.62 to 35.38 MΩ
Testing the Lo-Ohms Function
1. Switch the instrument function to the Lo-Ohm continuity position.
2. Place a short across the VΩG and COM input Terminals.
3. Push the RANGE button for 1 second to initiate Lo-Ohm calibration.
4. Push the RANGE button again to calibrate Lo-Ohms.
5. Apply 40 ohms to the VΩG and COM terminals and verify that the reading is within 38.00 Ω to
42.00 Ω.
 Loading...