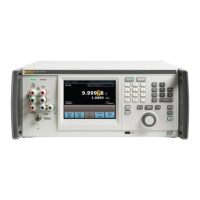
5730A Sales and Demo Guide
Fluke Corporation Company Confidential Page 17 of 28
I have a budget for upgrades but
not capital expenditures.
A. Unfortunately, we cannot classify the 5730A as an upgrade to an
existing calibrator due to legal issues and requirement to give unique
What does the 5730A bring me
more, except for a new look and
See key features and benefits
.
13. Product demonstration
This demo sequence will help you deliver a quick yet thorough demonstration of the capabilities of
the 5730A Multifunction Calibrator. You may wish to point out that the feature set and operation of
the 5730A is very similar to the 5700A and 5720A calibrators.
Equipment required
8846A DMM
5730A Multifunction Calibrator
Low Thermal EMF Cable with Banana Connectors
Instrument Setup
1) Power up the 5730A by first turning on the rear power switch followed by the front panel
power switch.
2) The default screen is the output screen with 0.0000 mV displayed. Press the “Setup Menu”
key in the lower right corner of the touchscreen.
3) A list of all the editable features of the 5730A appears, grouped by feature type. Each of the
5 feature types are essentially huge buttons to access each of the features in the list on the
next lower menu level. Press anywhere in the “Instrument Setup” menu.
4) Next touch the “Accuracy Information” button. Two menus items appear: Calibration
Interval and Confidence Interval. For this Demo, set the 5730A to “1 Year” Calibration
Interval and a Confidence Level of “99%.” The Calibration Interval menu brings up a list of
selectable intervals while the Confidence Interval menu toggles between the 2 available
choices.
5) Prior to exiting the Setup Menu, use the Breadcrumb navigation at the top of the
touchscreen to jump backwards 1 or 2 levels. Press the arrow marked “Instrument Setup” to
return to the previous screen or the arrow marked “Setup Menu” to jump back 2 screens
with a single button press. This feature was incorporated to give the user better control and
usability of the 5730A.
6) Take some time to explore the new menus of the 5730A. The goal of the Setup Menu is
simplicity and flatness. We put in great effort to design the menus so you can access any
function within 3 presses of a button. For time’s sake, please don’t execute an Artifact
Calibration or Cal Check routine as they take approximately an hour to finish. If you hit the
wrong key, simply press the key to return the calibrator to its default state.

 Loading...