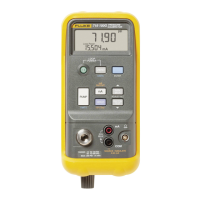
71X Series
Calibration Manual
10
Table 8. RTD Specifications (cont.)
RTD
Type
Range ˚C
Accuracy (˚C) *
Allowable
Excitation (mA)
Input
Source
4-Wire 2-Wire & 3-Wire
Pt 1000 385 -200.0 to 100.0 0.20 0.25 0.2 0.05 to 0.4
100.0 to 300.0 0.30 0.40 0.3
300.0 to 630.0 0.40 0.52 0.4
Pt 100 392
(3926)
-200.0 to 100.0 0.20 0.28 0.2 0.1 to 3.0
100.0 to 300.0 0.30 0.40 0.3
300.0 TO 630.0 0.40 0.52 0.4
Pt 100 JIS
3916
-200.0 to 100.0 0.20 0.28 0.2 0.1 to 3.0
100.0 to 300.0 0.30 0.40 0.3
300.0 to 630.0 0.40 0.52 0.4
Addresses pulsed transmitters and PLCs with pulses as short as 5 ms.
Excitation current from 712: 0.2 mA.
Maximum input voltage: 30 V
*2-wire: Does not include lead resistance
3-wire: Assumes matched leads
Table 9. Ohms Measurement Specifications
Ohms Range
Accuracy *
4-Wire 2- and 3-wire
0 Ω to 400 Ω 0.025 % ±0.05 Ω 0.025 % ±0.1 Ω
400 Ω to 4000 Ω 0.025 % ±0.05 Ω 0.025 % ±0.55 Ω
Excitation current: 0.2 mA.
Maximum input voltage: 30 V
*2-wire: Does not include lead resistance
3-wire: Assumes matched leads
Table 10. Ohms Source Specifications
Ohms Range
Excitation Current from
Measurement Device
Accuracy
5 to 400 Ω 0.1 to 0.5 mA 0.025 % ±0.1 Ω
5 to 400 Ω 0.5 to 3.0 mA 0.025 % ±0.05 Ω
400 to 1500 Ω 0.05 to 0.8 mA 0.025 % ±0.5 Ω
1500 to 4000 Ω 0.05 to 0.4 mA 0.025 % ±0.5 Ω
Resolution
RTD: 0.1 °C
Ohms: 0.1 Ω
Rev 1.3 or Later: < 400 Ω 0.01 Ω
> 400 Ω 0.1 Ω
www.GlobalTestSupply.com
Find Quality Products Online at: sales@GlobalTestSupply.com

 Loading...