71X Series
Calibration Manual
74
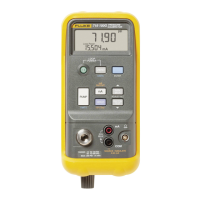
In mA Measurement Calibration mode, the 717 will show:
mA on the upper display
and
CAL 0 mA on the lower display
5. Connect the test leads from the AUX jacks of the Fluke 5520A to the mA jacks on
the 717 (black to black and red to red).
6. Set the Fluke 5520A to 0.00000 mA.
7. When 0.0 mA is sourced from the 5520A, the upper display shows approximately
0.000 mA. When is pushed, the unit makes the calibration constant for that point
and the lower display changes to CAL 12 mA. The upper display continues to show
the applied current so it does not change until after 12 mA is applied.
8. Set the Fluke 5520A to 12.0000 mA. The upper display shows approximately 12.000
mA.
9. Push on the 717.
10. When 12.000 mA is sourced from the 5520A, the upper display shows approximately
24.000 mA. When is pushed, the 717 makes the calibration constant for that
point and the lower display changes to CAL 24 mA. The upper display continues to
show the applied current so it does not change until after 24 mA is applied.
11. Set the Fluke 5520A to 24.0000 mA.
The upper display shows approximately 24.000 mA.
12. Push on the 717. CHEC is shown on the lower display. The CHEC mode lets
you quickly examine the calibration constants that you have just stored. Changes to
the applied current are shown on the display.
13. Push to continue. The lower display changes to:
rAnGE
Pressure Measure
The 717 has built-in temperature compensation. A stable temperature environment is
necessary when you calibrate the Instruments. Calibration facilities must be kept near
23 °C nominal. Re-calibration (recharacterization) is done in terms of PSI pressure units.
Inputs that use other pressure units (kPa and bar, for example) must be mathematically
converted.
1. Disconnect the test lead from the 717 mA jacks and carefully attach the pressure
fitting of the deadweight tester to the 717 pressure jack.
Note
Use TEFLON tape at the pressure fittings to strengthen the seal.
The lower display shows rAnGE.
The upper display must show the full-scale range for the 717, for example:
• For the 717 15G, upper display shows 15.
• For the 717 100G, upper display shows 100.
2. After you measure the correct range, push to continue.
3. Vent the system to ambient air to make sure 0.00 PSI or 0.000 PSI.
www.GlobalTestSupply.com
Find Quality Products Online at: sales@GlobalTestSupply.com