Maintenance
Performance Tests
3
3-11
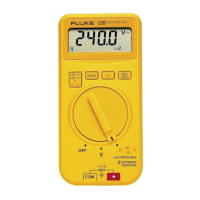
3-19. Ohms Test
1. Set the Fluke 78 rotary switch to the e function.
2. Connect the Ohms Calibrator or Decade Resistor to the z and COM input
terminals of the meter.
3. Referring to Table 3-7, set the Decade Resistor or Ohms Calibrator to the resistance
value indicated in steps 1 through 7. Verify that the display reading is within the
limits shown in the table.
Table 3-7. Resistance Test
Step Range Input
Resistance
Display Reading
1 400 J short 000.0 to 000.2 J
Decades of 1:
2 400 J 100 J 99.3 to 100.7 J (plus 0 reading)
34 kJ 1 kJ .994 to 1.006 kJ
4 40 kJ 10 kJ 9.94 to 10.06 kJ
5 400 kJ 100 kJ 99.4 to 100.6 kJ
64 MJ 1 MJ .994 to 1.006 MJ
7 40 MJ 10 MJ 9.87 to 10.13 MJ
Decades of 1.9:
2 400 J 190 J 188.8 to 191.2 J(plus 0 reading)
34 kJ 1.9 kJ 1.889 to 1.911 kJ
4 40 kJ 19 kJ 18.89 to 19.11 kJ
5 400 kJ 190 kJ 188.9 to 191.1 kJ
64 MJ 1.9 MJ 1.889 to 1.911 MJ
7 40 MJ 19 MJ 18.78 to 19.22 MJ
Decades of 3.5:
2 400 J 350 J 348.0 to 352.0 J (plus 0
reading)
34 kJ 3.5 kJ 3.481 to 3.519 kJ
4 40 kJ 35 kJ 34.81 to 35.19 kJ
5 400 kJ 350 kJ 348.1 to 351.9 kJ
64 MJ 3.5 MJ 3.481 to 3.519 MJ
7 40 MJ 35 MJ 34.62 to 35.38 MJ
3-20. Continuity Test
1. Set the Fluke 78 rotary switch to w and press the pushbutton for 2 seconds to put
the meter in the continuity test function.
2. Referring to Table 3-8, apply inputs as indicated. Verify that the Fluke 78 display
and beeper indicate as shown in the table.
Table 3-8. Continuity Test
Step Range Input Display Reading
1 400 J open OL
2 400 J 30 J tone

 Loading...