Maintenance
Operator Maintenance
3
3-5
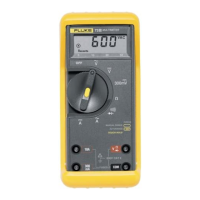
3-6. Fuse Test
Use the following procedure to test the meter’s internal fuse:
1. Turn the rotary selector switch to the J position.
2. Plug a test lead into the z input terminal, and touch the probe to the 10 A
input terminal.
3. The display should indicate between 0.1 and 0.5 ohms. This tests F1 (15 A, 600 V).
If the display reads OL (overload), replace the fuse and test again. If the display
reads any other value, further servicing is required.
3-7. Fuse Replacement
Refer to Figure 3-1, and use the following procedure to examine or replace the meter’s
fuses:
1. Remove the upper case.
2. Remove the defective fuse by gently prying one end of the fuse loose and sliding the
fuse out of the fuse bracket.
3. Install a new fuse of the same size and rating. Make sure the new fuse is centered in
the fuse holder.
4. Ensure that the case top rotary switch and circuit board switch are in the OFF
position.
5. Reinstall the four Phillips screws into the case bottom.
3-8. Circuit Assembly Removal
1. Remove the 15 A fuse (F1) to access the screw that holds the pca to the case bottom
(refer to Fuse Replacement, above).
Note
Be careful not to lose the spring located directly under the screw on the
back side of the pca.
2. Remove the pca from the case bottom.
3-9. Display Access
Caution
To prevent contamination, do not handle the conductive edges
of the LCD interconnects. If they are contaminated, clean them
with alcohol.
Refer to Figure 3-1.
1. Remove the four Phillips screws from the back side of the pca.
2. Remove the LCD assembly.
3. Insert a small screwdriver under the edges of the display mask bracket, and gently
pry the bracket loose from the snaps.
4. Turn the bracket (with LCD) upside down to remove the LCD.
5. Before installing a new LCD, make sure that all connector contact points are clean.
If needed, they may be cleaned with alcohol.

 Loading...