www.fmiproducts.com
124387-01D16
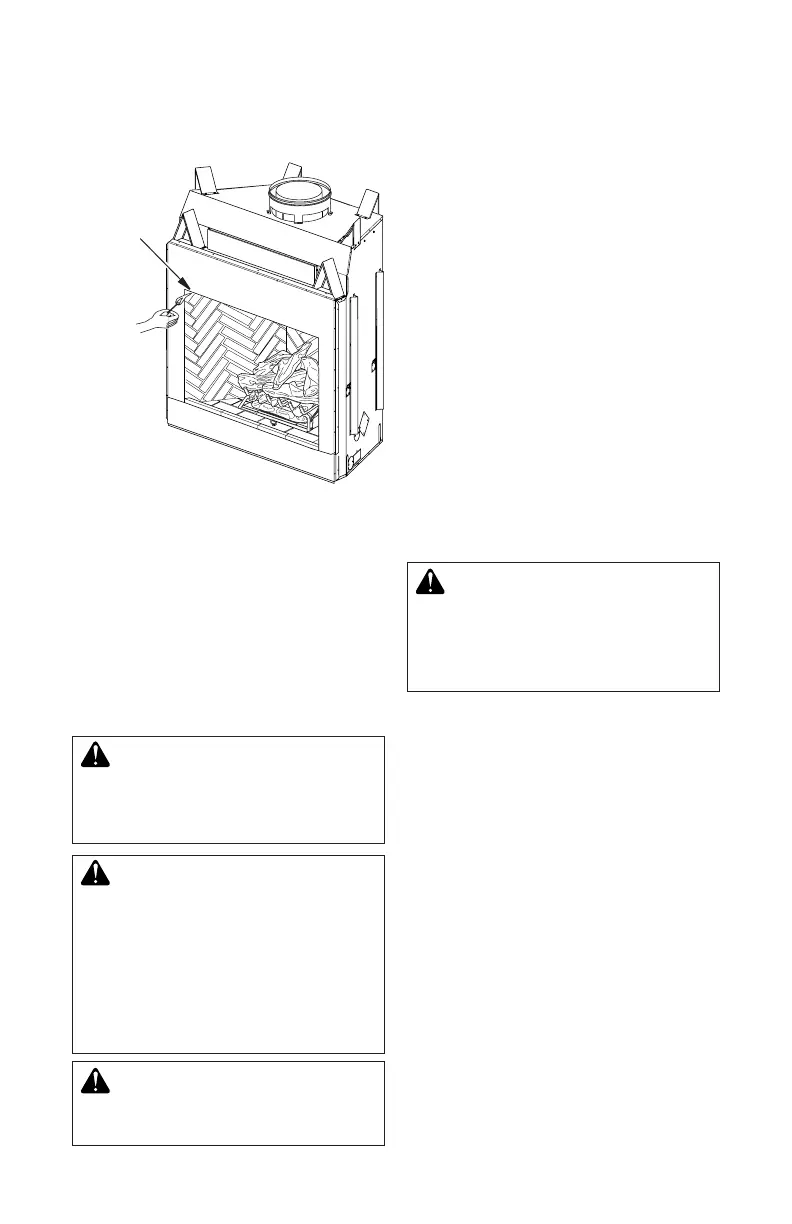
Check this area
along entire top
edge of replace
opening. Smoke
or ame should
be drawn into
appliance
opening.
Figure 21 - Checking for Spillage
VENTING INSTALLATION
Continued
FINISHING FIREPLACE
Combustible materials, such as wallboard,
gypsum board, sheet rock, drywall, plywood,
etc. may make direct contact with sides and
top around the replace face. It is important
that combustible materials do not overlap face
itself. Brick, glass, tile or other noncombustible
materials may overlap front face provided
they do not obstruct essential openings such
as louvered slots. When overlapping with
a noncombustible facing material, use only
noncombustible mortar or adhesive.
INSTALLATION
CHECK GAS TYPE
Use proper gas type for the replace unit you
are installing. If you have conicting gas types,
do not install replace. See retailer where you
purchased the replace for proper replace
according to your gas type.
INSTALLING GAS PIPING TO
FIREPLACE LOCATION
WARNING: A qualified
service person must connect
replacetogassupply.Follow
all local codes.
CAUTION: For propane/LP
units, never connect replace
directly to the propane/LP sup-
ply. This replace requires an
externalregulator(notsupplied).
Installtheexternalregulatorbe-
tweenthereplaceandpropane/
LP supply.
WARNING: Before you pro-
ceed,makesureyourgassupply
is OFF.
WARNING: For natural
gas,neverconnectreplaceto
private (non-utility) gas wells.
This gas is commonly known
aswellheadgas.
InstallationItemsNeeded
Before installing replace, make sure you
have the items listed below.
• external regulator (supplied by installer)
• piping (check local codes)
• sealant (resistant to propane/LP gas)
• equipment shutoff valve *
• test gauge connection *
• sediment trap
• tee joint
• pipe wrench
• approved exible gas line with gas connec-
tor (if allowed by local codes)
* A manual shutoff valve has been included
with log/burner module models BBM-36(N,P)-
JHB, BBM-42(N,P)-JHB and BBM-50(N,P)-
JHB. You may consider installing an extra gas
shutoff valve outside appliance’s enclosure
(check with local codes) where it can be ac-
cessed more conveniently with a key through
a wall as shown in Figure 22, page 17.