focusrite.com Tell the world 12
Examples of use
Vocaster One is the ideal audio interface for
live podcasting or voice recording, using a
Mac, PC, or iPad. A typical set of connection
possibilities is shown below.
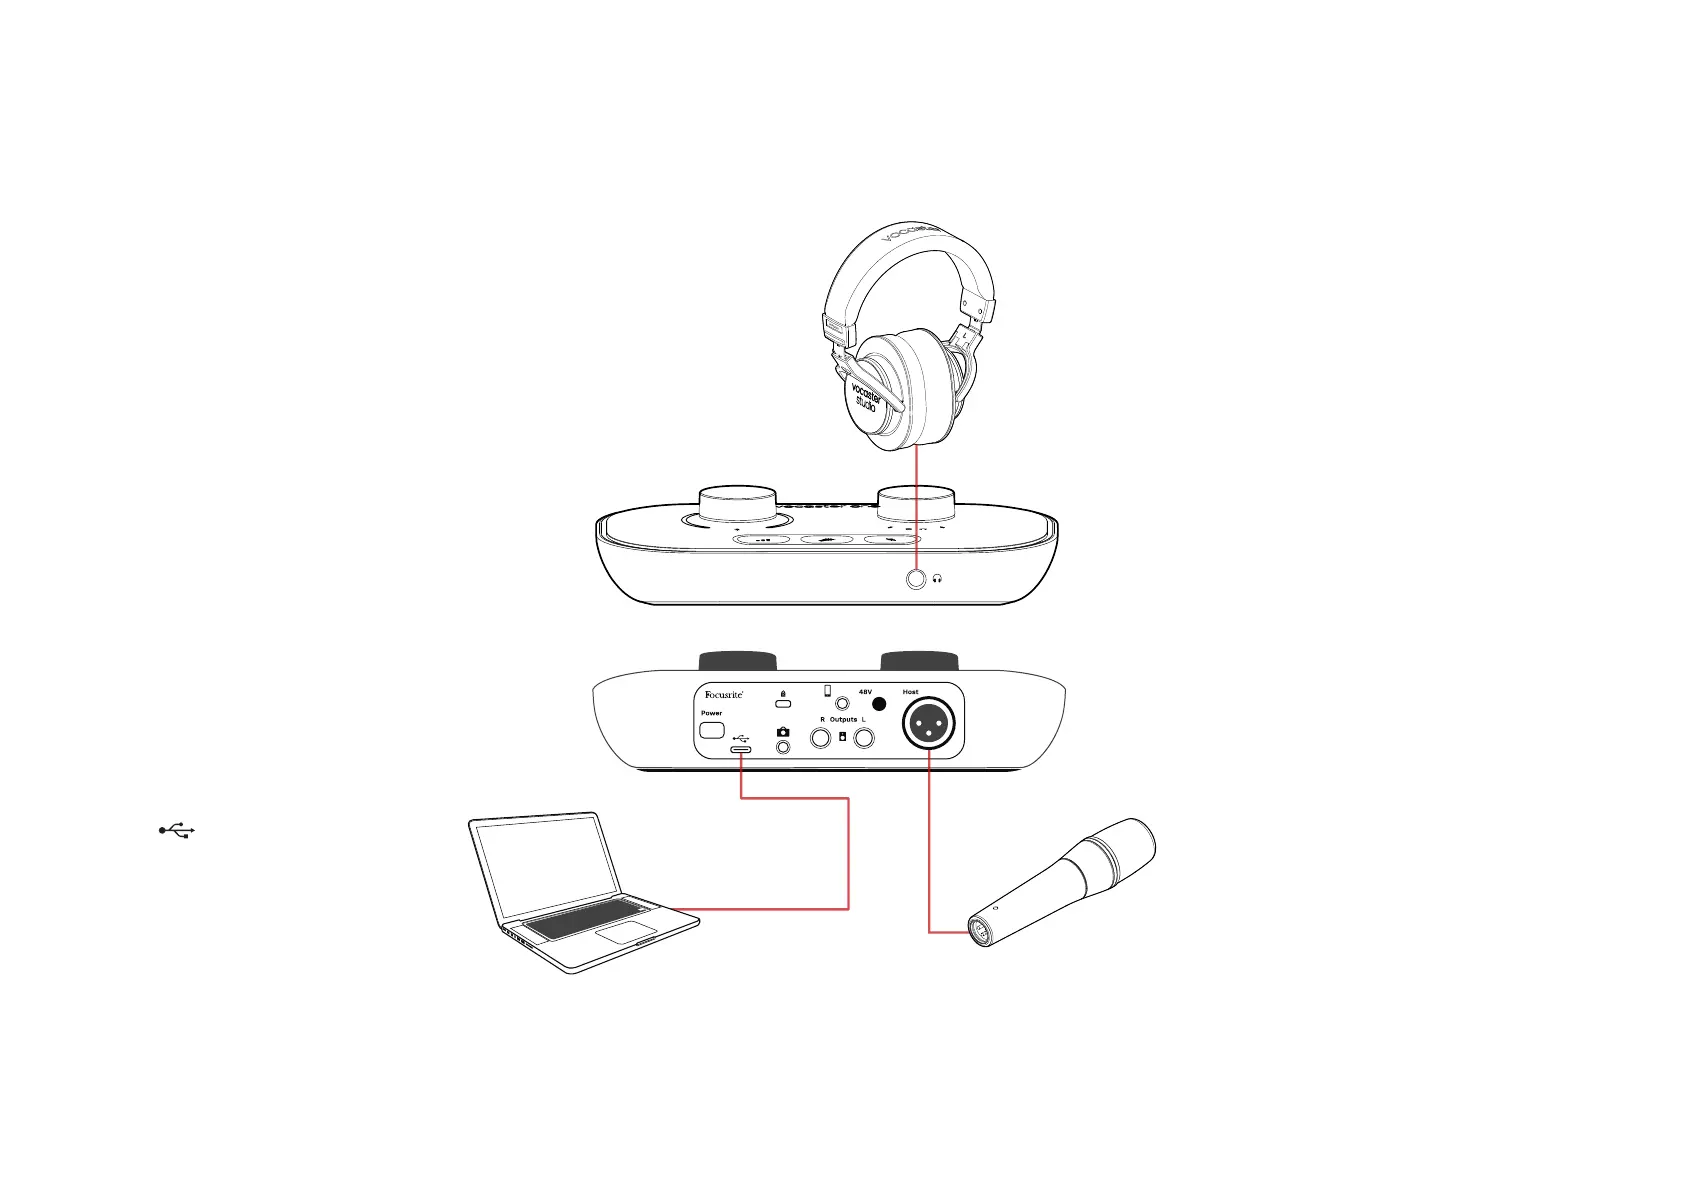
Recording with a microphone
This setup shows a typical conguration for
recording from a microphone using software
on your Mac, PC, or iPad. You can record your
voice while listening to yourself and any other
audio via headphones.
Apart from the headphone socket, all
Vocaster One’s connections are
on the rear panel. Connect your
computer or laptop to the USB port
(marked ) using the USB cable
supplied. Turn the unit on with the
Power button.
The microphone input is an XLR socket
and will work with microphones that have
an XLR connector: this includes the Vocaster
DM1 dynamic microphone supplied with the
Vocaster One Studio. Although the Vocaster
One interface can be used with condenser
and ribbon microphones as well as dynamic
types, we recommend the use of dynamic
microphones for speech recording for these
reasons:
• Dynamic microphones are typically less
sensitive than other types, so they will
pick up less room noise (typing, mic
adjustment etc.) which can ruin the quality
of voice recordings.
• To get the best isolation on a voice
recording you need to be close to
the microphone. You can get close to
dynamic microphones without hearing
lots of “plosives” (popping sounds
made by the lips) and breathing noise,
which more sensitive microphones may
pick up.
EXAMPLES OF USE