You are here: Rear Shocks > DHX AIR > DHX Air 50
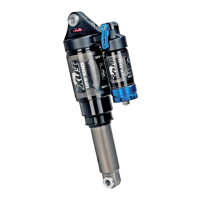
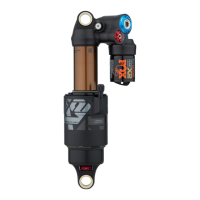
DHX Air 5.0
Installing Your Shock | General Maintenance | Before You Ride | Measuring Sag | Setting Sag | Adjusting
Rebound | ProPedal: Dial or Switch | Bottom-Out Resistance | Boost Valve | Service Intervals | Important
Safety Information | Stuck Down Shock | Air Sleeve Maintenance | DHX Air Explained
features/
adjustments
high volume
standard air
sleeve,
angled air
valve,
position-
sensitive
Boost valve,
adjustable
ProPedal 2-
position
lever,
adjustable
bottom-out
resistance,
adjustable
tuning
range via
Schrader
valve,
adjustable
air spring
pressure,
rebound
adjust
spring air
intended
use
downhill,
freeride, all-
mountain,
cross-
country
Installing Your Shock
If you are installing your shock on a bike in which the shock is not original equipment:
Install the shock. 1.
Remove the main air chamber air cap and let all the air out of the main air chamber.2.
Carefully cycle the suspension through its entire travel.3.
Check that all parts of the shock are clear of the frame and swingarm as it cycles through the travel.4.
Pressurize your main air chamber to a minimum of 50 PSI and no more than 300 PSI. You will tune to a
more specific air pressure in the Setting Sag section below.
5.
Set sag.6.