12
1.Wireless Settings
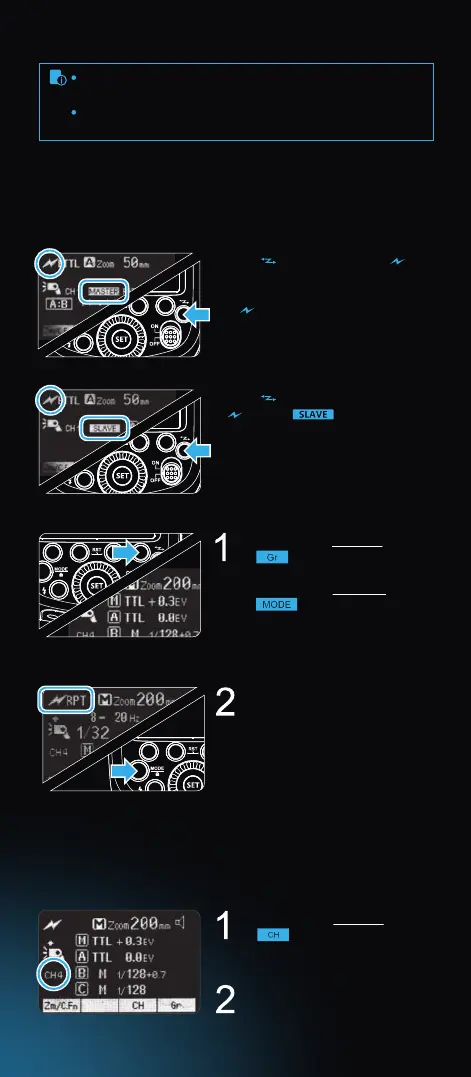
2. Setting Master Unit’s Flash Mode
You can switch between normal ash and wireless ash. For normal
ash shooting, be sure to set the wireless setting to OFF.
Master Unit Setting
Slave Unit Setting
Press < > button again so that
< > and < > are displayed
on the LCD panel.
The backlight turns orange now.
Press < > button so that < >
and MASTER is displayed on the LCD
panel.
If < RPT > is displayed, it means
RPT mode is ON.
The backlight turns green now.
Press Function Button 4
< > to choose the “M“
group from M/A/B/C. Then,
press Function Button 3
< > so that the master
unit can work in OFF / i-TTL / M
ash mode. Choose one of
them as the ash mode of
master unit.
Press the “MODE/Lock“ button
if you want to change to RPT
mode.
3. Setting the Communication Channel
If there are other wireless ash systems nearby, you can change the
channel IDs to prevent signal interference. The channel IDs of the
master unit and the slave unit(s) must be the same.
Press Function Button 3
< > and turn the
Select Dial to choose a
channel ID from 1 to 4.
Press the < SET > button to
conrm.
Even with multiple slave units, the master unit can control all
of them via optical wireless.
In this user manual, “master unit” refers to the speedlight on a
camera and “slave unit” will be controlled by the master unit.