Note: The Nailing Strips can be adjusted, depending on the facing
material (as indicated in Diagram 2).
9) Optional
Install Optional 3-Panel Arch Door. (Refer to Install 3-Panel Arch
Door Instruction Sheet).
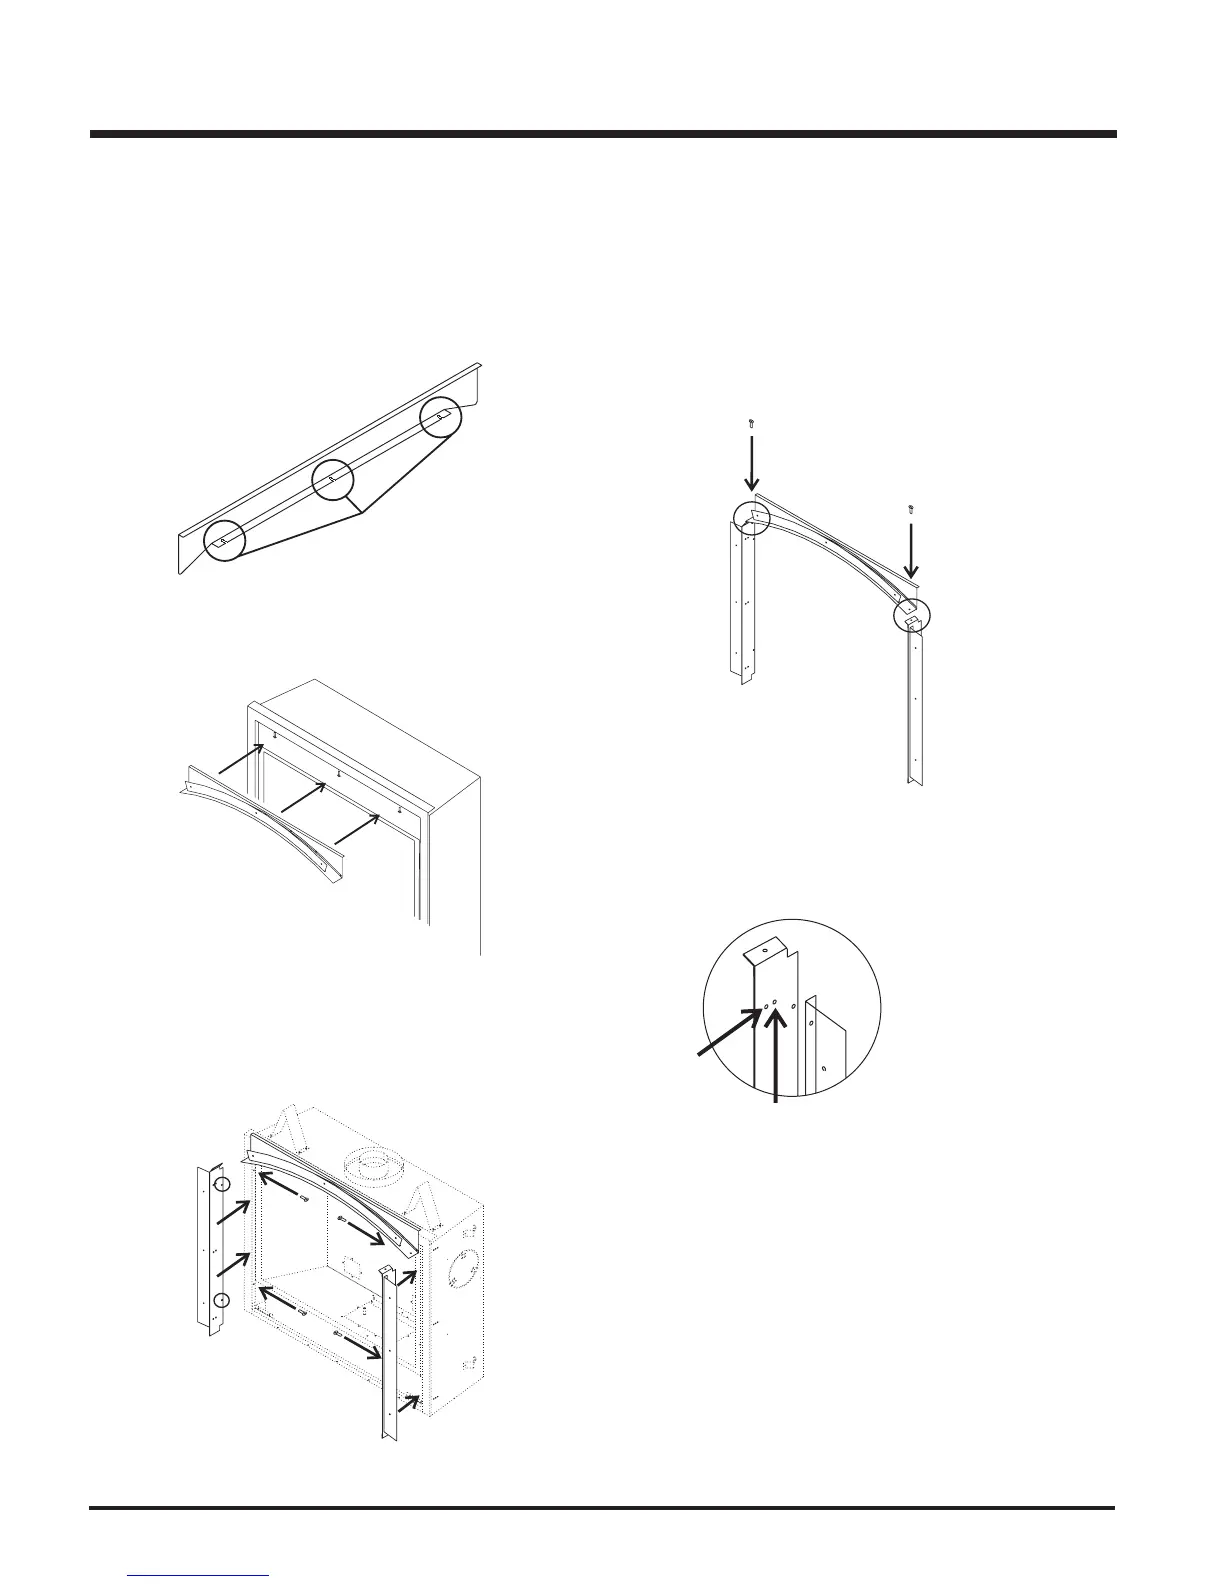
8) Attach Top and Side Support Frame
a) Ensure the Side Supports are aligned with the corresponding hole
on the Top Support Frame, then secure with 1 screw.
b) Repeat step on the other side.
Diagram 2
10) Change in Logo
Replace existing logo with Regency logo.
a) Mount Side Support Frame to unit as shown in diagram, then
secure with 2 screws on each side.
7) Side Support Frame
b) Repeat step on the other side.
6) Install Top Support Frame
Slide in the Top Support Frame
using the slots as a guide. Secure and re-tighten the screws to the
unit.
a) View of backside of Top Support Frame.
b)
Cut-Outs
1/2” Facing
Material
1” Facing
Material