12
This condition will result in a pressure drop from 80 or 85 psi down to 40 psi before the pump initially turns ON (this DROP is due to the stored water
being discharged from the pressure tank). If the installer desires to change this from a 80 psi–40 psi drop to a 80 psi–50 psi drop, the discharge
pressure switch can be adjusted to turn the pump ON when the discharge pressure reaches 50 psi. Follow these steps:
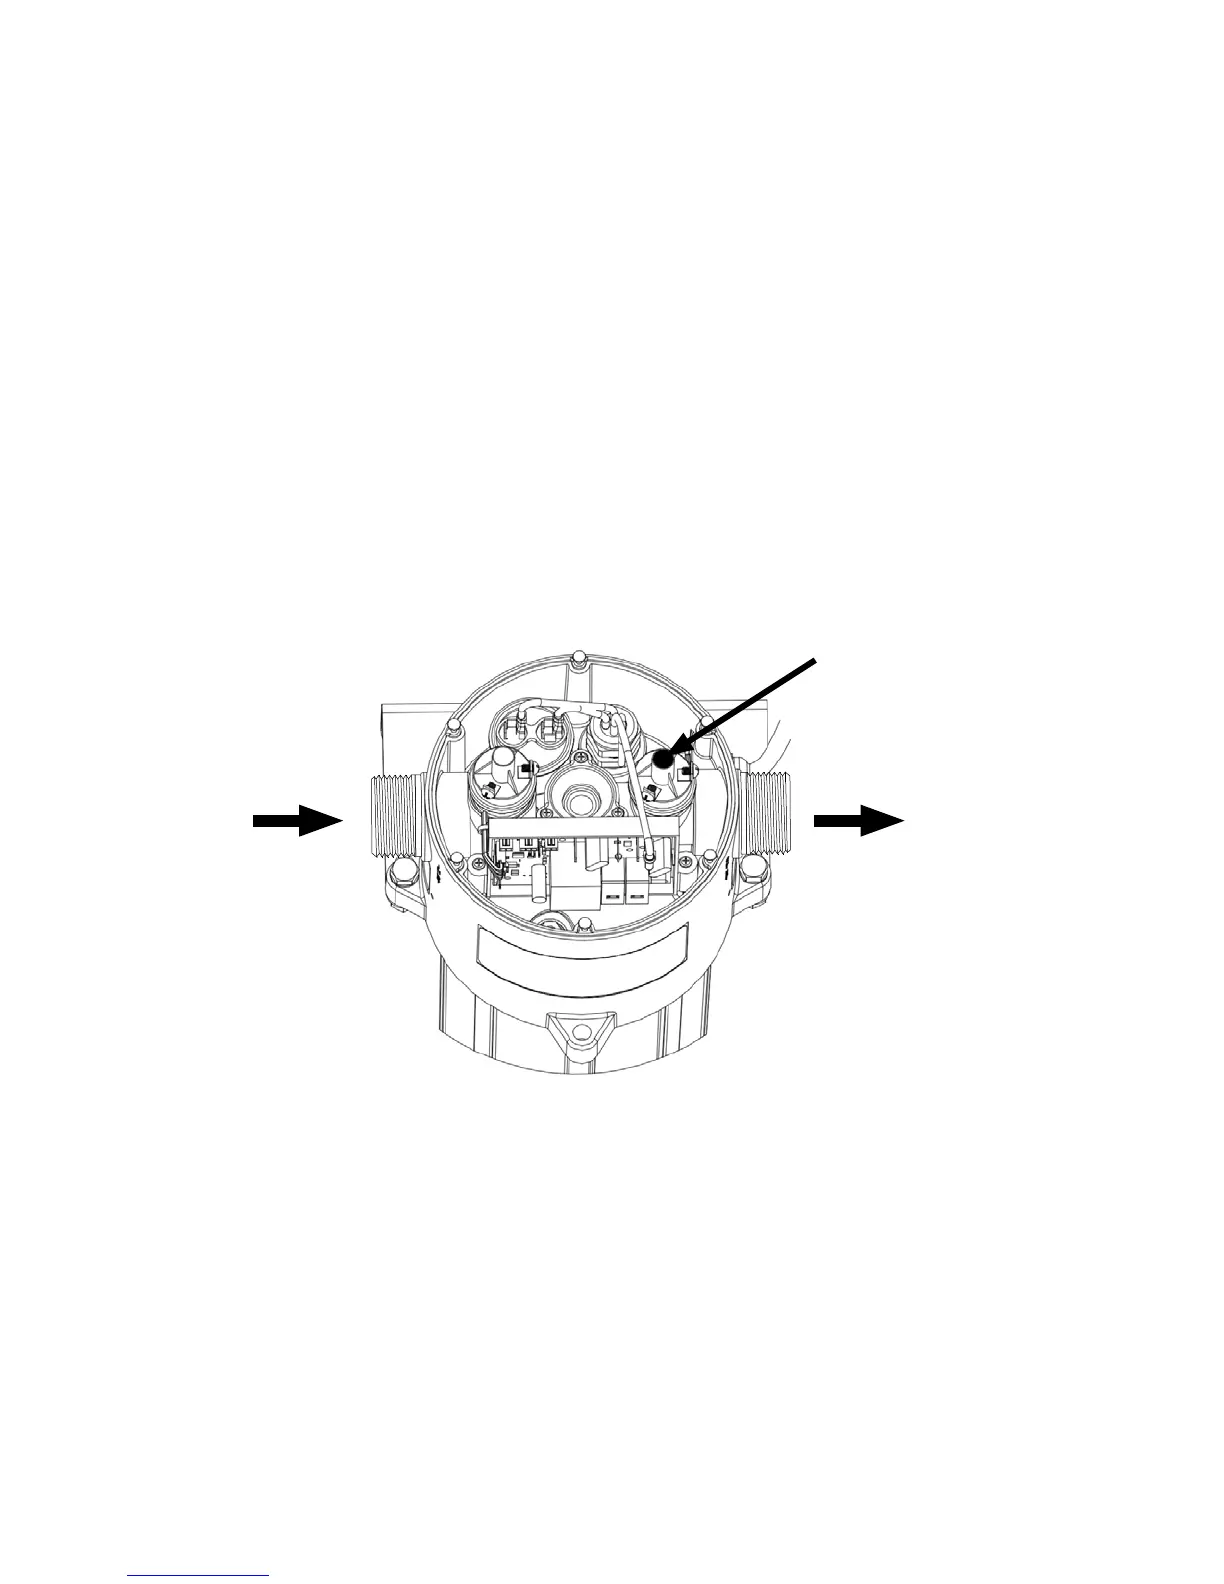
1. Disconnect the unit from incoming power.
2. Remove the (6) control cap screws and remove the cap.
NOTE: Be careful when removing the control cap, as there is an electrical cable attached to the head.
3. Using a 7/32" hex wrench, turn the internal discharge pressure switch screw clockwise one full turn.
This should raise the switch cuto by 10–12 psi.
4. Replace the control cap and re-install (6) screws.
5. If desired (not required) adjust the pressure tank pre-charge pressure to a maximum of 2 psi below the new outlet pressure switch setting
(48 psi in this example).
NOTE: NEVER adjust the discharge pressure switch to a setting HIGHER than the SUM of your minimum incoming pressure + 40 psi,
as doing so may result in a fault (flashing RED).
OUTLETINLET
Discharge Pressure Switch