28 PB
INSTALLATION
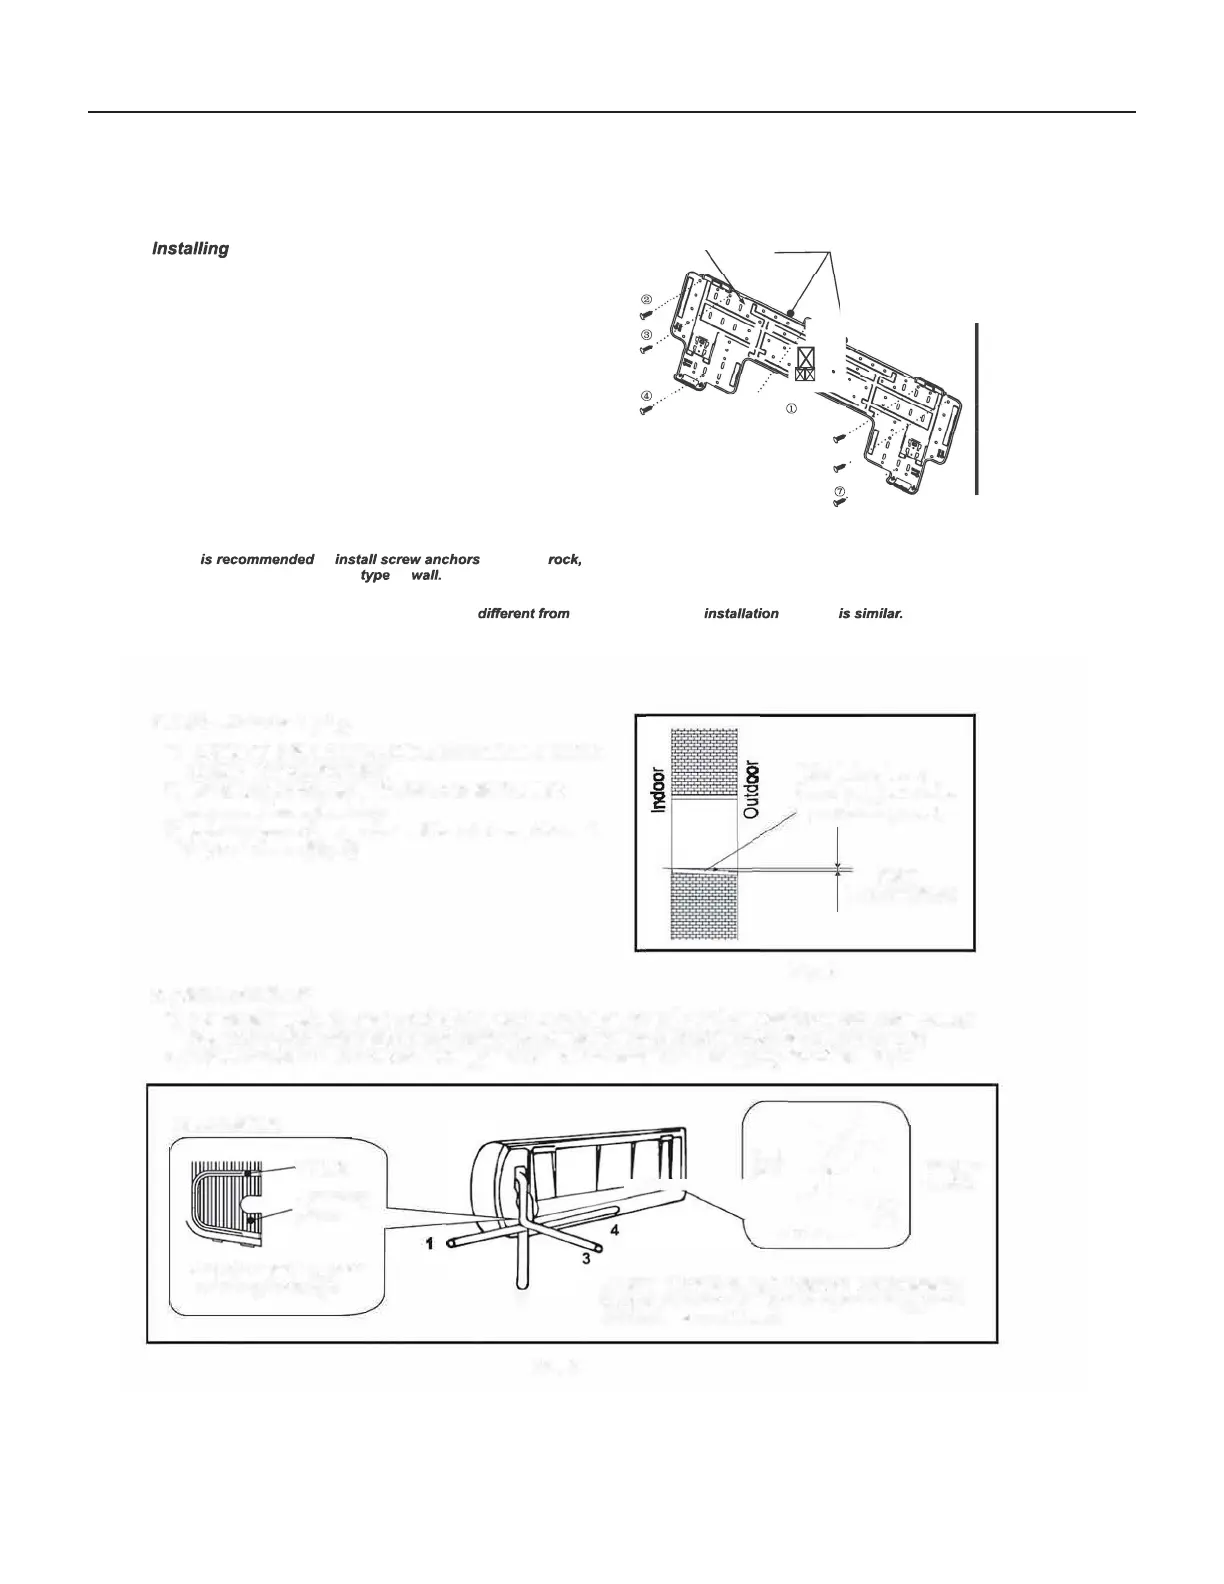
Install Indoor Unit
Mounting plate
Horizontal ruler
position
Holder
(for some models)
.
.
.
.
-·····
:
.
.
. . .
.
/
(@),i
,i
@
First fixed
center position
@
.
.
.
screws
T
apping
Fig. 405
..
.
.
.
.
•
·
·
·
1. the Mounting Plate
1)
2)
3)
4)
5)
Decide an installing location for the mounting plate
according to the indoor unit location and piping
direction.
Find the center of the mounting plate according to the
mark on it. Then Install a screw to fix it preliminary.
Keep the mounting plate horizontally with a horizontal
ruler or dropping line.
Drill holes of 1 1/4" (inches) in depth on the wall for
fixing the plate.
Fix the mounting plate with as least 7 self-tapping
screws. For some mounting plates with a holder in the
middle , at least 8 screws are required. (Fig. 405)
6) Inspect if the mounting plate is well fixed. Then drill a
hole for piping.
2in or more !
to wall
• MOUNTING DIAGRAMS AND DIMENSIONS
d.
Pipe hole
7 .9in or more to ceiling
For 9K/12K Series Models, WIDTH: 26.6in
Indoor unit outline
Pipe hole
Note: It to for sheet
concrete block, brick and such of
Note: The left
of the mounting bracket may be not the center of the indoor unit.
Note: The design of your mounting plate may be
the one above, but method
406
/4"
406
407
407
- �
:
 Loading...