10.2 Selection of the best location
①
There should not be any heat or steam near the unit.
②
Select a place where there are no obstacles around of
the unit.
③
Make sure that condensation drainage can be conve-
niently routed away.
④
Do not install near a doorway.
⑤
Use a metal detector to locate studs to prevent unneces-
sary damage to the wall.
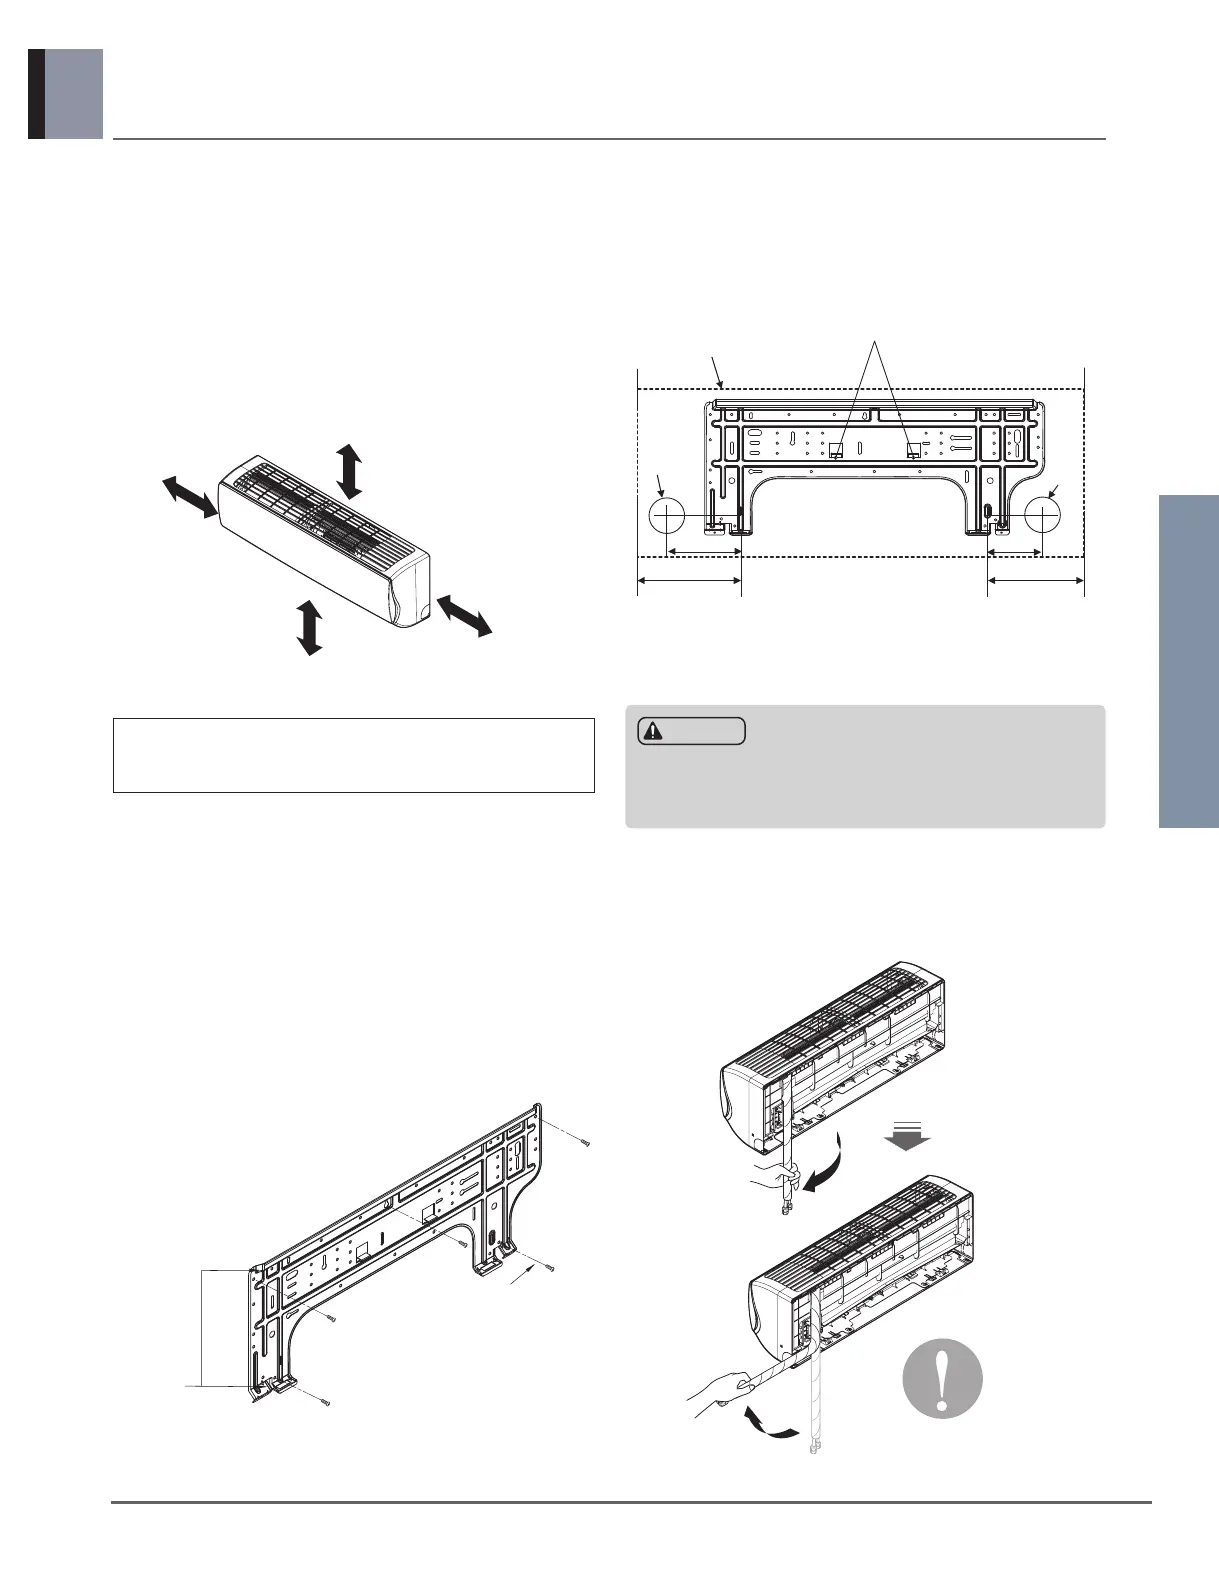
10.3 Fixing installation plate
The wall you select should be strong and solid enough to
prevent vibration
①
Mount the installation plate on the wall with
type "A" screws. If mounting the unit on a concrete wall,
use anchor bolts.
• Mount the installation plate horizontally by aligning the
centerline using a level gauge.
②
Measure the wall and mark the centerline. It is also
important to use caution concerning the location of the
installation plate. Routing of the wiring to power outlets is
through the walls typically. Drilling the hole through the
wall for piping connections must be done safely.
10.4 Before piping work
Good case
• Press on the upper side of clamp and unfold the tubing to
downward slowly.
 Loading...