12
7 EXCHANGE OF WEARING PARTS
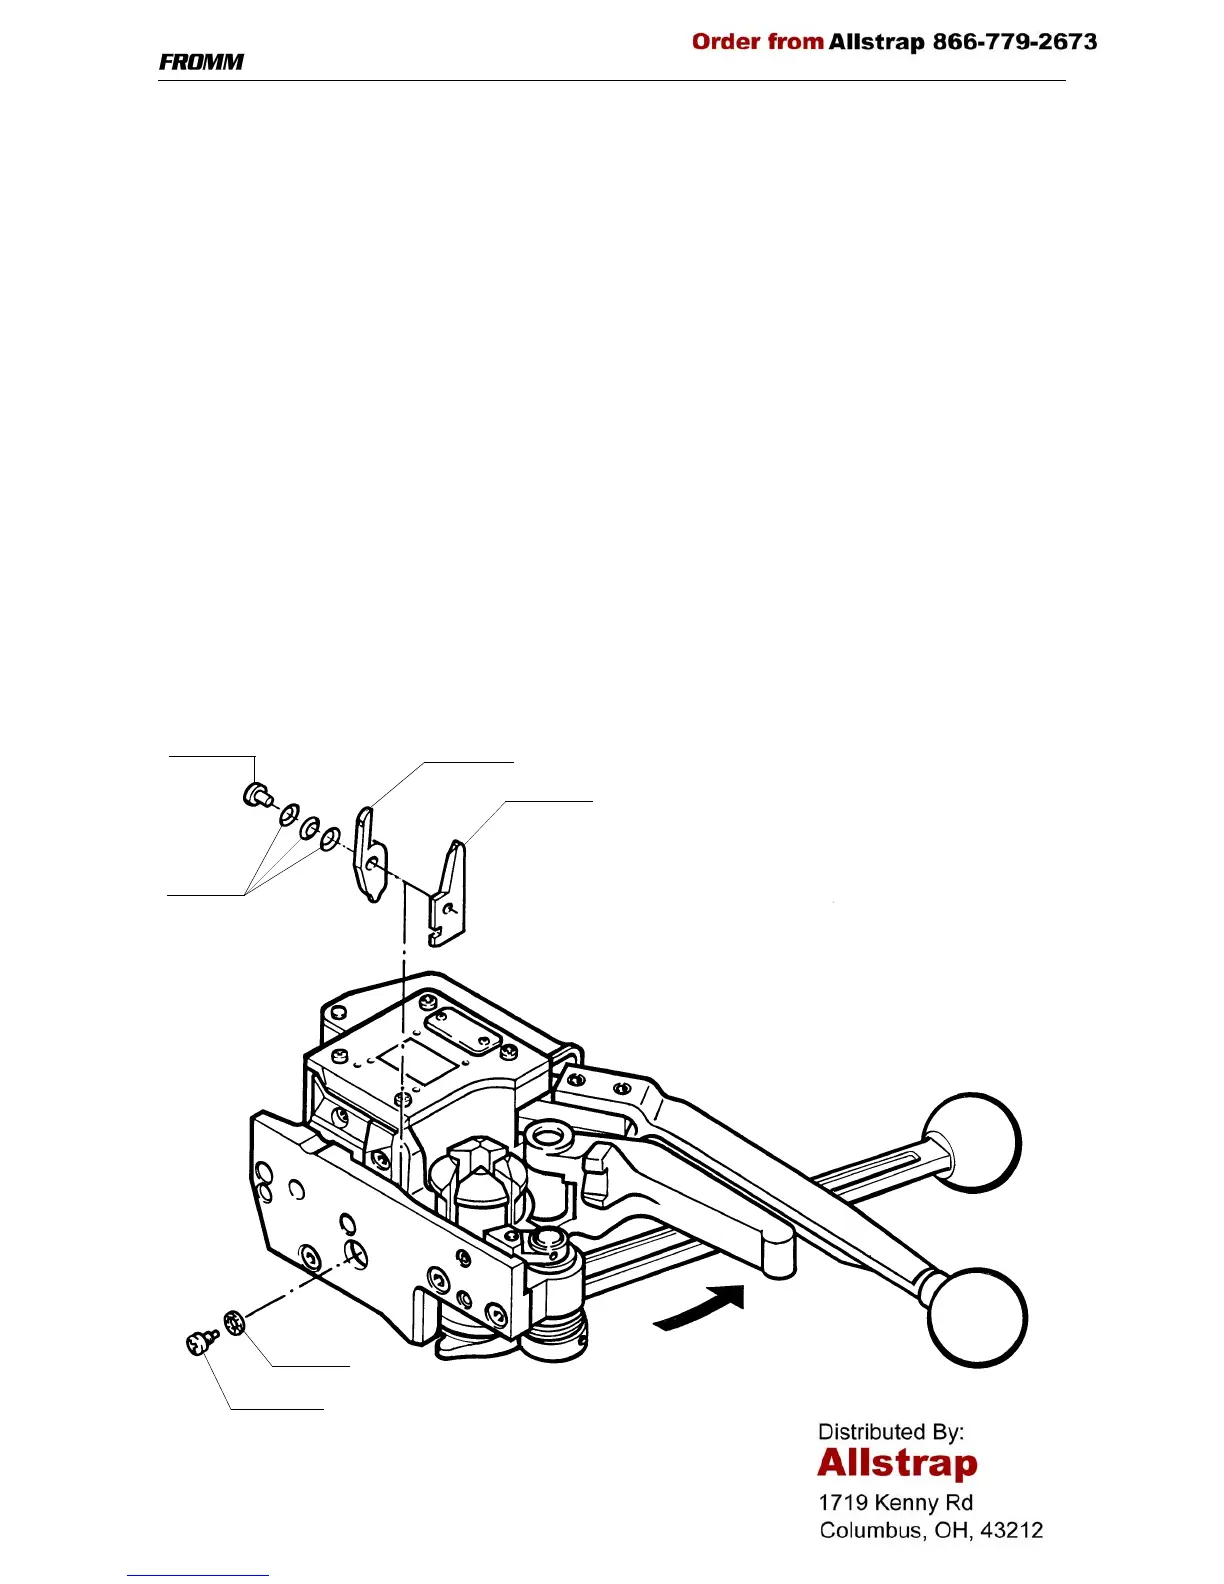
7.1 Exchange of the cutter
Disassembly
- Remove screw with pivot P40.2045 including safety disk N1.6504.
- The lower cutter P40.2524 is lifted against the sealing lever by operating the lifting handle.
- Insert a screw driver into the boring of the lower side of the cutter.
- Lift out the cutters complete with bolt P40.2526 and the cup springs N2.5614 from the support.
Assembly
- Assemble the individual components (cutting edges closed).
- Press the lifting handle against the sealing lever.
- Insert the cutter into the support until it hits the stop.
The cutters are correctly positioned if the lower cutter can be moved up and down by lifting and
lowering the lifting handle and the screw with pivot can be screwed into the groove of the
cutter P40.2525.
Adjustment of the cutter
- Press the lifting handle against the sealing lever.
The blades of the cutters should now overlap by 1 to 2 mm (.040" to .080").
- The adjustment is made by the set screw N1.3508 and the counter nut N1.5131 in the lifting handle.
N1.6504
P40.2045
P40.2526
N2.5614
P40.2524
P40.2525