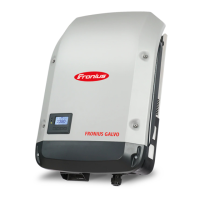
Do you have a question about the Fronius Galvo and is the answer not in the manual?
Defines DANGER, WARNING, CAUTION, and NOTE symbols indicating potential hazards.
Illustrates symbols for indoor/outdoor suitability and protection against water jets.
Details restrictions for installation altitude, corrosive areas, farm animals, dust, and specific environments.
Shows correct and incorrect mounting positions for the inverter, including orientation and overhang.
Defines the intended purpose of the solar inverter and lists exclusions from proper use.
Outlines criteria for choosing a location, including surface, temperature, humidity, and ventilation.
Guidance on selecting appropriate wall plugs and screws for mounting the bracket.
Specifies steel or aluminium screws with a diameter of 6-8 mm for inverter installation.
Instructions for securely mounting the wall bracket, ensuring it remains straight.
Information on using a standard mast fixing kit for mounting the inverter on a mast.
Emphasizes low resistance in AC leads for effective grid monitoring.
Details AC terminal connections, conductor sizes, torque, and cable types (copper/aluminium).
Describes the types of AC cable that can be connected to the inverter's AC terminals.
Provides steps for cleaning and preparing aluminum cables for connection due to oxide layer.
Explains proper grounding terminal tightening and neutral conductor requirements for grid connection.
Specifies the maximum AC fuse rating and lists fuse ratings for different inverter models.
Discusses the requirement for residual current protective devices (RCDs) and recommends types suitable for frequency converters.
Provides guidance on selecting solar modules, open circuit voltage limits, and temperature coefficients.
Details DC terminal connections, conductor sizes, torque, and cable strain relief.
Details connecting single-wire, round aluminum DC cables, considering the oxide layer.
Advises against connecting DC cables to dummy devices and clarifies permissible connections for demonstration.
Instructs on breaking out recesses and verifying solar module string polarity and voltage limits.
Explains that some manufacturers stipulate module grounding and the inverter's grounding capabilities.
Details the inverter's fuse-based grounding for negative pole connections and its limitations.
Explains how to deactivate insulation monitoring and configure the inverter for grounding fuse trips.
Provides instructions on correctly installing data communication cables, using blanking plugs.
Details the latch mechanism, safety requirements before attaching, and the importance of correct fastening screw torque.
Outlines the steps to update inverter software using a USB stick, including menu navigation.
Explains how a USB stick functions as a data logger, saving data in FRONIUS.sys, DALO.fld, and DATA.csv files.
Describes the format and structure of data logged onto the USB stick, including CSV file structure.
Details storage capacity limits for CSV and FLD files, and recommendations for backing up data.
Explains the inverter's buffer memory function for logging data when the USB stick is removed.
Lists supported file systems (FAT12, FAT16, FAT32) and recommends certified drives for site use.
Describes how to use a USB stick to transfer software updates to the inverter via the SETUP menu.
Warns against removing the USB stick while the LED is flashing and details conditions for safe removal.
Recommends checking screw joints annually for outdoor horizontal installations.
Provides instructions for cleaning the inverter using a damp cloth and avoiding cleaning agents.
Explains where to find the inverter's serial number on the rating plate at the bottom.
Mentions the inclusion of two serial number stickers for affixing in visible locations.
| Protection Rating | IP 65 |
|---|---|
| AC Nominal Voltage | 230 V |
| Number of MPP Trackers | 1 |
| Power Output | 1.5 kW to 3.1 kW |
| AC Voltage Range | 180 V to 270 V |
| Operating Temperature Range | -25°C to +55°C |
| Protection Class | I |