To adjust the settings follow these steps:
/ Go to the Datamanager Web Interface (For instructions on how to go to the Datamanager Web interface see
chapter ‘Datamanager Web interface’ in the apendix.)
/ Go to “Settings”
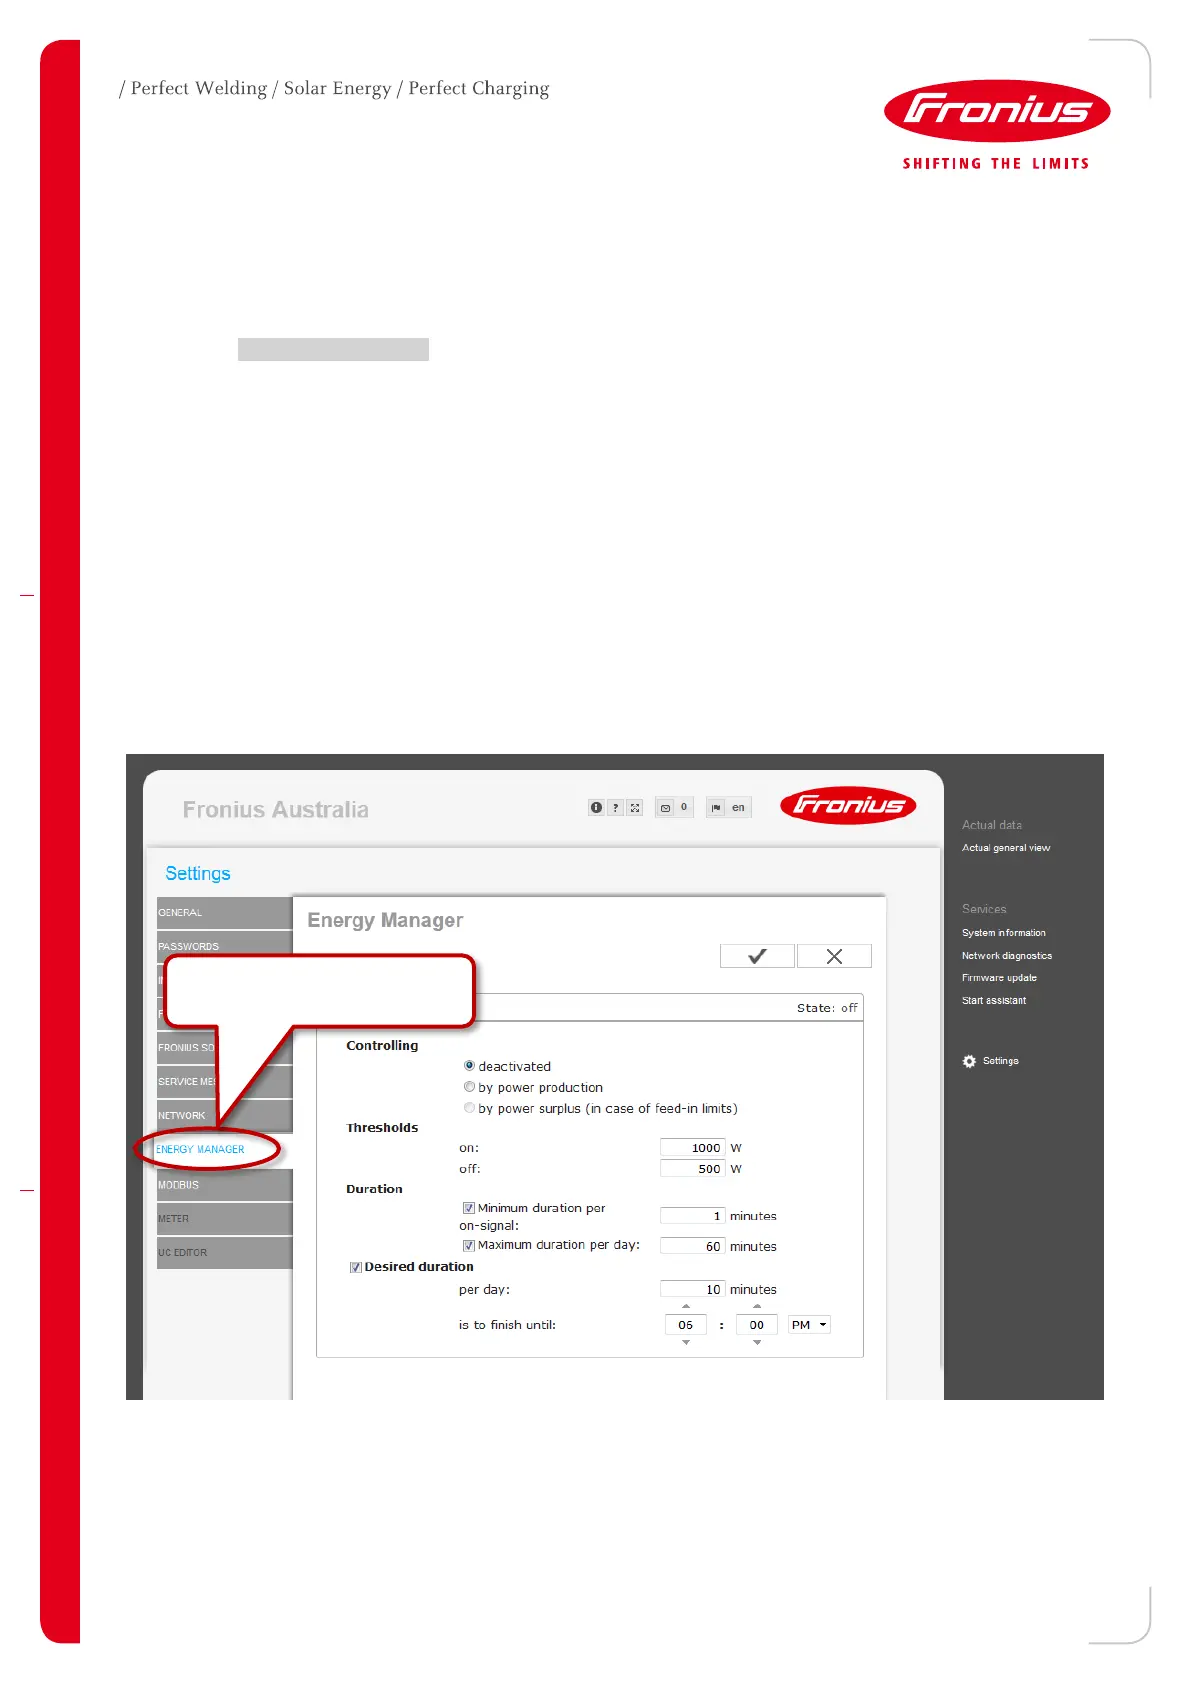
/ Select the “ENERGY MANAGER” tab (see Figure 10)
1. Activate Energy Management function by selecting “Controlling: by power production”.
If a Fronius Smart Meter is included in the system, the setting “by power surplus (in case of feed-in
limits)” can be chosen. The treshholds to switch ON/OFF are then activated according to site surplus
energy.
2. Set “Thresholds on:” to level of which the relay should be switched on
3. Set “Thresholds off:” to level of which the relay should be switched off
4. Set “Minimum duration per on-signal” (if required)**
5. Set “Maximum duration per day” (if required)
6. Click “Save” for the settings to be activated
If the load needs to be switched ON every day for a certain amount of time, then apply the following settings:
1. Tick “Desired duration” to activate a minimum time to switch on (if required)
2. Set a desired daily ON duration in minutes (“per day”)
3. Set the time of day when the desired duration should be completed by (“is to finish by”)
4. Click “Save” for the settings to be activated
Figure 6 - Datamanager web interface
Go to ‘ENERGY MANAGER’’

 Loading...