5
Preparing your FRONIUS IG for commissioning
General remarks
WARNING! Mains voltage can cause fatal injuries. The connection area
should only ever be opened by an authorised electrical engineer, and only
when the power is disconnected.
WARNING! Mains voltage and DC voltage from the solar modules can cause
fatal injuries. Plug-in cards must not be installed unless the FRONIUS IG
- has been disconnected on the mains (AC) side.
- has been disconnected on the solar module side (DC side)
To install a plug-in card:
1. Put FRONIUS IG into "Standby" mode
2. Disconnect FRONIUS IG on both the AC and DC sides
3. Open connection area by removing the LCD foceplate. See chapter entitled "Ope-
ning the housing" in your FRONIUS IG operating instructions
4. Unplug the ribbon cable that attaches the LCD faceplate cover to the unit from the
control board
NOTE! Risk of damage to the plug-in card. Be sure to follow the general ESD
regulations when fitting plug-in cards.
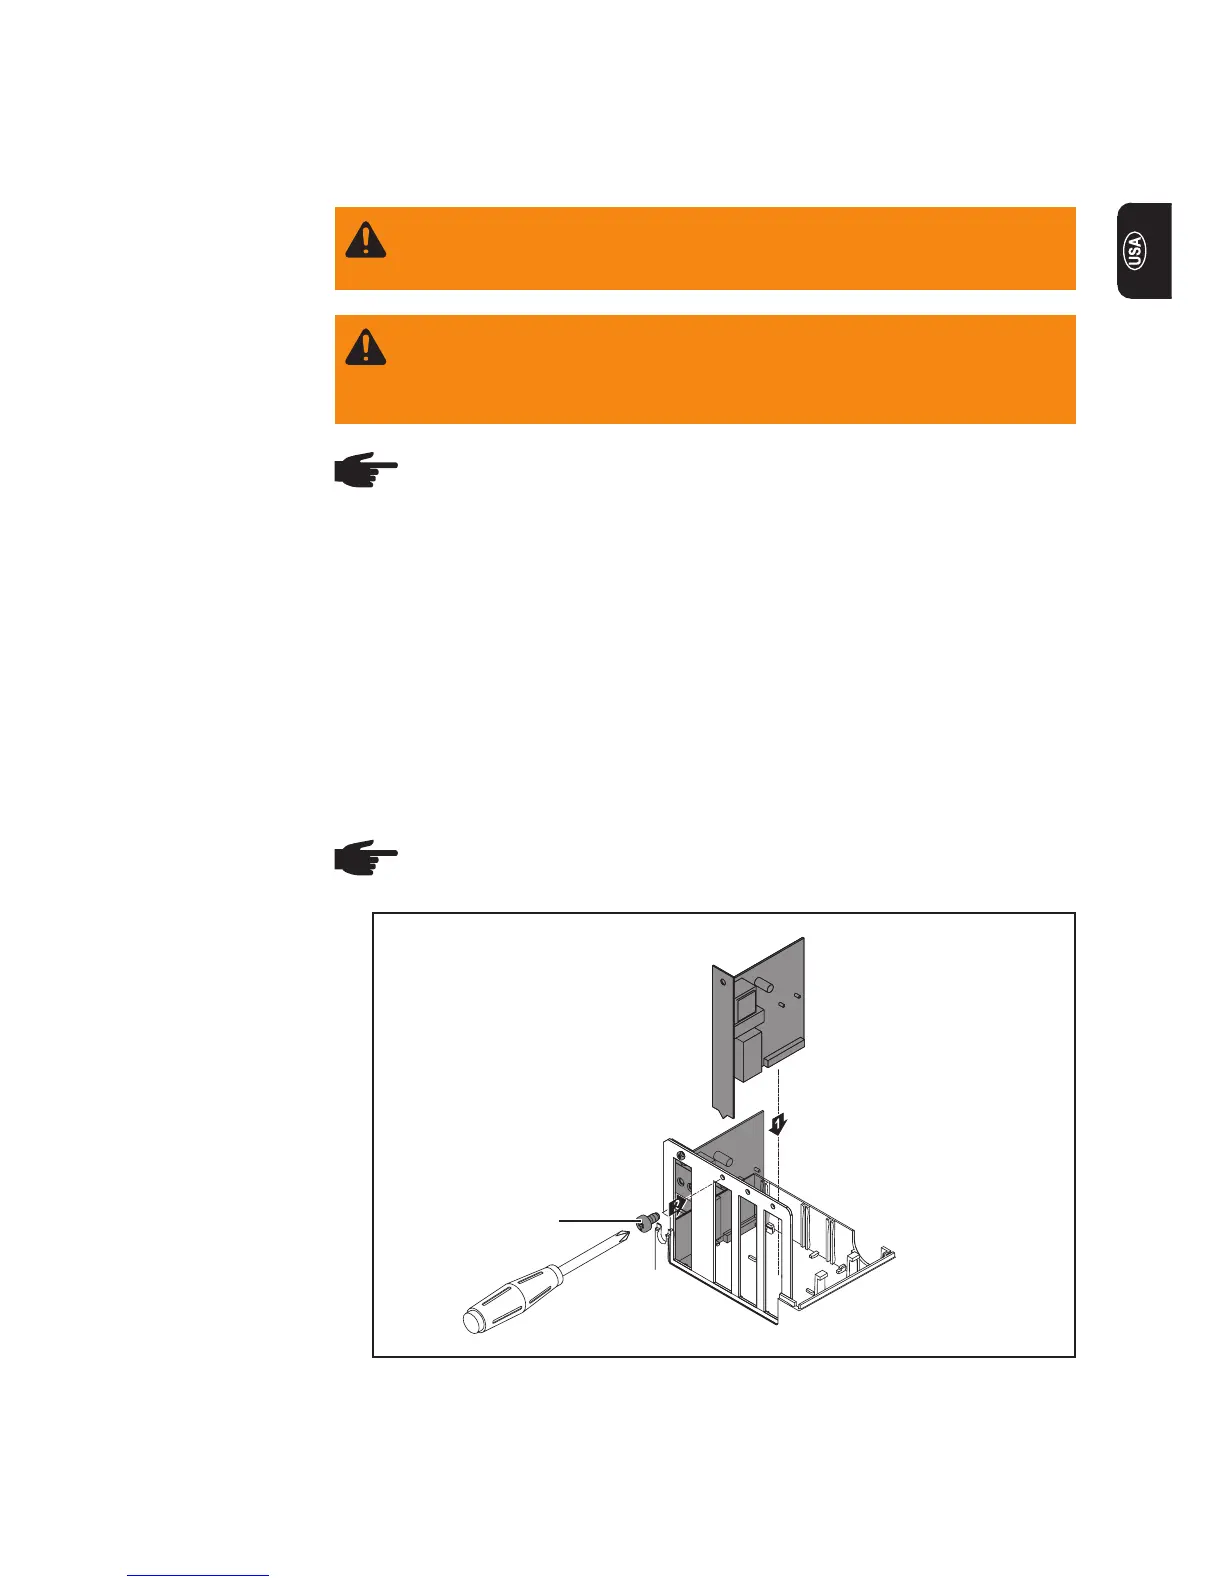
Installing the
display card in
FRONIUS IG
5.
NOTE! In the case of systems with several inverters, the antennae must be at
least 0.5 m (20 in.) apart so that communication with the personal display is not
disrupted. For an optimum range, we recommend a distance of 1 m (39 in.)
Important! The mounting bracket is part of the antenna. Only fit the antenna to the
mounting bracket supplied with the antenna.
(2)