27
EN-US
Connection Requirements:
Carefully clean off the oxide layer of the stripped end of the cable, e.g., using a knife.
IMPORTANT Do not use brushes, files or sandpaper. Aluminum particles may get stuck
and can transfer to other cables.
After removing the oxide layer of the cable end, rub in a neutral grease, e.g., acid- and
alkali-free Vaseline.
Then immediately connect it to the terminal.
Repeat the steps above whenever the cable is disconnected and then reconnected.
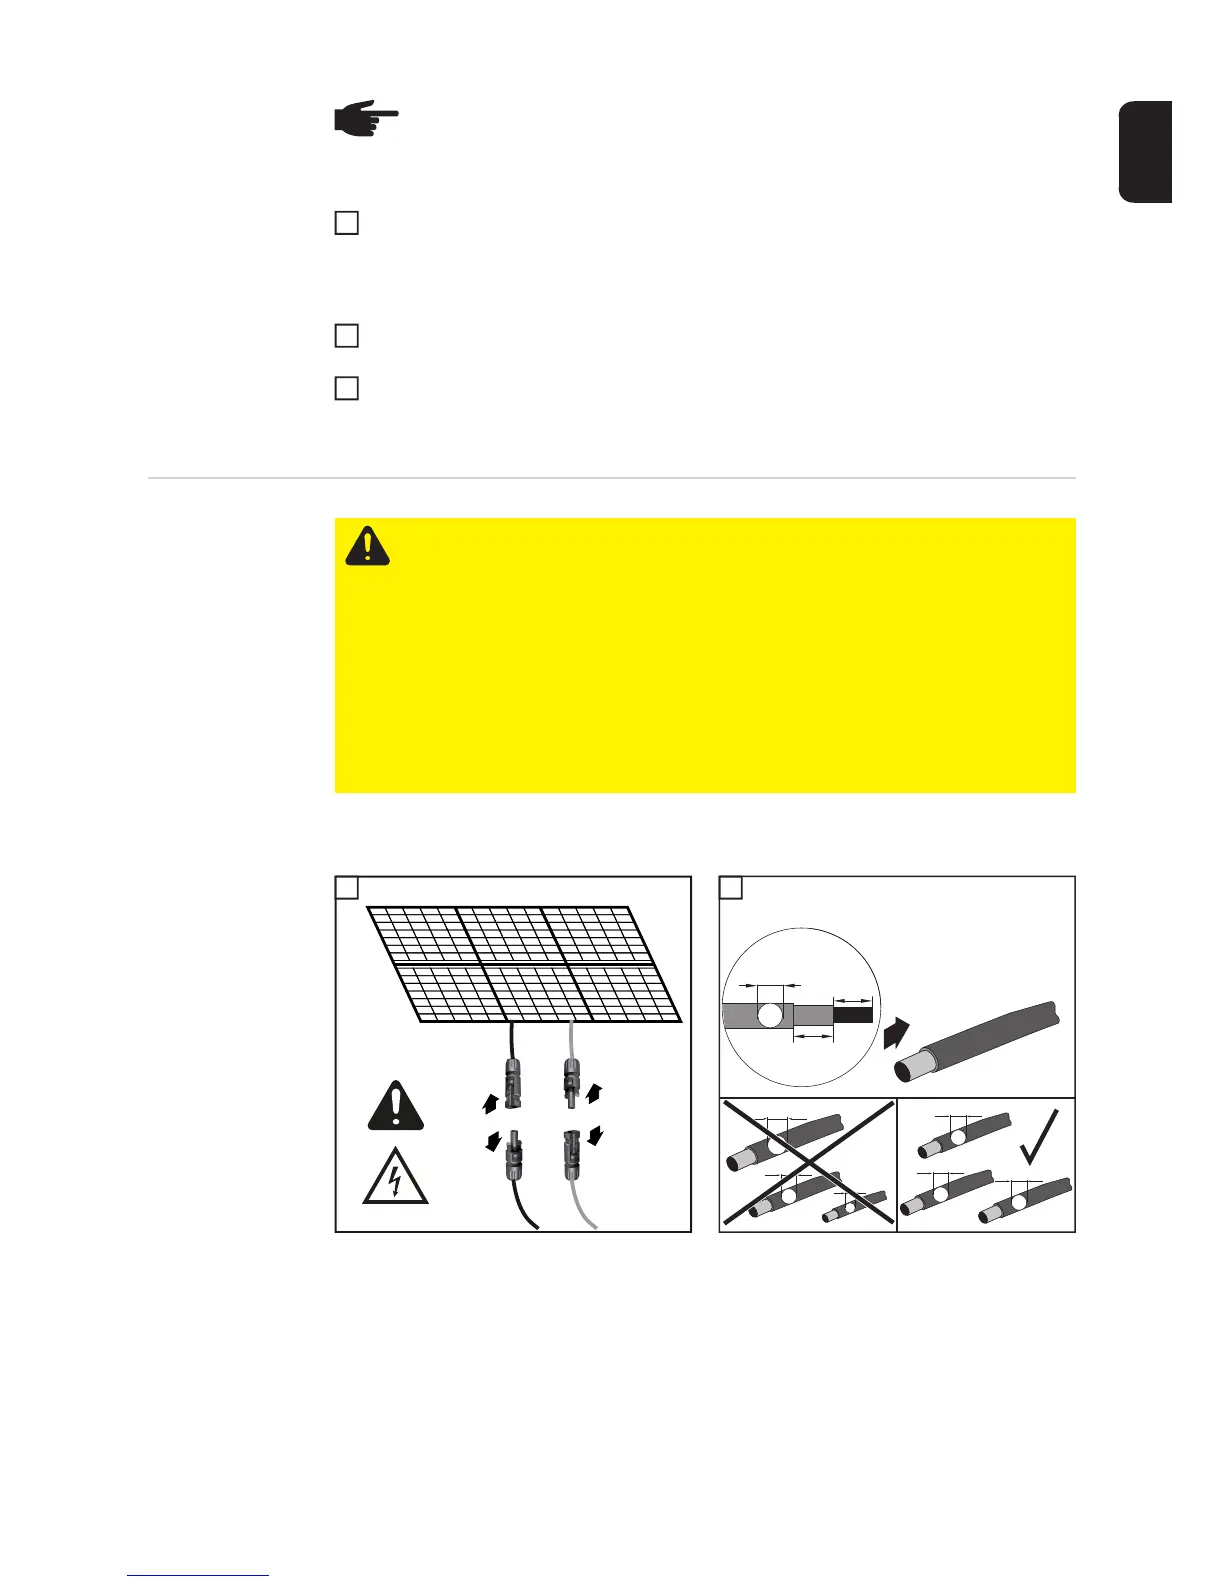
Connecting Solar
Module Strings to
the Inverter (DC)
1 2
NOTE! Take into account local specifications when configuring cable cross sec-
tions.
1
2
3
CAUTION! Risk of possible damage to the inverter! Check the polarity and volt-
age of the solar module strings before connection. The voltage must not exceed
the following values:
Symo 10.0-3 – 12.0-3 208–240
- 0–11154 ft (0–3400 m) = 600 V
Symo 10.0-3 – 24.0-3 480
- 0-6561 ft (0-2000 m) = 1000 V
- 6531–8202 ft (2000–2500 m) = 950 V
- 8202–9842 ft (2500-3000 m) = 900 V
- 9842–11,154 ft (3000-3400 m) = 850 V
IMPORTANT! You should only remove the minimum number of knockouts required for the
available cables.
1
2
1
DC+
DC-
2
DC =
DC =
1
D1
D2
D3
D1
D1
D1
0.59 in.
(15 mm)
2.76 in.(70 mm)
> AWG 10
(6 mm²)
AWG 14 ... AWG 6 copper direct
AWG 6 aluminum direct
AWG 4 copper or aluminum with
input combiner
2
 Loading...