16
TROUBLESHOOTING
Warning! Machine may only be opened up by suitably trained and skilled personnel! Before opening up the welding machine, switch it off,
unplug it from the mains and put up a warning sign to stop anybody inadvertently switching it back on again. If necessary, discharge the
electrolytic capacitors. If fuses need replacing, they must be replaced by fuses of the same rating. No warranty claims will be accepted in
respect of damage caused by the use of too high a rating of fuse.
ERROR MESSAGES ON THE DISPLAYS
The power source is equipped with a self-diagnosis system! Any errors that occur will be recognised and indicated on the displays in the form of an
error code (E00 - E99).
Error message Cause Remedy
Wirefeeder-motor overcurrent: Wirefeeder-
motor is overloaded
E02 (Error indicator lights up)
External reset Check the external controlE40
E02 (Error indicator lights up) Overtemperatur Allow the machine to cool down
N.B.! If any other error message appears on the displays, then the fault is one that can only be put right by a service technician. Make a note of the
error message shown in the display, and of the serial number and configuration of the power source, and get in touch with our after-sales service.
Check the wire inner liner, contact tube and
wire brake
Secondary short circuit Check torch and torch lead for short-circuitingE42
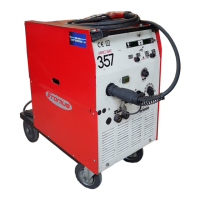
VST 357/357-2, VST 457/457-2 POWER SOURCE
Fault Cause Remedy
Check the mains supply lead; if necessary
plug the machine into the mains
Machine does not function after torch
trigger is pressed
Mains switch is ON, indicators are not lit up
Break in mains supply lead, machine not plugged
into mains
Machine does not function after torch
trigger is pressed
Mains switch is ON, ‘Error’ indicator is lit up
Power source overheated / overloaded Allow the machine to cool down
Check the fuse
Arc does not ignite after torch trigger is
pressed
‘Ready’ indicator is lit up, wirefeeder motor is
running
Break in earth connection Check the earthing cable and clamp
Break in current cable in the welding torch Change the torch
Change the main contactor or step switch
Unsteady arc, heavy spattering, weld-
metal pores
Operating point has not been set with optimum
values
Ensure correct relationship between welding
voltage and wirefeed speed
Check the wire inner liner, contact tube and
wire-brake adjustment
Wirefeeder motor overloaded
Machine does not function after torch
trigger is pressed
Mains switch is ON, ‘Ready’ indicator is lit up
Internal machine fault
Fuse F1, F2, F3 or F7 faulty
Control plug not plugged in
Torch faulty
Contact After-Sale Service
Change the torch
Plug in the control plug
Step switch has not clicked into position
Main contactor or step switch is faulty
Shift the step switch to a definite position
Earthing cable is plugged into the wrong welding-
current socket
Select the correct welding-current socket
Poor earth connection Ensure good contact between earthing-current
socket and workpiece
Change the contact tubeWrong contact tube, or contact tube is worn out