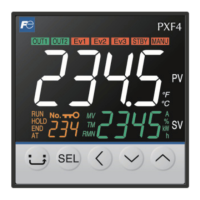
8. Basic Operations
To switch between SV, MV and power
Each time you press
,the displayed value
switches in the following order:
Press and
hold
MV Power
SV
To change the setpoint
Press to display the SV.
Press
or
to change the value.
Press
to move to the next digit.
Press
to save the change.
ĺ6HHWKH³3DUDPHWHUOLVW´RQWKHULJKWSDJH
ĺ)RUGHWDLOVRIWKHSDUDPHWHUV
6HHWKH³3DUDPHWHUOLVW´RQWKHULJKWSDJH
< Operation mode >
< Operation control mode >
1
2
3
To change the setpoint
Press
or
to change the parameter.
Press
select the parameter you want to
edit.
ĺThe parameter setpoint starts blinking.
Press
or
to change the setpoint.
Press
to save the change.
1
2
3
4
< Channel selection mode >
To change the channel
1
Press and
hold
Press
or
.
CH1
Pid
CH2
Plt
CH3
PRG
CH4
MoN
CH5
ALM
CH6
SEt
CH7
SYS
CH8
MAtH
CH11
dSP
CH12
&)*
CH13
PASS
< Setup mode >
To change a parameter setpoint
Press
or
to select the parameter
you want to edit.
Press
.
ĺThe parameter setpoint starts blinking.
Press
or
to change the value.
To change the digit, use
.
Press
.
1
2
3
4
ĺ6HHWKH³3DUDPHWHUOLVW´RQWKHULJKWSDJH
●
Operation mode
In this mode the normal operation is performed. The process value (PV) and the
set value (SV) are displayed. The device starts in this mode when you turn on the
power. You can change the set value (SV) in this mode. You can check the output
value (MV) and the amount of electric ower by switchin the screen.
●
Operation control mode
In this mode you can put the device to standby or change the alarm set value.
●
Channel selection mode
In this mode you can select the parameter channel to be displayed.
●
Setup mode
In this mode you can setup each parameter. This mode includes the parameter
selection submode and the parameter editing submode, which can be switched by
key. In the parameter selection submode, you can switch between parameters
by using
keys. In the parameter editing submode, you can change parameter
values by using
keys.
Changing MV (control output values)
1
Press to switch to the Operation control mode.
2
Press to change the value of the parameter “ ”.
3
Press
to change “ oFF ” to “ oN ”, and then press to save the change.
(MANU indicator appears.)
4
Press to display the MV.
(MANU indicator appears.)
5
Press or to change the MV.
(Changes are reflected to the MV as it is changed.)
11. Error Indications
This controller has a display function to indicate several types of error code shown below. If any of the error code is displayed,
please eliminate the cause of error immediately. After the cause is eliminated, turn off the power once, and then re-start the
controller.
Display Possible cause Control output
“ ”
(1) Thermocouple burnout.
(2) Resistance bulb sensor (A) burnout.
(3) PV exceeds upper limit of the range by 5%FS.
The controller outputs the specified value for an
error.
(The value can be set in parameter Flo1)
“ ”
(1) Resistance bulb sensor B or C wire burnout.
(2) Resistance bulb sensor (between A & B or A &
C) short.
(3) PV is below lower limit of the range by 5%FS.
(4) Burnout or short in the voltage input.
PV < -199.9
Control operation is continued
Note)
Control operation is continued as long as the
accuracy is above -5%FS. When the accuracy
declines to be lower than -5%FS, the controller
outputs the specified value for an error.
“
”
(SV flickers)
Incorrect setting (Pvb/PvF) The controller outputs the specified value for an
error. (The value can be set in parameter Flo1)
PV is not displayed Check the set value of DSPT. Normal control
* The controller does not have to be restarted
SV is not displayed Check the set value of DSPT. Normal control
* The controller does not have to be restarted
Parameters may not
be displayed
Check the settings of Ch11 DSP. Normal control
* The controller does not have to be restarted
“ ”
,
“ ”
Alarm 1 or alarm 2 is occurred under the condition
that ALMF is set to 1 or 3.
Normal control
“ ”
The number that relay has operated reached the
RYCN (relay contact life limit) under the condition
that ALMF is set to 1 or 3.
“ ”
The number of days that the device has operated
reached the oPtM (upper limit of operating days)
under the condition that ALMF is set to 1 or 3.
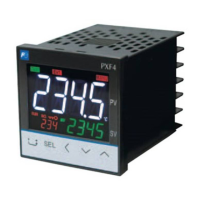
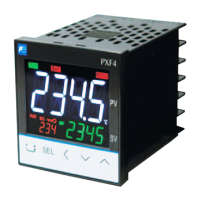
12. Model Specifications
Specifications
45678
PXF
2U
-
9 10111213
<Front panel size W × H>
48×48mm
<Input signal>
Universal input
Universal input (PXW/Z/V)
<Control output>
Relay contact (SPDT)
SSR drive output
Current output
<Terminal form>
Socket type
<Revision code>
<Alarm output>
None
2 points
<Power supply voltage>
100 to 240V AC
24 V AC/DC
ʊ
4
U
Y
0
0
2
V
B
4
G
B
C
E
A
N
4
5
6
7
8
9
10
11
12
13
0Y04
Digit
Note
9. Setting the Temperature Controller
9-1. Input Setting
Set the type and the range for input sensor. Input can be set in
the setup menu (“
”
).
For more on input types, input scaling, decimal point location,
and input codes, see “10. Input Range and Codes (standard
range)”.
1
Choose an input type (“ ”)
Check the type of the thermocouple or resistance bulb
which is used.
ź
2
Set the PV scaling (input range) (“ ” / “ ”)
Set Pvb to the lower limit of the temperature range and
PvF to the upper limit.
It is recommended to set the values at the standard range,
even though they can be set at values beyond of it.
There is no standard range for DC voltage or DC current
input. (-1999 to 9999, lower limit<upper limit)
ź
3
Set the decimal point location (“ ”)
Sets whether or not to display digits after the decimal
point. Two digits can also be displayed after the decimal
point when using 1 to 5V DC, and 4 to 20mA DC.
Point
PV scaling and decimal point location can be
used with the factory settings.
9-2. Output Setting
Sets the control output. (Only when the output is current or
voltage.)
1
Sets the range of the control output (OUT1) (“ ”)
Choose any of 0 to 5V, 1 to 5V, 0 to 10V, 2 to 10V, 0 to
20mA or 4 to 20mA DC.
9-3. Control Setting
Sets controls to normal operation or reverse operation.
●
Reverse operation:
As the process value (PV) rises, the control output (MV)
becomes smaller. Used to heat the control object.
●
Normal operation:
As the process value (PV) rises, the control output (MV)
becomes larger. Used to cool the control object.
1
Set the normal or reverse operation (“ ”)
Choose any of the following combinations of heat and cool
to suit your system.
REV Control output 1
RV-- Reverse
No-- Normal
9-4. Alarm Output Setting
Changing the DO type setting, set as below.
●
Set the “do2t” to the value output from AL1.
●
Set the “do3t” to the value output from AL2.
10. Input Range and Codes (standard range)
Input type
Input code
Measurement
range (°C)
Minimum input
increment (°C)
Measurement
range (°F)
Minimum input
increment (°F)
(PVb, PVF)
(PVT) (PVb, PVF)
RTD
JIS (IEC)
JPt 100
JPT1 0.0 to 150.0 0.1 32.0 to 302.0 0.1
JPT2 0.0 to 300.0 0.1 32.0 to 572.0 0.1
JPT3 0.0 to 500.0 0.1 32.0 to 932.0 0.1
JPT4 0.0 to 600.0 0.1 32 to 1112 1
JPT5 -50.0 to 100.0 0.1 -58.0 to 212.0 0.1
JPT6 -100.0 to 200.0 0.1 -148.0 to 392.0 0.1
JPT7 -199.9 to 600.0 0.1 -328 to 1112 1
Pt 100
PT1 0.0 to 150.0 0.1 32.0 to 302.0 0.1
PT2 0.0 to 300.0 0.1 32.0 to 572.0 0.1
PT3 0.0 to 500.0 0.1 32.0 to 932.0 0.1
PT4 0.0 to 600.0 0.1 32 to 1112 1
PT5 -50.0 to 100.0 0.1 -58.0 to 212.0 0.1
PT6 -100.0 to 200.0 0.1 -148.0 to 392.0 0.1
PT7 -199.9 to 600.0 0.1 -328 to 1112 1
PT8 -200 to 850 1 -328 to 1562 1
Thermocouple J
J1 0.0 to 400.0 0.1 32.0 to 752.0 0.1
J2 -20.0 to 400.0 0.1 -4.0 to 752.0 0.1
J3 0.0 to 800.0 0.1 32 to 1472 1
J4 -100 to 1000 1 -148 to 1832 1
K
K1 0 to 400 0.1 32 to 752 0.1
K2 -20.0 to 500.0 0.1 -4.0 to 932.0 0.1
K3 0.0 to 800.0 0.1 32 to 1472 1
K4 -200 to 1300 1 -328 to 2372 1
R R 0 to 1700 1 32 to 3092 1
B B 0 to 1800 1 32 to 3272 1
S S 0 to 1700 1 32 to 3092 1
T
T1 -199.9 to 200.0 0.1 -199.9 to 392.0 0.1
T2 -199.9 to 400.0 0.1 -199.9 to 752.0 0.1
E
E1 0.0 to 800.0 0.1 32 to 1472 1
E2 -150.0 to 800.0 0.1 -238 to 1472 1
E3 -200 to 800 1 -328 to 1472 1
L L -100 to 850 1 -148 to 1562 1
U
U1 -199.9 to 400.0 0.1 -199.9 to 752.0 0.1
U2 -200 to 400 1 -328 to 752 1
N N -200 to 1300 1 -328 to 2372 1
W W 0 to 2300 1 32 to 4172 1
PL-II PL-2 0 to 1300 1 32 to 2372 1
DC voltage
0 to 5 V DC 0-5V
-1999 to 9999
(Range where
scaling is allowed)
—
-1999 to 9999
(Range where
scaling is allowed)
—
1 to 5 V DC 1-5V
0 to 10V DC 0-10
2 to 10V DC 2-10
0 to 100mV DC MV
DC current
0 to 20 mA DC 0-20
4 to 20 mA DC 4-20
 Loading...