Machine Components
25
Product Overview
2
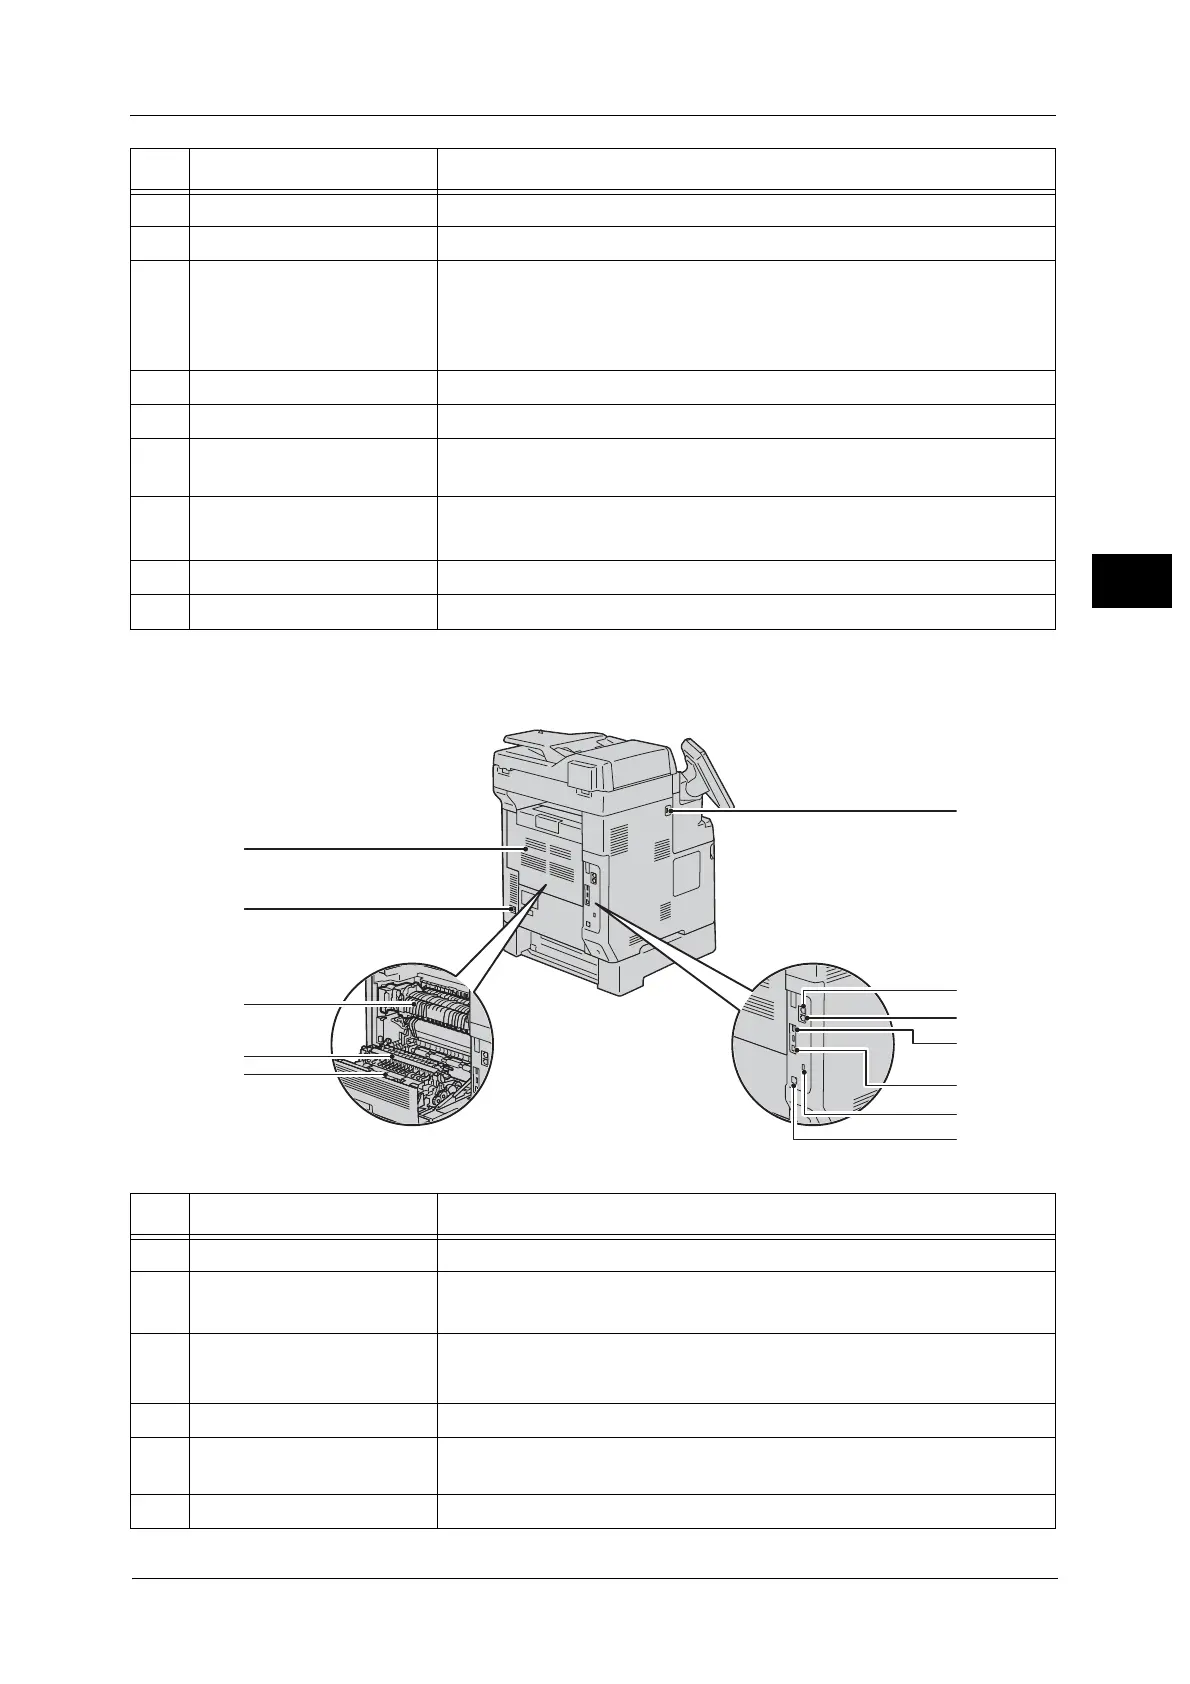
Left side and rear views of the machine
8 Drum cartridges Contains photoconductors.
9 Waste toner container Collects waste toner.
10 Main power switch Switches the main power on/off of the machine. Always follow the
instructions by the system administrator.
Important •Always switch the power off before switching the main power off. Refer
to
"Power Source" (P.29)
.
11 Side cover Open this cover to replace consumable and clean the machine.
12 Output tray Copies and prints are delivered here.
13 Tray 5 (bypass tray) Used for loading non-standard paper, such as thick-stock paper and other
special media, that cannot be loaded in Trays 1 and 2.
14 Tray 1 and 2 Load paper here.
Note •Tray 2 is optional.
15 Toner cartridges Contains toner.
16 Front cover Open this cover to replace consumable and clean the machine.
No. Component Function
No. Component Function
1 USB 2.0 interface connector Connects to a USB memory device.
2 PHONE connector
Enables you to connect the machine to a telephone device.
*
Do not connect any device (fax system) other than a telephone.
3LINE connector
Use this connector to connect to a telephone line.
*
Note •ISDN is not supported.
4 USB 2.0 interface connector Connects to the 3Gnet-BOX (optional).
5 10BASE-T/100BASE-TX
connector
Connects to a network cable. To use this as a Gigabit Ethernet interface
connector (1000BASE-T), install the Gigabit Ethernet Kit (optional).
6 Security slot The Kensington lock (optional) can be attached to the machine.

 Loading...