En-19
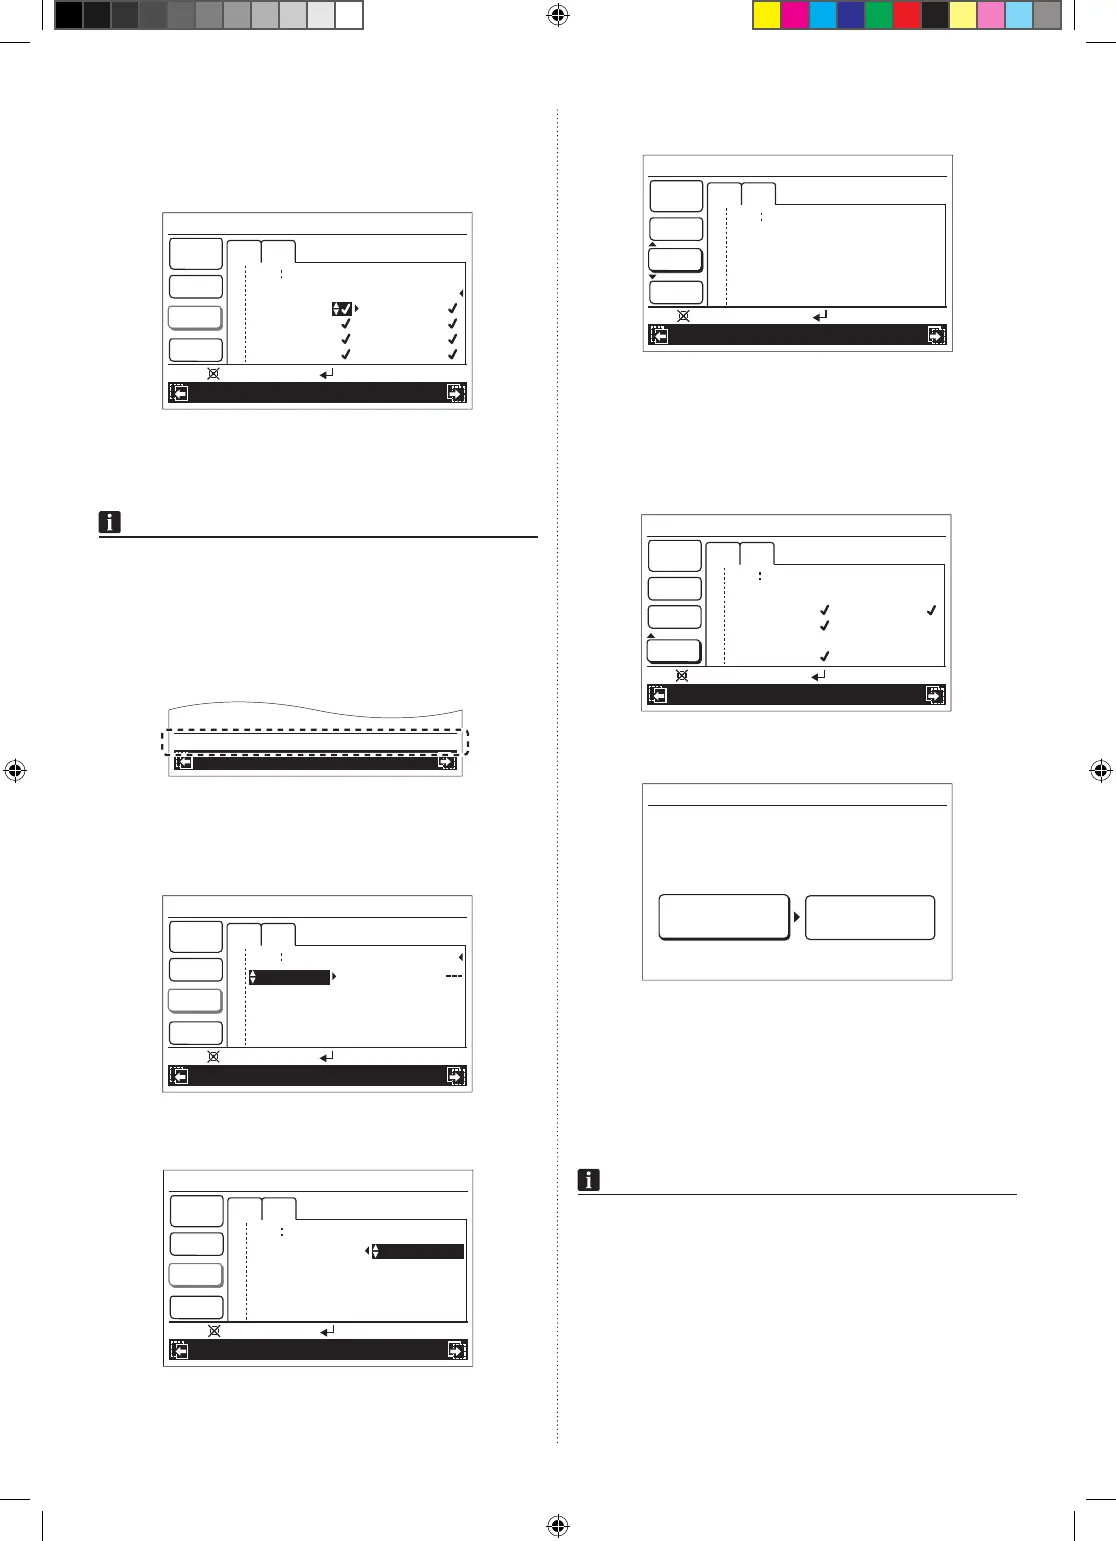
Select applicable zone name with the [Cursor button
(Left/Right)], and press the [Cursor button (Up/Down)]
to mark a check.
Check-marked: The zone is air-conditioned.
Blank: The zone is not air-conditioned.
1
Weekly
1
Day
Time
End
Su
Mo
5 00
On
Weekly timer setting
Time 8
Time 2
Mo
10:00
Cancel:
OK:
Heat
20
°
C
Zone
(
sin
g
le
)
Sensor: Secondary RC
Zone 1 Zone 2
Zone 3 Zone 4
Zone 5 Zone 6
Zone 7 Zone 8
After you select all the applicable zones, press the
[Enter button] to complete the individual setting of zone
control.
NOTES
• When you set “On timer”, you need to set all of operating
mode, temperature, room-temperature sensor, and
applicable zone(s).
Withoutthesecongurations,thetimerwillnotwork.
• Depending on the initial setup in the installation, there is
a case that at least one zone need to be selected. In that
case, following message is displayed on the screen, and
you need to put a check mark at least one zone.
XXXXXX
XXXXXX
One zone must be open at all times.
Simultaneous setting of zone control:
Select [Zone (group)] with the [Cursor button (Up/
Down)]. Then press the [Cursor button (Right)] to move
the cursor to next setting item.
1
Weekly
1
Day
Time
End
Su
Mo
5 00
On
Weekly timer setting
Time 8
Time 2
Mo
10:00
Cancel:
OK:
Heat
20
°
C
Zone
(group)
Select the applicable group with the [Cursor button (Up/
Down)].
1
Weekly
1
Day
Time
End
Su
Mo
5 00
On
Weekly timer setting
Time 8
Time 2
Mo
10:00
Cancel:
OK:
Heat
20
°
C
Zone
(group)
Day
To complete the simultaneous setting of zone control,
press the [Enter button].
1
Weekly
1
Day
Time
End
Su
Mo
5 00
On
Weekly timer setting
Time 8
Time 2
Mo
10:00
Back:
Setting:
Heat
20
°
C
Zone
(
group
)
Day
(8) When setting the other days of the week continually,
perform procedures in step 4 and 5.
6.Tonalizethesettingyouhavesetinstep5, select [End]
with the [Cursor button (Up/Down)], and press the [Enter
button].
Example: Weekly timer setting screen for Zone (single)
1
Weekly
1
Day
Time
End
Su
Mo
5 00
On
Weekly timer setting
Time 8
Time 2
Mo
10:00
Back:
Setting:
Heat
20
°
C
Zone
(
sin
g
le
)
Sensor: Secondary RC
Zone 1 Zone 2
Zone 3 Zone 4
Zone 5 Zone 6
Zone 7
Zone 8
Ifyoupressthe[Cancelbutton]beforeyounalizetheset-
ting,followingcancelconrmationscreenisdisplayed.
Setting change will be canceled. OK?
No
Yes
Select [No] or [Yes] with the [Cursor button (Left/Right)], and
press the [Enter button].
If you select [Yes] and press the [Enter button] here, all the
congureditemsinstep5willbecanceled.
If you select [No] and press the [Enter button] here, the
“Weekly timer setting” screen is displayed. To
nalizethe
setting, select [End] with the [Cursor button (Up/Down)] and
press the [Enter button].
NOTES
• If any names have been registered for zones and sensors in
[Zone user setting], the registered names are displayed on
this screen.
• Onlyconnectedzonesandsensoraredisplayed.
• Whenthe“Weeklytimersetting”screenisdisplayed
againafternalizingthesetting,thesetpatternsyouhave
registered will be sorted in time order. (Sorting function)
9381067145_OM_EN.indd 19 14/09/2015 13:48:04
 Loading...