4. Connection and Settings
Setting the ETERNUS DX/AF
FUJITSU Storage ETERNUS AF, ETERNUS DX Configuration Guide (Power Synchronized Unit)
Copyright 2019 FUJITSU LIMITED P3AM-8012-14ENZ0
45
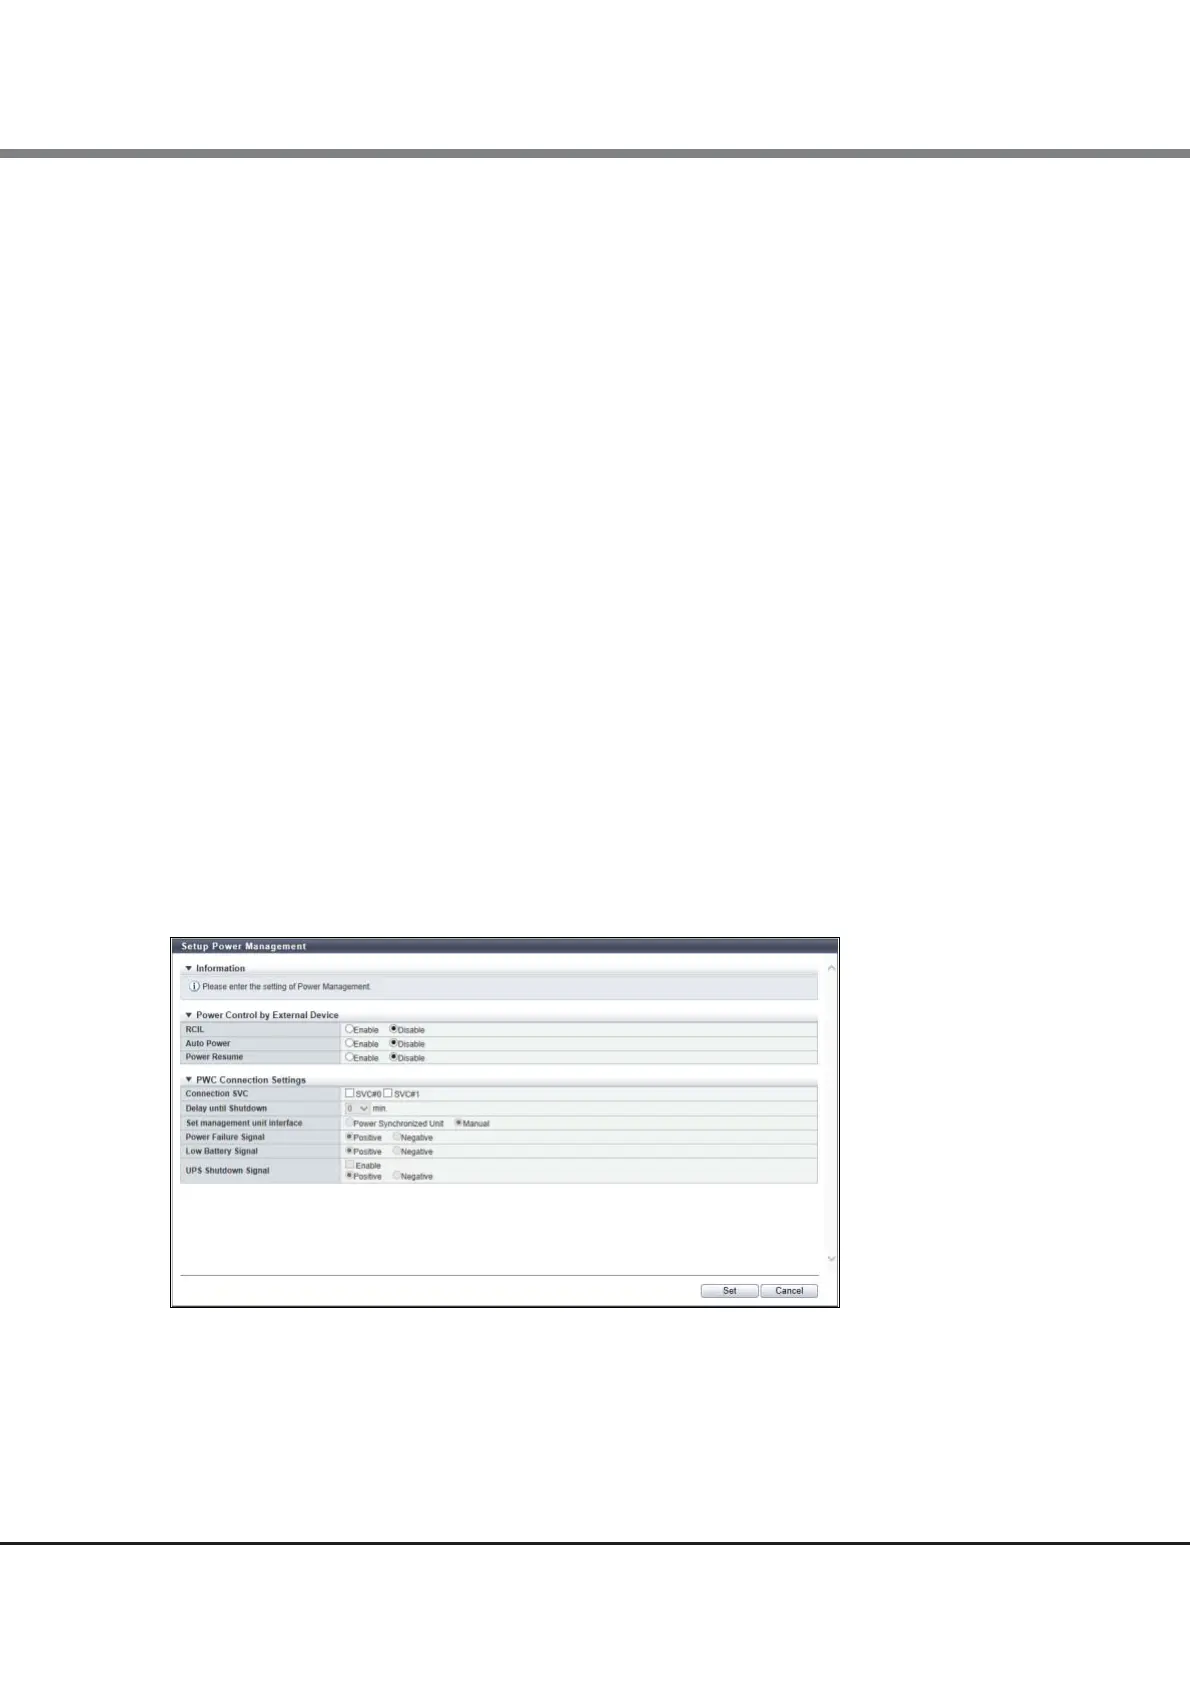
• Connection CM
Select the controllers (CM#0 and/or CM#1) of the ETERNUS DX/AF that are connected to the power synchro-
nized unit with the RS232C cable.
Select "CM#0" when the power synchronized unit is connected to the PWC port on controller 0. Select "CM#1"
when the power synchronized unit is connected to the PWC port on controller 1.
When different power synchronized units are connected to controller 0 and controller 1 in a duplicated config-
uration, select both "CM#0" and "CM#1".
• Delay until Shutdown
Do not change the default setting (0 minute).
• Set management unit interface
Select "Power Synchronized Unit".
• Power Failure Signal
"Positive" (positive logic) is automatically set.
• Low Battery Signal
"Negative" (negative logic) is automatically set.
• UPS Shutdown Signal
Do not select the "Enable" checkbox.
"Positive" (positive logic) is set by default.
■ ETERNUS DX900 S5, ETERNUS DX8900 S4, and ETERNUS DX8700 S3/DX8900 S3
This section explains the setting items on the power synchronization setting screen for the ETERNUS DX900 S5,
ETERNUS DX8900 S4, and ETERNUS DX8700 S3/DX8900 S3.
Figure 12 ETERNUS DX900 S5, ETERNUS DX8900 S4, and ETERNUS DX8700 S3/DX8900 S3 setup (Setup
Power Management screen)
• Auto Power
Select "Disable".
• Power Resume
Select "Disable".
 Loading...


