EasyManua.ls Logo

Fujitsu INDOOR UNIT (Duct Type) AIR CONDITIONER User Manual

Fujitsu INDOOR UNIT (Duct Type) AIR CONDITIONER
16 pages
To Next Page IconTo Next Page
Page #1 background imageLoading...
Page #1 background image
EnglishDeutschFrançaisEspañolItalianoEλληvIkάPortuguês
Русский
Turkiçe
INSTALLATION MANUAL
For authorized service personnel only.
INSTALLATIONSANLEITUNG
Nur für autorisiertes Personal.
MANUEL D'INSTALLATION
Pour le personnel agréé uniquement.
MANUAL DE INSTALACIÓN
Solo para personal autorizado.
MANUALE D'INSTALLAZIONE
Ad uso esclusivo del personale autorizzato.
ΕΓΧΕΙΡΙΔΙΟ ΕΓΚΑΤΑΣΤΑΣΗΣ
Για εξουσιοδοτημένο προσωπικό σέρβις.
MANUAL DE INSTALAÇÃO
Apenas para técnicos autorizados.
РУКОВОДСТВО ПО УСТАНОВКЕ
Для уполномоченного персонала.
KURULUM KILAVUZU
Yetkili servis personeli içindir.
PART NO. 9379127035-02
AIR CONDITIONER
9379127035-02_IM.indb 19379127035-02_IM.indb 1 23/01/2013 16:24:4023/01/2013 16:24:40
Question and Answer IconNeed help?

Do you have a question about the Fujitsu INDOOR UNIT (Duct Type) AIR CONDITIONER and is the answer not in the manual?

Fujitsu INDOOR UNIT (Duct Type) AIR CONDITIONER Specifications

General IconGeneral
BrandFujitsu
ModelINDOOR UNIT (Duct Type) AIR CONDITIONER
CategoryAir Conditioner
LanguageEnglish

Summary

1. SAFETY PRECAUTIONS

2. ABOUT THE UNIT

2.1. Precautions for using the R410A refrigerant

Safety measures and considerations for handling R410A refrigerant.

2.2. Special tool for R410A

List and description of specialized tools required for R410A systems.

3. INSTALLATION WORK

3.1. Selecting an installation location

Guidance on choosing an appropriate and safe installation site.

2.3. Accessories

List of supplied parts and accessories for installation.

2.4. Optional parts

List of optional kits and their applications.

3.2. Installation dimension

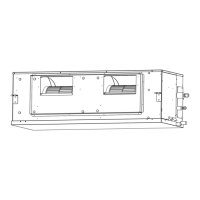
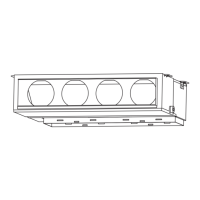
Specifies the required space and dimensions for unit installation.

3.3. Installation the unit

Procedures for physically mounting and securing the indoor unit.

3.3.1. Installing the hangers

Steps for securely mounting the unit using hangers.

3.3.2. Leveling

Procedures for ensuring the unit is level during installation.

3.3.3. Intake duct connection

How to connect the air intake duct to the unit.

3.3.4. Outlet duct connection

How to connect the air outlet duct to the unit.

4. PIPE INSTALLATION

4.1. Selecting the pipe material

Guidelines for choosing appropriate pipe materials for refrigerant lines.

4.2. Pipe requirement

Specifications and requirements for refrigerant piping.

4.3. Bending pipes

Instructions on how to properly bend refrigerant pipes.

4.3.3. Pipe connection

Steps for connecting refrigerant pipes to the unit.

4.4. Installing heat insulation

How to install heat insulation on refrigerant pipes.

5. INSTALLING DRAIN HOSE

6. ELECTRICAL WIRING

6.1. Wiring system diagram

Schematic illustrating the electrical connection points and layout.

6.2. Connection cable preparation

How to prepare power and communication cables for installation.

6.3. Connection of wiring

Detailed instructions for making electrical connections to the unit.

7. REMOTE CONTROLLER SETTING

7.1. Installing the remote controller

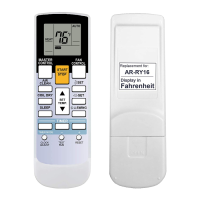
Steps for physically mounting and connecting the remote controller.

7.2. Setting the DIP switches

Configuration of DIP switches on the remote controller for specific functions.

8. FUNCTION SETTING

8.1. Turning on the power

Procedure for powering up the unit after installation.

8.2. Function setting

Detailed steps for configuring various unit functions via the remote controller.

Filter Sign

Setting the filter cleaning reminder interval.

Static pressure

Adjusting static pressure for optimal airflow based on installation.

Cooling room temperature correction

Adjusting room temperature sensor readings for cooling mode.

Heating room temperature correction

Adjusting room temperature sensor readings for heating mode.

Auto restart

Enabling or disabling automatic restart after a power outage.

Indoor room temperature sensor switching function

Selecting the source for room temperature detection.

Wireless remote controller signal code

Changing the signal code for wireless remote controller communication.

External input control

Configuring external input modes like operation/stop.

Setting the room temperature detection location

Choosing where the unit detects room temperature.

8.3. Static pressure characteristic

Overview of static pressure characteristics and modes.

8.4. Special installation methods

Advanced installation techniques and configurations.

8.4.1. Group control system

Setting up multiple indoor units to operate from a single remote controller.

8.4.2. Dual remote controllers

Configuring two remote controllers to operate indoor units.

8.4.3. Simultaneous multi-system operation (22,24 model)

Enabling simultaneous ON/OFF control for twin indoor units.

9. FRESH AIR INTAKE

10. TEST RUN

Operation Method

Step-by-step guide for performing the test run operation.

11. CHECK LIST

12. OPTIONAL KIT INSTALLATION (OPTION)

13. CUSTOMER GUIDANCE

14. ERROR CODES

Related product manuals